
Hello and happy December! I can hardly believe it’s almost the end of the year!
With a new month comes a new Greenhouse Society stamp from Technique Tuesday and this month’s set is the pretty Bowl Bouquet. The Greenhouse Society stamps and dies can be bought individually and are also available via a monthly subscription at 25% off the regular price!
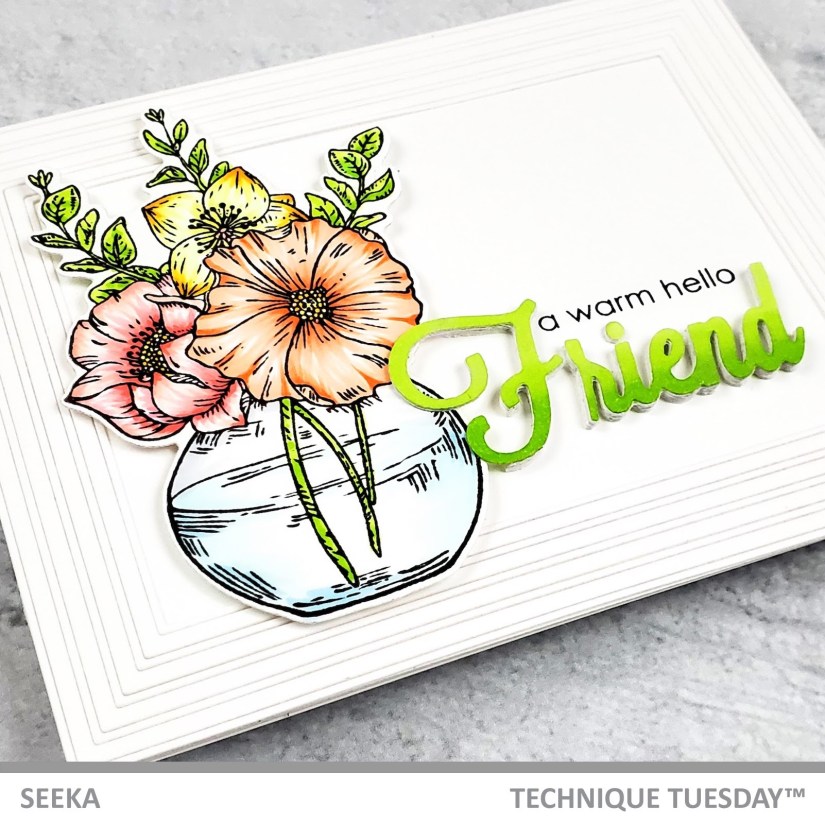
I started off by stamping the image in Copic-friendly Hero Arts Intens-ified black ink onto Neenah Solar White 80# Classic Crest cardstock. Then I got ready to color. As you can tell by the colors I chose, I’m still hanging on to the idea of warmer months (though living in northern California where 40 degrees is “cold,” I can’t really complain). For this bouquet, I chose some light peaches, pinks, and yellows:
- Peach flower: YR01, E92, YR02
- Pink flower: R12, R32, R14
- Yellow flower: Y13, Y17, Y38
- Leaves: YG03, YG25
- Water: B000, B21
- Vase: C2
To create highlights, I left a lot of white space in the flowers by flicking color in from center of the flowers and again from the edges of each petal. I usually start with long strokes of the lightest color, then skip to short strokes of the darkest color, and then add flicks of the middle color to bring it all together. There’s no right or wrong here, I just find that this order has been working for me.
Once all the petals were done, I used the two darker yellows to dab at the center of each flower. For the leaves and stems, I put down a solid layer of YG03 and then added dots of YG25. Those teeny petals are too small to worry about shading with too much detail! Then I added some blues around the edges of the water lines and added a touch of gray near the top of the vase (though the gray is so light, it’s barely noticeable). I used the coordinating dies to cut out the image and then set it aside.
 For the “Friend” sentiment, I used another die from the coordinating die set. I die cut it once out of Neenah Solar white and five (!) more times out of thicker 110# scrap white cardstock. I didn’t separate the Neenah die cut from the negative cut so that I could easily color it with the same two greens I used for the leaves. I added a piece of Post-it Tape to the back of the die cut piece to hold it all together and then ran a bone folder over the surface to smooth out the die cut. Then I used broad and messy strokes to color the die cut in light green. I added the darker green along the bottom and then used the light green again to blend the colors together (I’ve included a photo of a pink version of the die cut that I decided not to use). To finish the “Friend” sentiment, I stacked and adhered all of the layers together to create a chipboard-like embellishment.
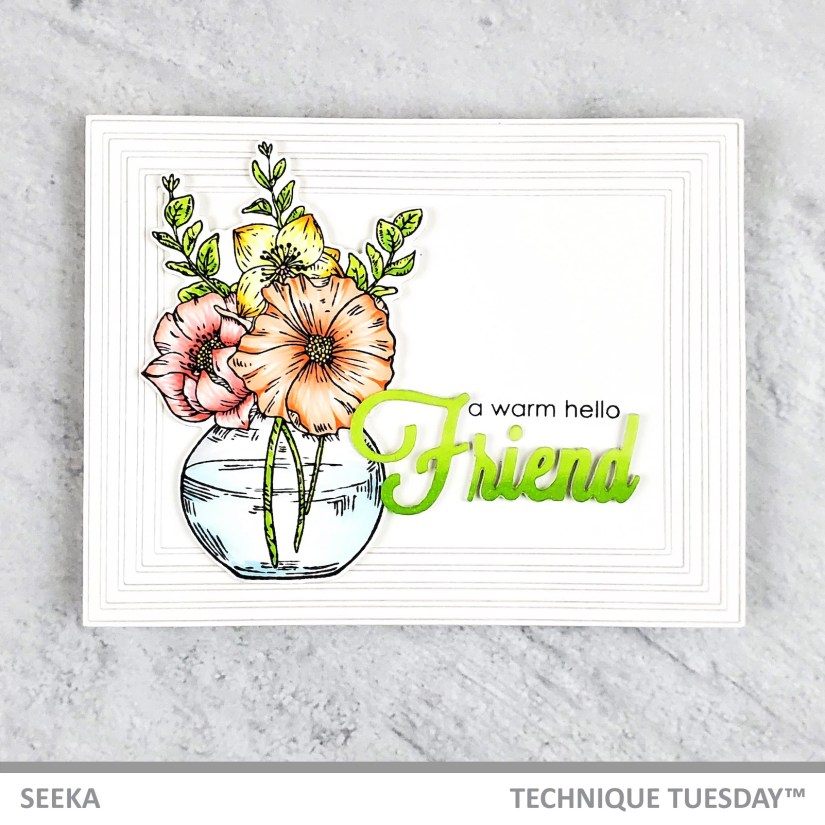
For the background I started with an A2-sized piece of Neenah Solar White. Then I added a number of the Fine Frames die cuts (from Altenew) around the border to create some white-on-white texture. I stamped “a warm hello” in Verafine Clair Nocturne ink and then adhered the bouquet with foam tape. I adhered the “Friend” piece, but first had to snip off the extra layers behind the left side of the “F” because they overlap the vase.
To finish, I adhered the card front to an A2-sized card base.
Thanks so much for visiting!

*This blog post includes affiliate links. If you purchase products through these links, I will earn a small commission at no extra cost to you.
