Hi there, I hope you’re having a great weekend!
I really can’t believe it’s already the middle of December, can you? The middle of the month always means a new challenge over at A Blog Named Hero, and this month’s theme is Sparkle!
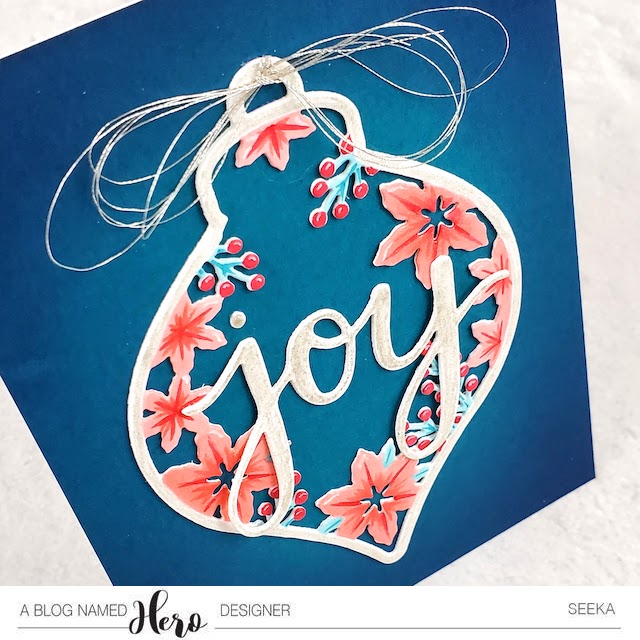
 I often find it difficult to capture sparkle in photos and this card is no exception! You might be able to make out the sparkle around the frame of the ornament, as well as on the sentiment. I also added shimmer to the flowers, however it’s even more subtle than the rest.
I started by using the Hero Arts Poinsettia and Ornament Fancy Die to die cut two ornaments out of 110# white cardstock. Using R22, R24, and R29, I colored the poinsettias and the berries. I used BG53 and BG07 for the leaves and stems and then added a bit of white gel pen to the berries and to the some of the poinsettia petals. I also went over the poinsettias with a Wink of Stella pen, to add a bit of shimmer. Then I stacked and layered the two die cuts together to create a sturdier ornament with a more dimension.
I used the die from the Stamp & Cut Joy set to die cut the word “joy” twice out of the same white cardstock. I adhered the two layers together and then used a Sakura Stardust Clear Star gelly roll pen to “color” over the sentiment as well as the over the border of the ornament. This added a pretty sparkle over both pieces.
For the background, I started with an A2-sized piece of Adriatic Hero Hues cardstock. Using a foam blending tool, I blended Chipped Sapphire Distress ink around the edges of the panel. This technique, of tone-on-tone ink blending on colored cardstock, I first saw used by Yana Smakula and I just love how it helps frame and anchor a central image without drawing too much attention.
To assemble the card, I adhered the ornament to the background and then tied a bit of silver thread around the ornament’s hook. Then I adhered the sentiment. To finish, I adhered the card front to an A2-sized card base.
Thank you so much for visiting!