

Hello and welcome!
I’m so excited and honored to be part Altenew’s four-day celebration of their 8th anniversary! If you arrived from Nancy Souza’s blog, you’re right on track. If you want to hop along from the beginning, visit the Altenew Card Blog. And, if we’ve never met before, I hope you’ll also visit me on Instagram where I frequently share cards made with Altenew products!
Today I’m sharing four cards that I previously made with some of my favorite product from Altenew’s 8th year so let’s dive in!
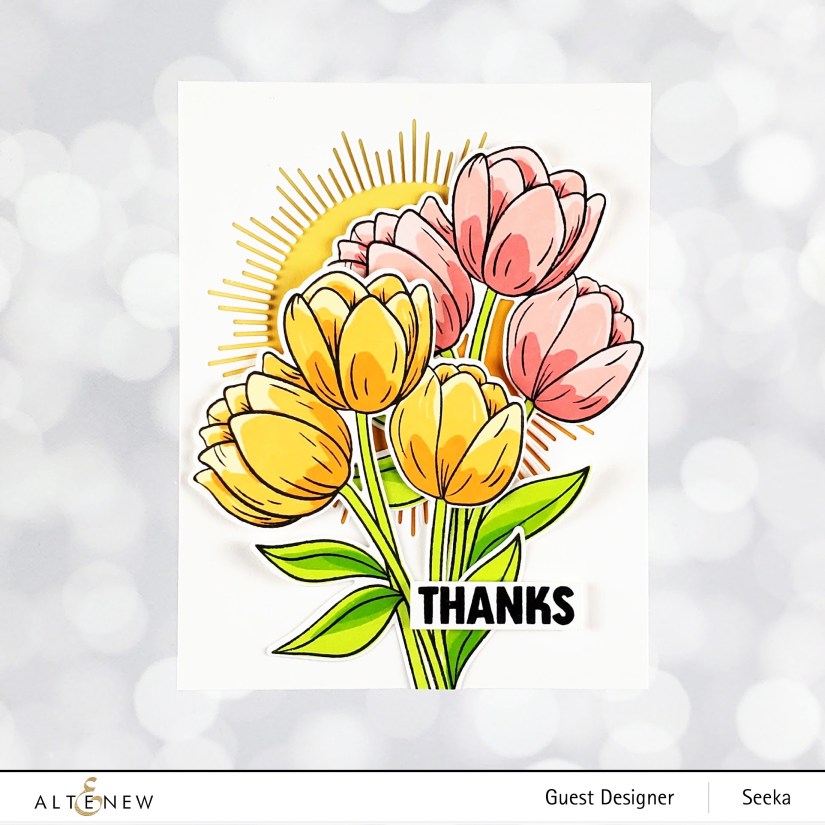
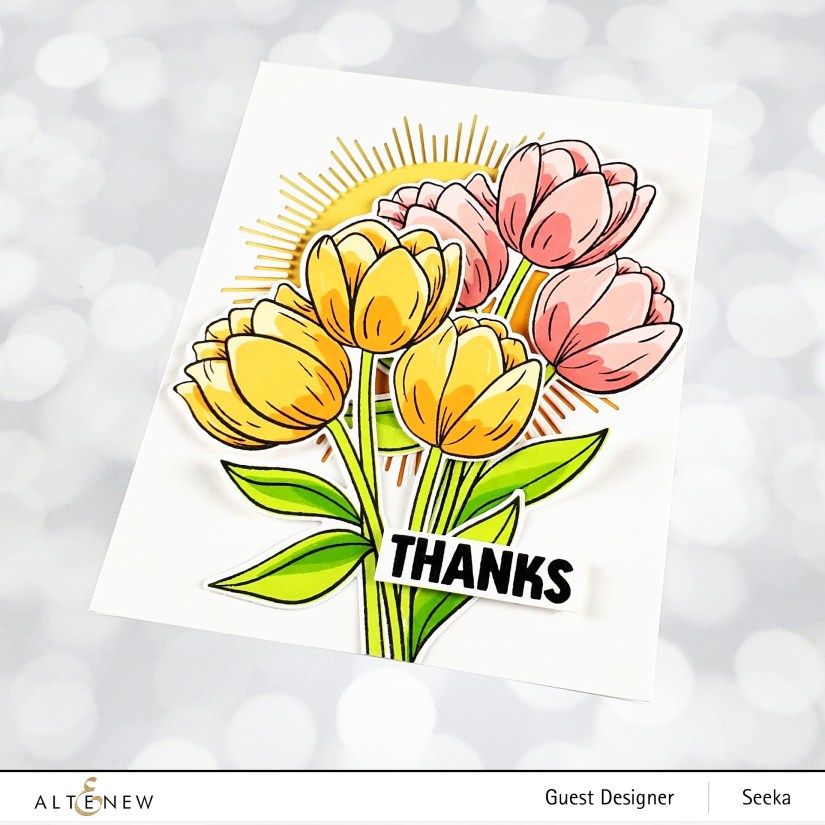
Thanks – Cartoon Tulips
My first card features the new Cartoon Tulips stamp set and coordinating dies (also available as a bundle) against a backdrop created with the Mid-Century Frame die.
To recreate this card:
- Stamp the outline layer of the tulip bunch in Permanent Black ink
- Stamp the three petal layers; for the yellow blooms, use Buttercream, Chamomile, and Snapdragon, and for the pink blooms use Blush, Pink Pearl, and Coral Bliss
- Stamp the stem and leaves layers in Bamboo, Parrot, and Grass Field
- Use the coordinating die to cut out the images; set aside
- Stamp the sentiment in black ink onto white cardstock and trim; set aside
- Use the Mid-Century die to cut a window from a 4.25″ x 5.5″ panel of white cardstock
- Cut a 4.25″ x 5.5″ panel of yellow cardstock (I used Papertrey Ink Harvest Gold)
- Use a Large Blending Tool to blend Snapdragon ink the bottom right two-thirds of the yellow cardstock panel, letting the color fade out within the area exposed behind the Mid-Century window
- Adhere the yellow panel and Mid-Century window panel together
- Adhere the tulips over the background using a combination of glue and foam tape to create some depth and dimension
- Adhere the sentiment strip with foam tape
- Adhere the card front to a card base
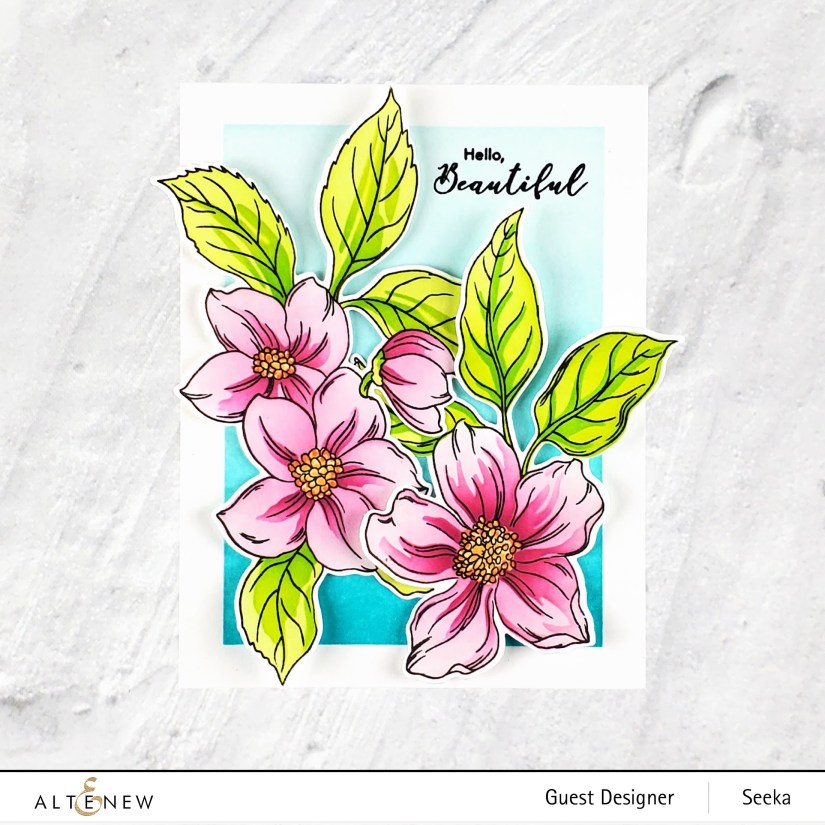
Hello Beautiful
My second card features the Altenew Craft Your Life Project Kit: Hello Beautiful set. I love how easily the layering stencils in this kit make coloring bright and beautiful blooms!
To recreate this card:
- Stamp the floral images in Permanent Black ink onto white cardstock
- Position the first layering coloring stencil over the blooms and use Post-it tape to temporarily hold it in place and to mask off any open areas of the stencils that are for a different layer or a different color (like the leaves)
- Use a blending brush to blend Pink Diamond ink over the exposed area
- Position the next layer stencil over the image and blend on the next deeper color; repeat until all the layers of the bloom have been inked up with Pinkalicious, Rubellite, and Razzleberry (these four colors are also available in a set), and create some variation within a single layer by intensifying the color in some areas
- Stencil the leaves using Bamboo, Parrott, and Grass Field inks
- Use yellow and orange markers to color the centers of the flowers (or use the stencils!)
- Die cut the images and set aside
- Mask off the borders of an A2-sized panel of white cardstock using Post-it Tape
- Use a blending brush to blend Aqualicious ink over the exposed area of the panel, concentrating the color towards the bottom; deepen the color at the bottom with a bit of Teal Cave and then remove the mask
- Stamp the sentiment ink black pigment ink
- Use glue dots to adhere the centers of the flowers to the background; selectively add small pieces of tape behind the petals to lift them away from the background
- Adhere the card front to a card base

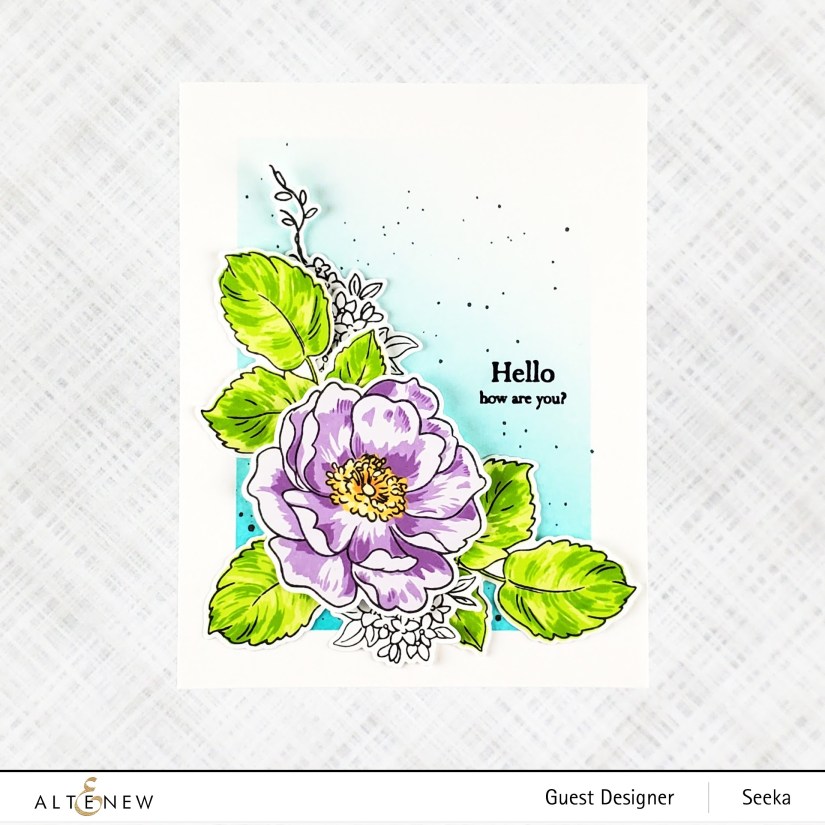
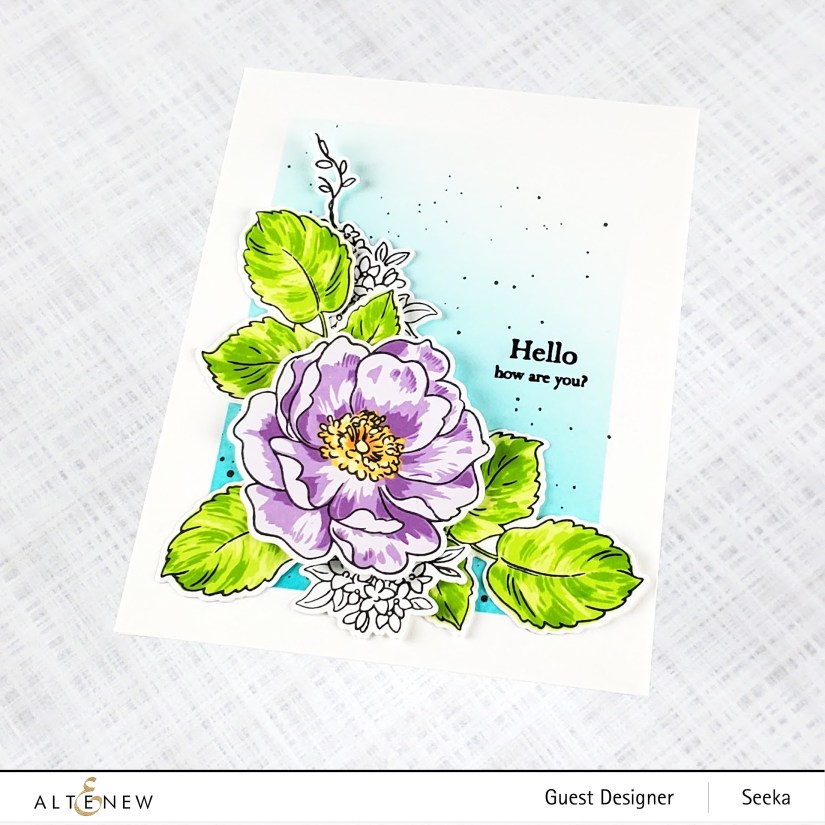
Hello, How Are You?
My third card features the Altenew Wild Rose Release stamp and die set. This is one of my favorite Build-A-Flowers of the past year, with its pretty detailed layers and bonus little flower cluster.
To recreate this card:
- Stamp the outline layers of the blooms and leaves, as well as the small flower clusters in Permanent Black onto white cardstock
- Stamp the layers of the bloom’s petals in Soft Lilac, Lavender Fields, and Deep Iris
- Stamp the centers of the flower in Buttercream and Chamomile
- Stamp the leaf layers in Limeade, Bamboo, and Parrot
- Die cut the images and set aside
- Mask off the border of an A2-sized piece of white cardstock
- Use a large blending tool to blend Aqualicious ink onto the exposed area, concentrating the color at the bottom left and letting the color fade towards the opposite corner
- Use a paint brush to splatter a bit of Jet Black Ink Spray over the panel
- Remove the mask and then stamp the sentiment in black pigment ink
- Adhere the leaves and black and white flowers with glue dots and then adhere the purple bloom with foam tape
- Adhere the card front to a card base
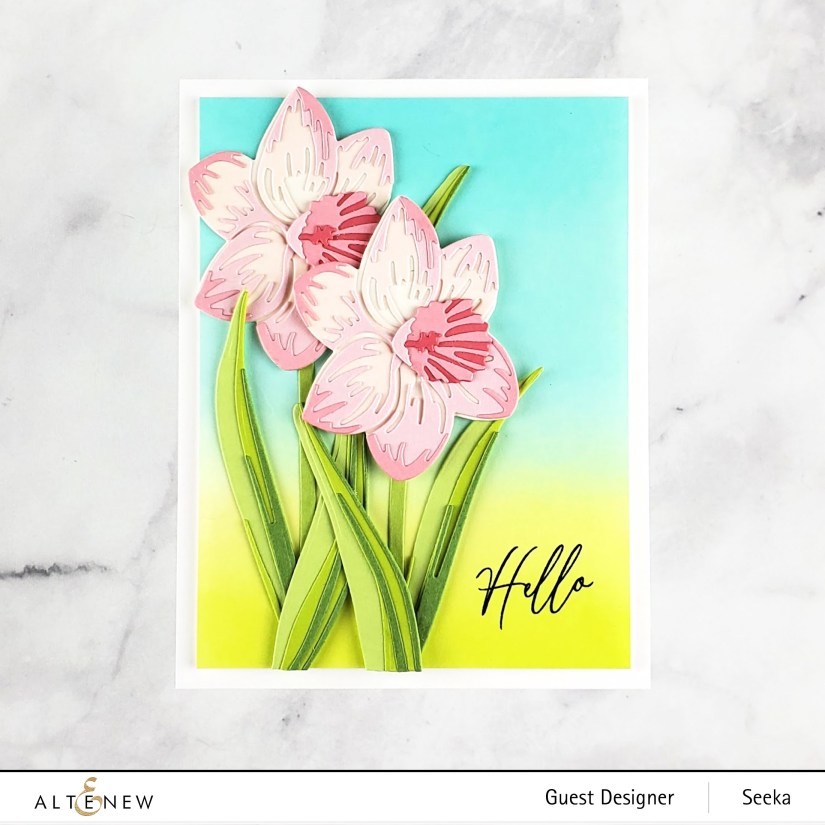
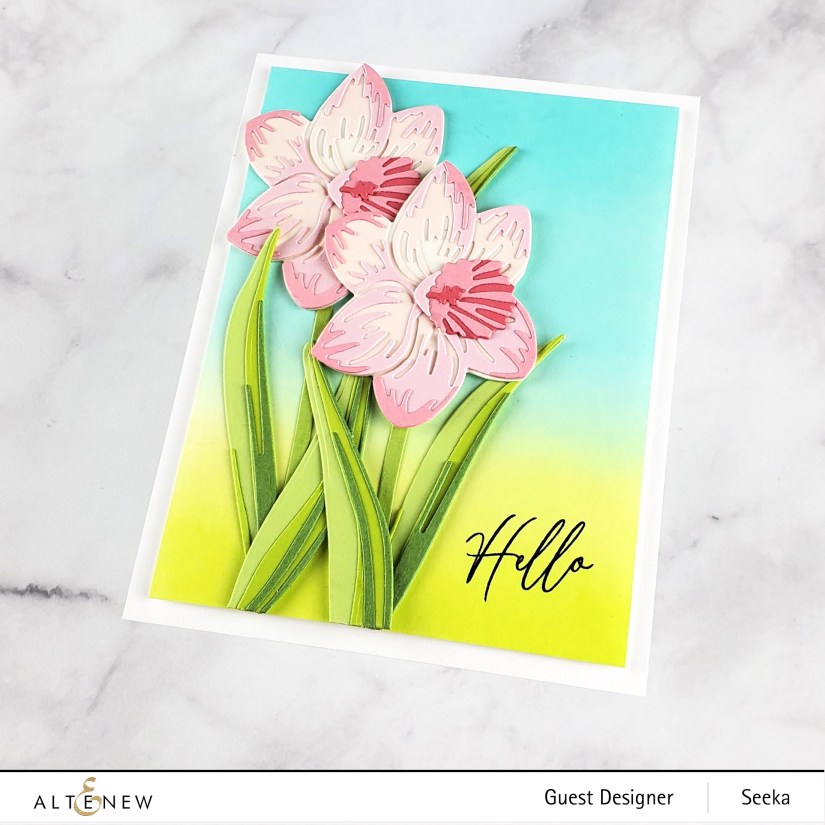
Hello – Craft-A-Flower: Daffodil
My last card features the Craft-A-Flower: Daffodil layering die set.
I started of by choosing colors of cardstock for the daffodils and their stems and leaves. Even though most daffodils are yellow (and I LOVE yellow), I decided I wanted to go for a salmon-y pink. I chose a light cream for the base layer of the blooms and then added on light pinks and salmons, five shades in all. For the stems and leaves, I chose three shades of greens starting with a bright light green as the base and building to a medium green as the darkest shade. I’ve listed the brands and colors of cardstock that I used at the very bottom of the post but I encourage you to use whatever colors you have on hand!
Following the layering guide on the packaging, I layered and adhered the blooms and stems together. I really like how dimensional these turn out!
While the glue dried, I worked on the background. Using large blending tools, I blended Limeade ink at the bottom of an A2-sized panel of white cardstock and Dew Drops at the top, just barely overlapping the two colors about two-thirds of the way down the panel. I deepend the blue at the top by blending a bit of Sea Breeze ink and deepened the green at the bottom with a bit of Bamboo. Then, I trimmed 3/8″ off both the length and the width of the panel.
Next, I adhered the background bloom to the ink-blended panel using adhesive dots, and the bloom in the foreground using foam tape. I added in the stems and leaves, tucking them behind and under the blooms. To create the illusion of a very tall leaf, I cut one in half and adhered just the tip of it behind and above the bloom on the right.
To finish the card, I stamped a sentiment from the Vintage Garden stamp set in black pigment ink and then used foam tape to adhere the card front to a card base.
Thank you so much for visiting! Your next stop is the super lovely and talented Kelly Griglione! Be sure to scroll down for information about the giveaways!
Giveaway Prizes
Over $2,000 in total prizes! Altenew is giving away a $80 gift certificate to 5 lucky winners and one Altenew Academy class ($8.95 value) to 15 lucky winners. There are also 26 awesome companies/crafty friends who are celebrating with us, and they are offering the following prizes:
- Altenew: 5 x $80 Altenew Gift Certificate
- Altenew Academy: 15 x Online Monthly Class Spot
- Jennifer McGuire Ink: Share Handmade Kindness Goodie Bag
- A Cherry on Top: $50 Gift Certificate
- Auzz Trinklets N Krafts: $50 Gift Certificate
- Avery Elle: $50 Gift Certificate
- Bumbleberry Papercrafts: £25 Gift Certificate
- Butterfly Reflections Ink: $25 Gift Certificate
- CiLi in Papers: €75 Gift Certificate
- Concord & 9th: 1 $50 Gift Certificate & 1 Eclectic Garden Bundle ($38 Value)
- Craft Stash: $100 Gift Certificate
- Dare 2B Artzy: $30 Gift Certificate
- Ellen Hutson LLC: $25 Gift Certificate
- Gina K. Designs: $50 Gift Certificate
- Hero Arts: $50 Gift Certificate
- Lawn Fawn: $25 Gift Certificate
- MarkerPop: 4 x $40 Gift Certificate
- Michelle’s Cards & Stamps: AUD$100 Gift Certificate
- My Little Attic: $50 Gift Certificate
- My Sweet Petunia: $50 Gift Certificate
- Online Card Classes: 3 Online Class Spots to 1 Winner
- Pink and Main: $50 Gift Certificate
- Pinkfresh Studio: $50 Gift Certificate
- Scrapbook & Cards Today: $50 Gift Certificate
- Scrapbook.com: $50 certificate
- Simon Says Stamp: $50 Gift Certificate
- Studio Katia: $50 Gift Certificate
- Waffle Flower: $25 Gift Certificate
Be sure to leave comments by 4/15/2022 for a chance to win one of 50 prizes! To make the hop more exciting, start your comment with “Hi from (city or country where you’re from)!” 50 winners will be chosen at random from the comments left on any of the blogs listed below and will be announced on the Altenew Card Blog on 4/21/2022.

Hi from Montreal, Canada. I so enjoy seeing your lovely floral projects!
LikeLiked by 1 person
Hi from AZ!Thanks for sharing these gorgeous cards!
LikeLiked by 1 person
Hi from northwest Alabama! Beautiful floral cards! I especially love the tulips with the sun behind them! Thanks for sharing AND happy 8th birthday to Altenew!
LikeLike
Hi from Georgia. Love your bright happy cards. Spring is definitely on the way. Thanks for sharing.
LikeLiked by 1 person
Hi from NY! Great cards, each are lovely! Thank you for the inspiration!
LikeLike
Hi from Ohio. Love the colors on your pretty floral cards.
LikeLike
Hi, I’m from Texas. Wow! Your craft a flower daffodil card is incredible. I will be pulling out that set this weekend. Happy 8th Anniversary Altenew!
LikeLiked by 1 person
Hi from NJ! Very cheerful cards. I love the backdrop of that midcentury frame die.
LikeLiked by 1 person
These are lovely. Great ink blending and coloring. I think the last one is my favorite.
LikeLiked by 1 person
Hi from Utah! I love how bright and cheerful your cards are! They are beautiful!
LikeLiked by 1 person
Wow, beautiful colouring!
LikeLiked by 1 person