
Hello and happy Monday, I’m so glad you’re here! It’s release day at Hero Arts and we’re celebrating the December release with a blog hop full of inspiration and a giveaway. If you’ve arrived from visiting the wonderful Pocono Pam, you’re right on track. If you’d like to start from the beginning, head on over to the Hero Arts blog.
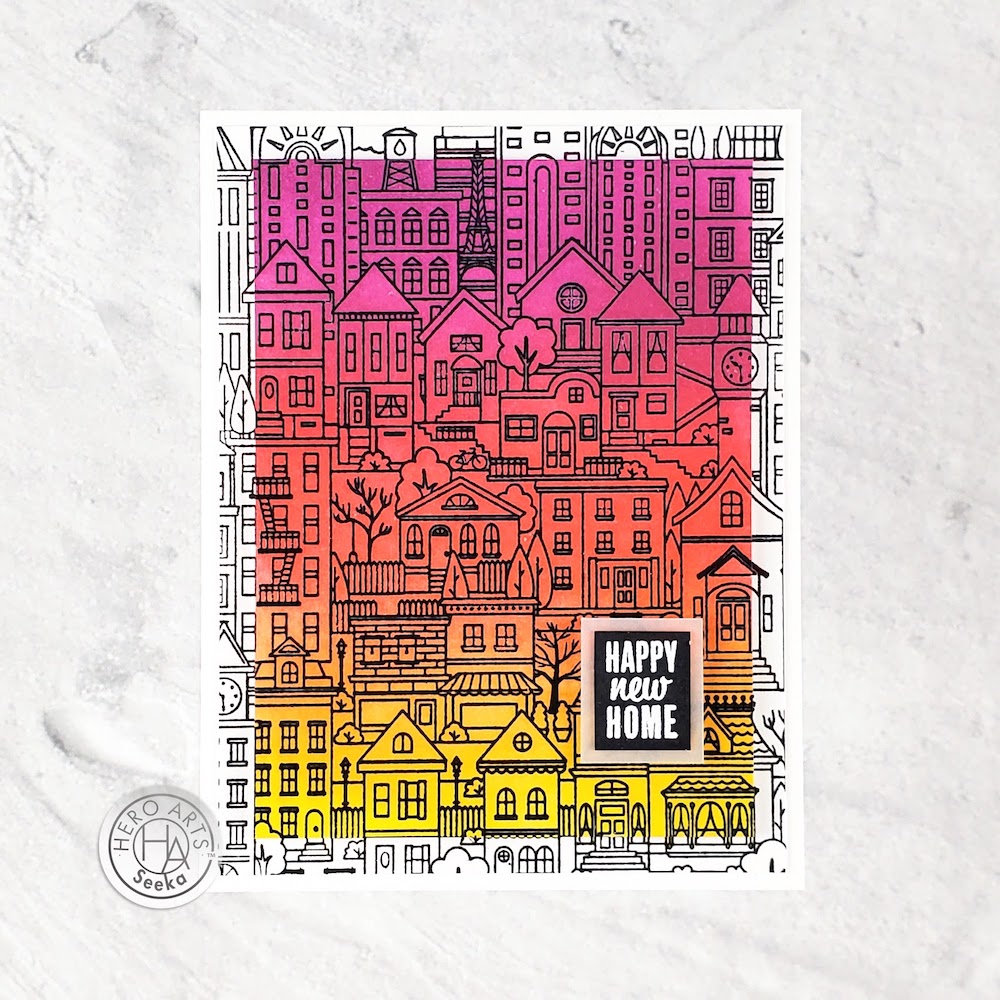
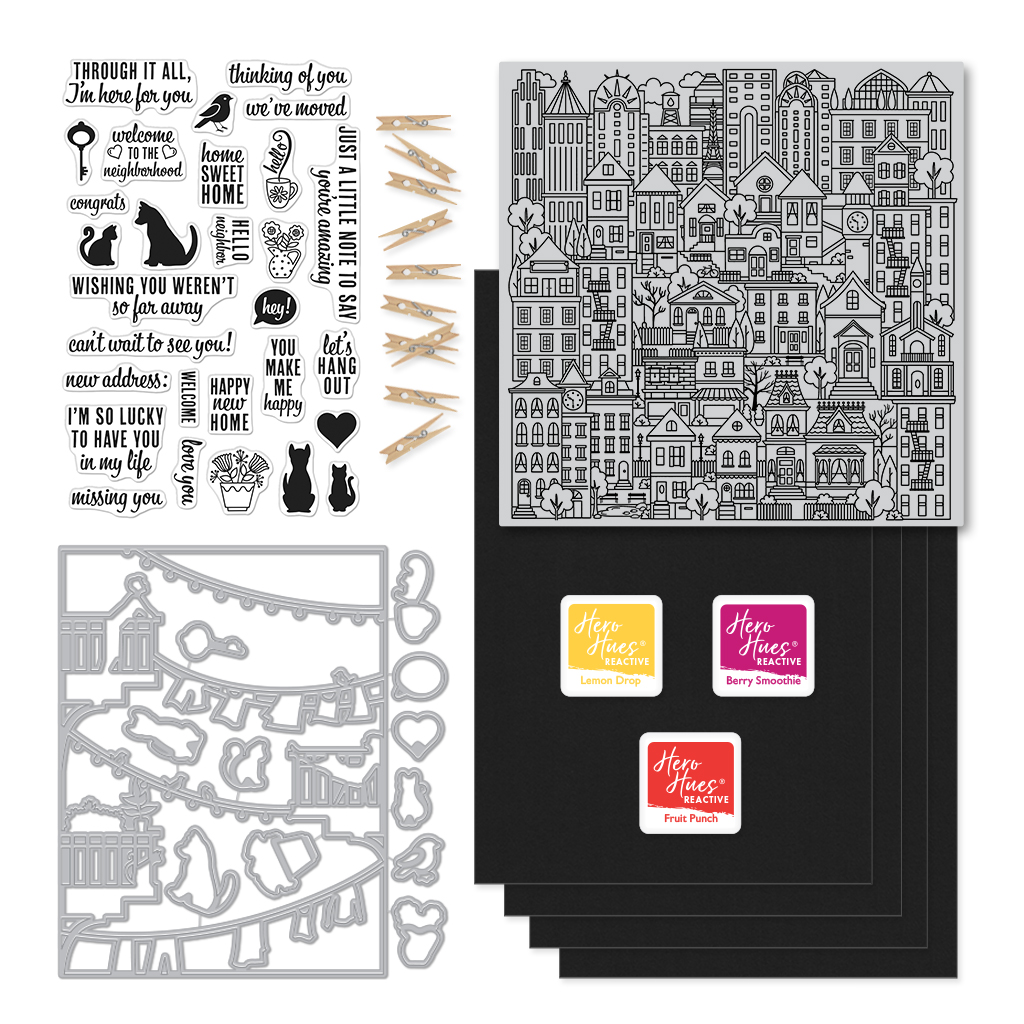
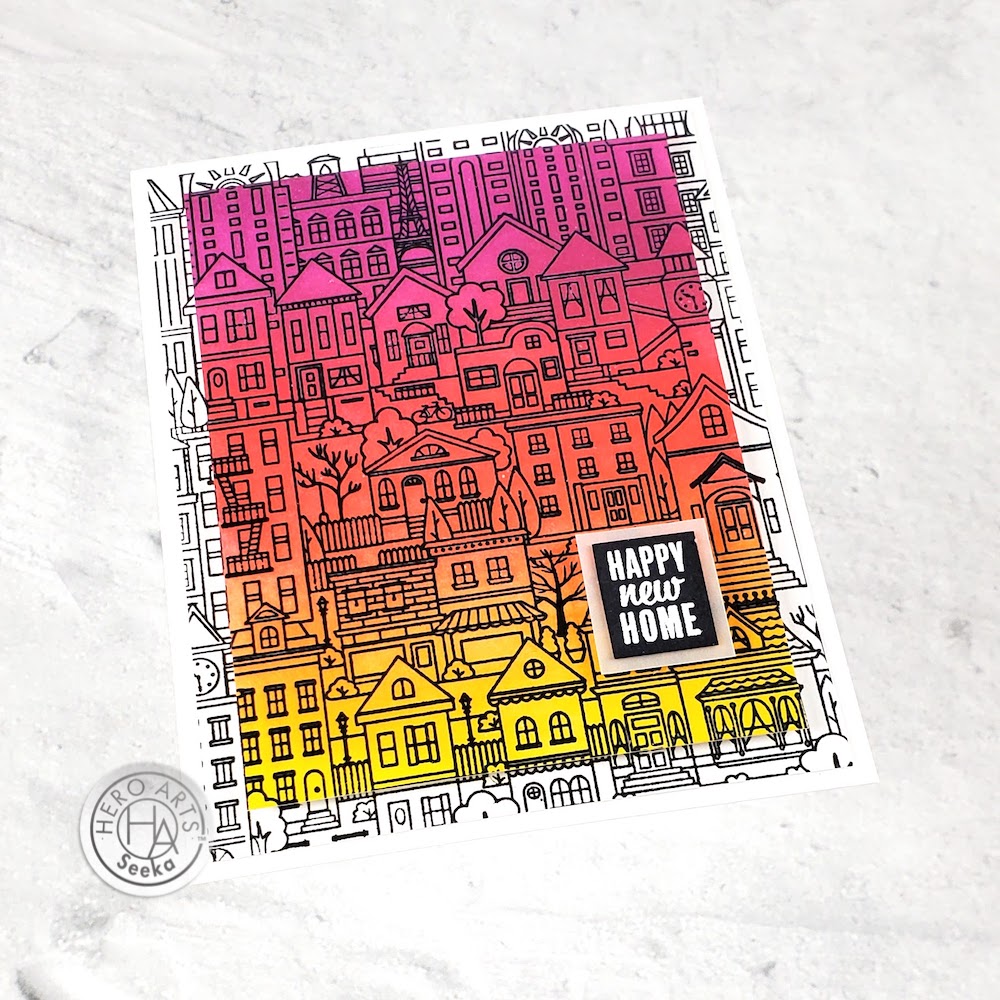
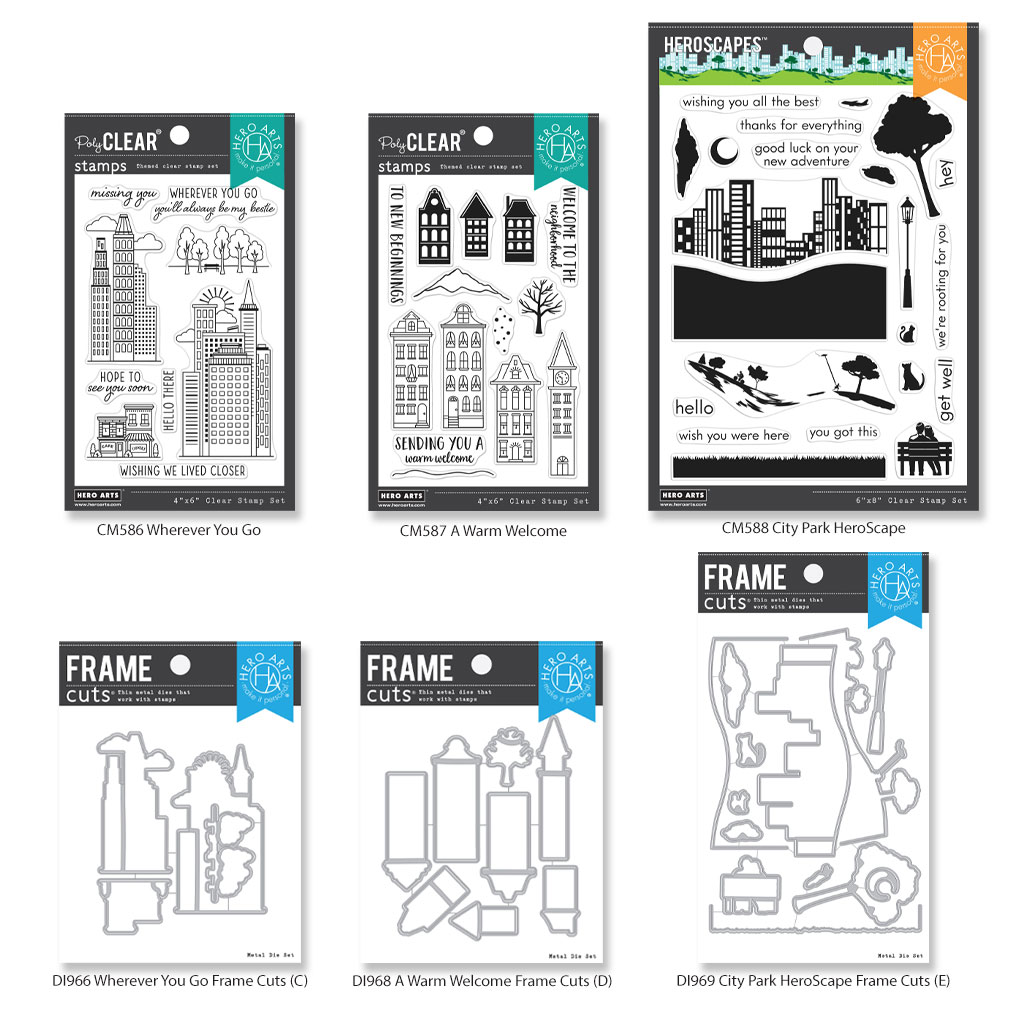
My first card today features this month’s My Monthly Hero kit. This month’s kit is a reminder that no matter where we live, near or far, in cities or in neighborhoods – through it all we’re here for each other. The kit includes a lively cityscape cling background stamp, a beautiful new cover plate die, and a clear stamp set containing useful messages for welcoming new neighbors, or letting friends and family know you are thinking of them. The images in the clear set have coordinating dies as well. Rounding out the kit is Pitch Black cardstock, ink cubes (perfect for blending a gorgeous sunset) and adorable clothespin embellishments. It’s a fabulous value at only $34.99!
To recreate this card:
- Stamp the background stamp in Onyx pigment ink onto a 4.25″ x 5.5″ panel of Dove White cardstock; trim 1/8″ off each side of the panel and set aside
- Stamp the background again, then use clear Ultra Fine embossing powder to heat emboss the image
- Trim 3/8″ off each side of the heat-embossed panel
- Use blending brushes to blend the three colors of ink (Berry Smoothie, Fruit Punch, and Lemon Drop) included in the kit over the heat embossed panel, blending the colors where they overlap
- Use Clear Embossing & Watermark ink and white embossing powder to heat emboss the sentiment onto Pitch Black cardstock and trim into a small rectangle
- Adhere the sentiment to a slightly larger rectangle of vellum layering paper
- Assemble the card by adhering the black and white panel to a white card base, then use foam tape to adhere the ink-blended panel and sentiment

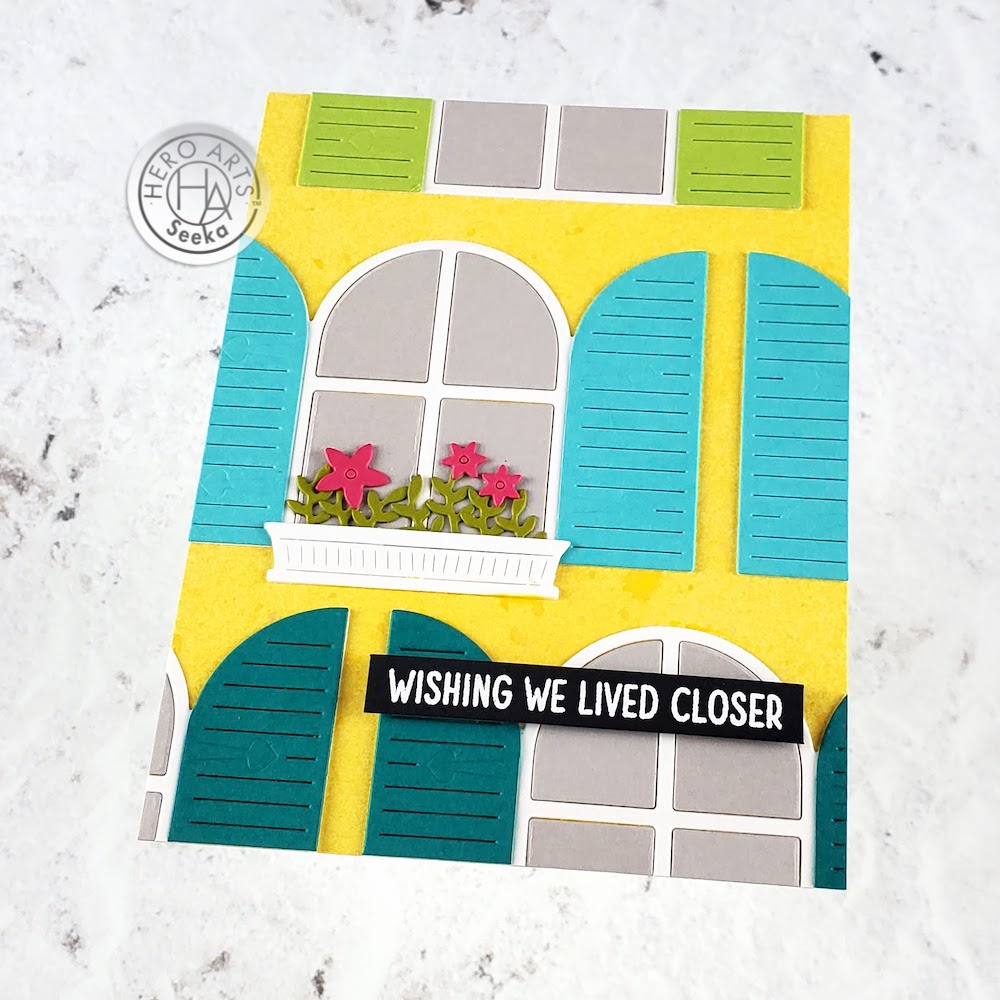
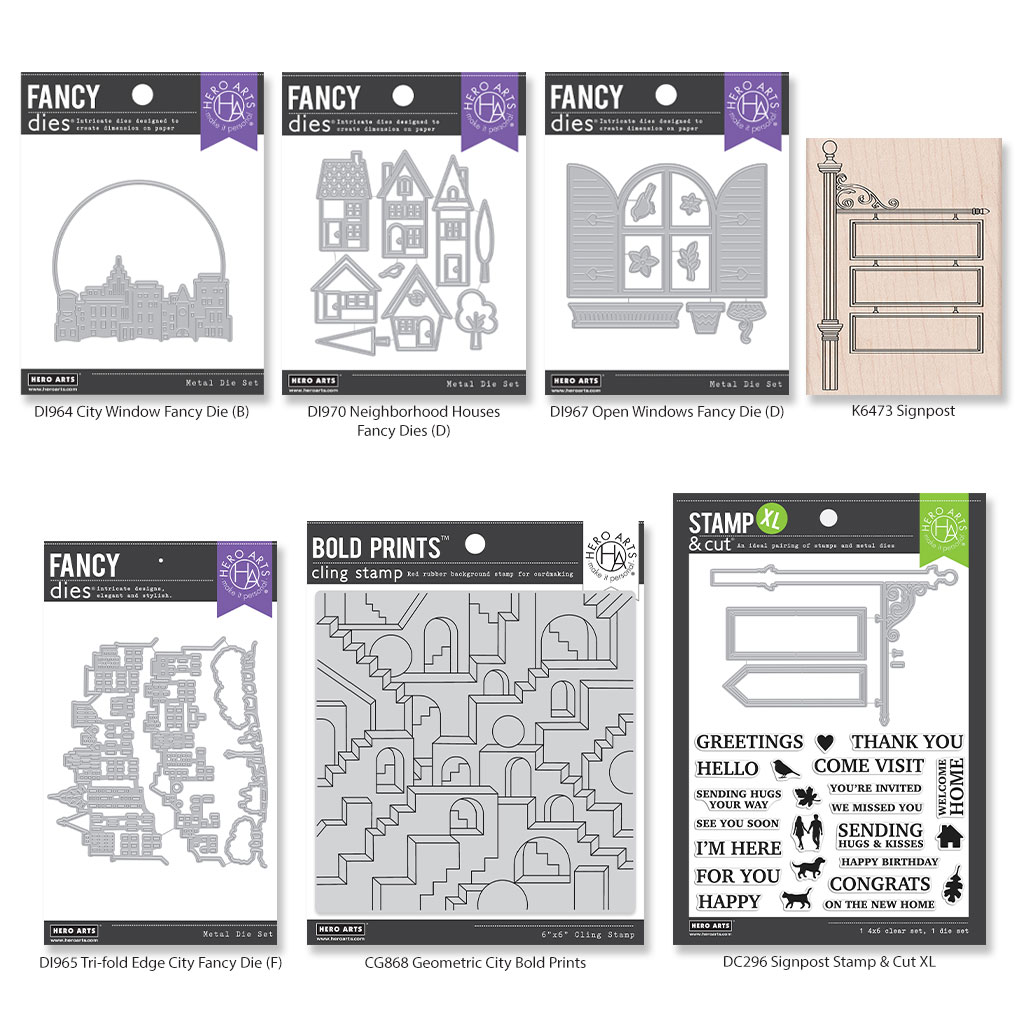
My second card features the adorable Open Windows die set. I love this arched window and shutters and the additional small dies, including a window box, leafy stems, flowers, flower pot, a small bird, and even a freshly-baked pie!
To recreate this card:
- Die cut the window four times from Dove White cardstock
- Die cut just the shutter areas of the window from three colors of cardstock: Kiwi, Paradise, and Bermuda (you may need more than two shutters for each color)
- Trim away any part of the window frame that may have been cut along with the shutters in step 2
- Glue the color cardstock shutters to the white window frames then set them aside
- Die cut the window area several times from Pebble cardstock and set aside the pieces; these are the window panes
- Die cut the window box from Dove White cardstock, leafy stems from Palm cardstock, and flowers from Azalea cardstock
- Spritz a 4.25″ x 5.5″ panel of Canary cardstock with Mustard Seed Distress Oxide spray (this step can be skipped, it just helps to deepen the color of the yellow cardstock and to create a bit of visual texture, like stucco)
- Glue the window frames to the background, then piece in and glue the window panes
- Glue the window box, leafy stems, and flowers to one window
- Use foam tape to adhere a heat embossed sentiment (this one is from the new Wherever You Go stamp set)
Thank you so much for visiting! Your next stop is the wonderful Jennifer Kotas! Be sure to read below for giveaway details.
Giveaway
Hero Arts will give away a $50 gift card, drawn from the comments left across the hop. Enter by Sunday, December 12th at 11:59pm Pacific, and the winner will be announced on the Hero Arts blog the following week.

your cards are lovely – thanks for sharing them with us
LikeLiked by 1 person
I love the first one. GREAT idea to mask off the “frame”
LikeLiked by 1 person
Two beautiful cards ! Another proof of how great the new kit is !
LikeLiked by 1 person
I love your cards.
LikeLiked by 1 person
Hi, Seeka! Love both of these. They are cheerful and bright. I’m looking forward to this kit and a few of the extra items! You’re a wonderful brand ambassador!!
Lori S in PA
LikeLiked by 1 person
Lovely cards! I really like the first one, thank you for the inspiration!
LikeLiked by 1 person
I LOVE both! Cool window one!
LikeLiked by 1 person
Love what you created!! Thank you for the inspiration!
LikeLiked by 1 person
So gorgeous!
LikeLiked by 1 person
The window card is a great idea….. you’ve got me thinking of what I can do this from my stash. Really neat.
LikeLiked by 1 person
Great cards. I love the colorful smaller card on top of the black and white card!
LikeLiked by 1 person
I love how you layered color on black & white on your New Home card; it really makes it pop!
LikeLiked by 1 person
Wonderful ink shades & use of the window die. May have to add the window die to my order.
Melissa
“Sunshine HoneyBee”
LikeLiked by 1 person
Gorgeous cards! Love the window…
Thanks for sharing.
LikeLiked by 1 person
Stunning!!!! the ink blending on the first card it out of this world!
LikeLiked by 1 person
What nice cheery cards to beat the winter doldrums. Thanks for the inspiration!
LikeLiked by 1 person
Love both of your stunning cards.
LikeLiked by 1 person
Beautiful cards! Love the design and bright colors on the window card!
LikeLiked by 1 person
Love the frame around the color buildings!
LikeLiked by 1 person
Love the colors on your cards.
LikeLiked by 1 person
These cards are so sweet. Love the spotlight card, especially.
LikeLiked by 1 person