

Hello, I hope you’re having a nice day!
Today we’re celebrating the release of the Altenew Adventures Ahead release! If you arrived from the super-talented Jaycee Gaspar’s blog, you’re right on track. If you want to hop along from the beginning, visit the Altenew Card Blog. Check the bottom of this post for giveaway information and the full blog hop list.
I have four cards to share, so I’ll jump right in!
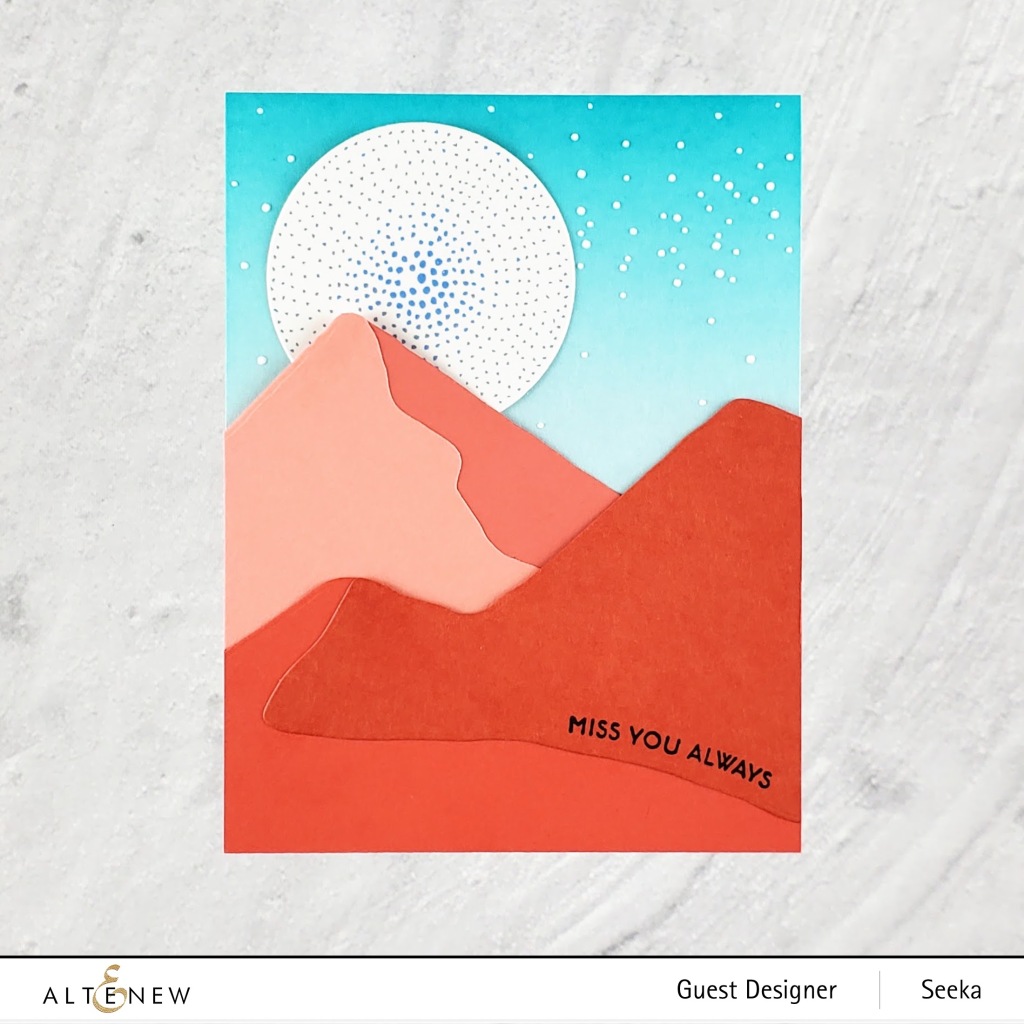
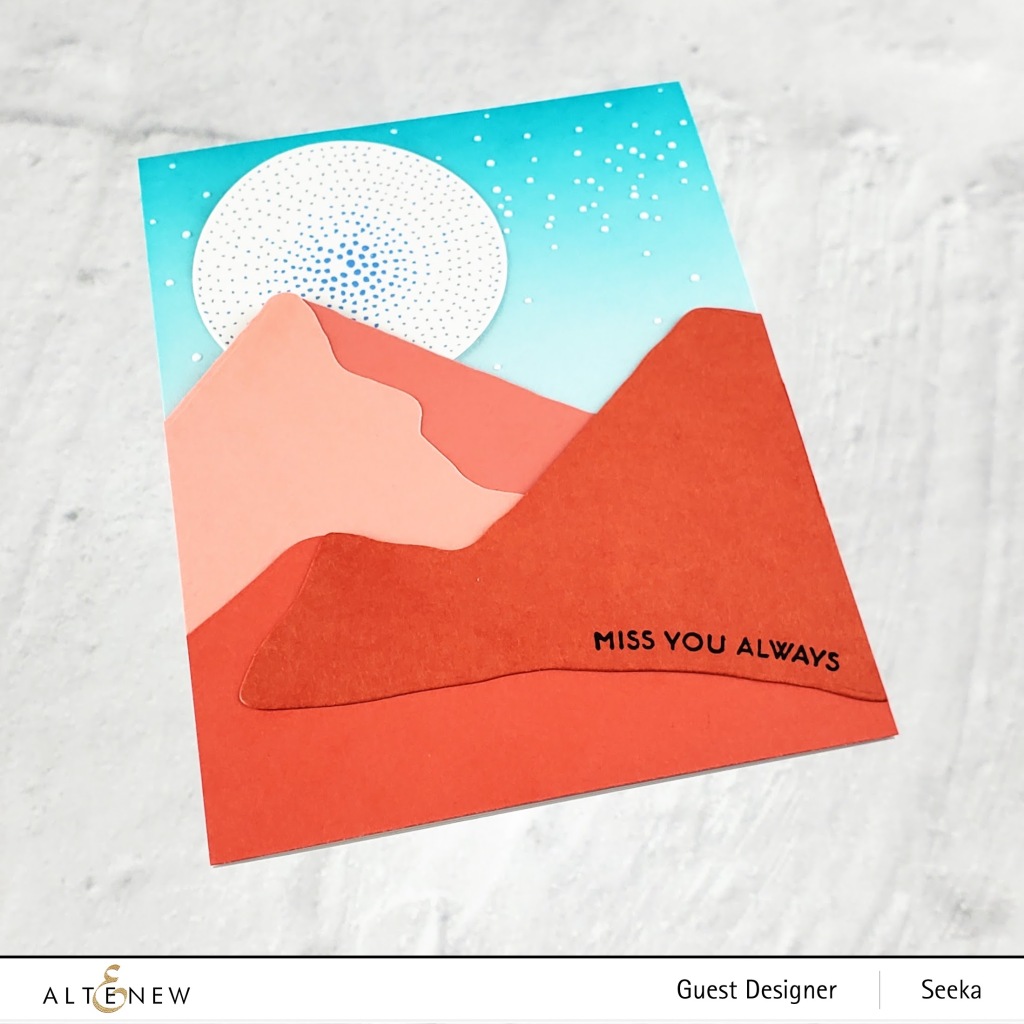
Miss You Always
My first card features the new Mountain Builder die set with star details that I created using the new Stellar stencil. I really like how this die set can be used to create a really graphic card like this one or, with a bit of ink blending or coloring, could be used to make a softer or more realistic mountain!
To recreate this card:
- Use the Mountain Builder dies to cut four different shades of cardstock. I chose shades of peach and brick reds from my cardstock stash (Simon Says Stamp’s Burnt Orange, Gina K. Design’s Coral Reef, and Concord and 9th’s Sorbet and Grapefruit)
- Use glue to adhere the layers of the mountains together
- Stamp the sentiment in Permanent Black ink along one of the mountain ridges, curving the stamp if necessary; this sentiment is from the Needlework Motif stamp set. Set the mountains aside
- Use a large blending tool to blend Aqualicious ink along the top of an A2-sized panel of light blue cardstock (this happens to be Hero Arts’ Artic cardstock)
- Position the Stellar stencil over the top part of the inked panel and use a palette knife to apply Embossing Paste over the stencil; set aside to dry
- Create the moon by applying the dotted circle image from the Round Art Washi tape over a piece of white cardstock and then using a circle die to cut it out (there is a great sun-like circle image on this washi tape, too!)
- Adhere the mountains to the background panel and trim off any excess
- Adhere the moon
- Adhere the card front to a card base
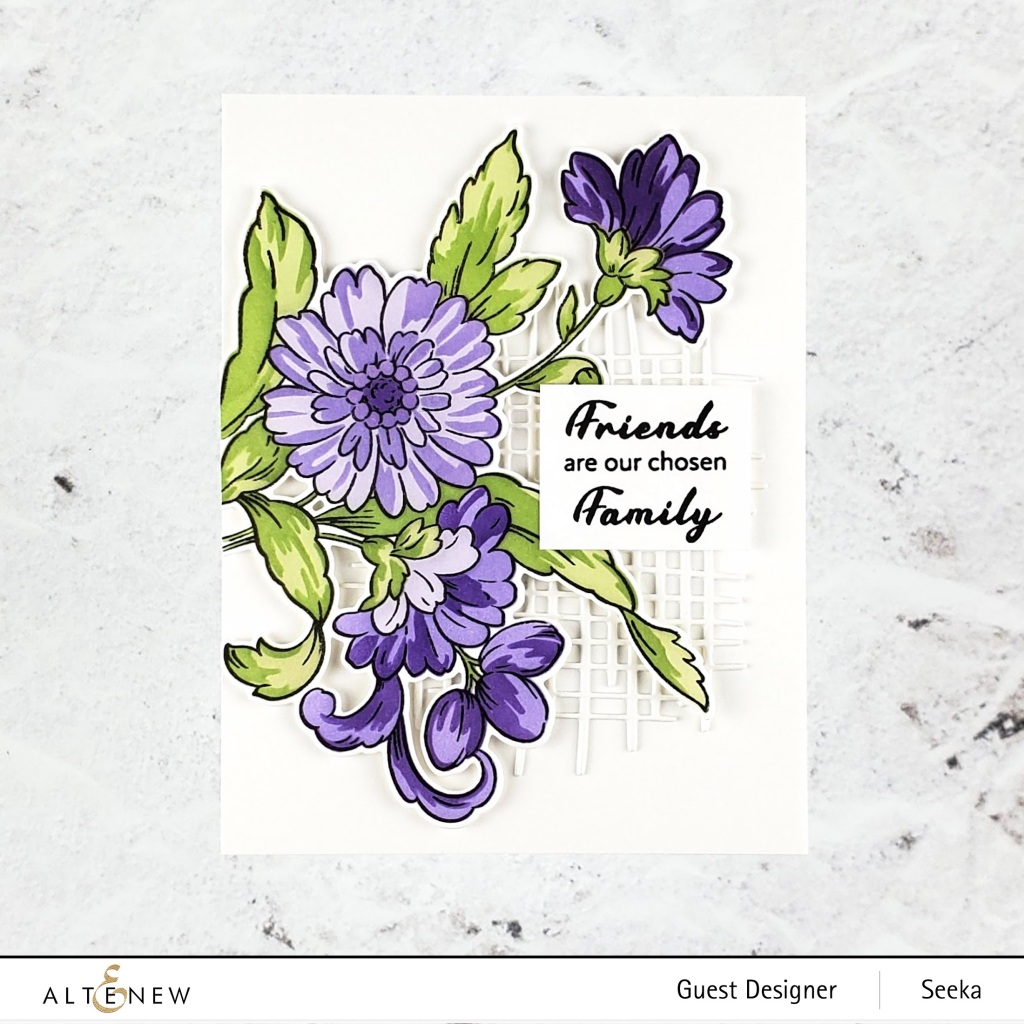
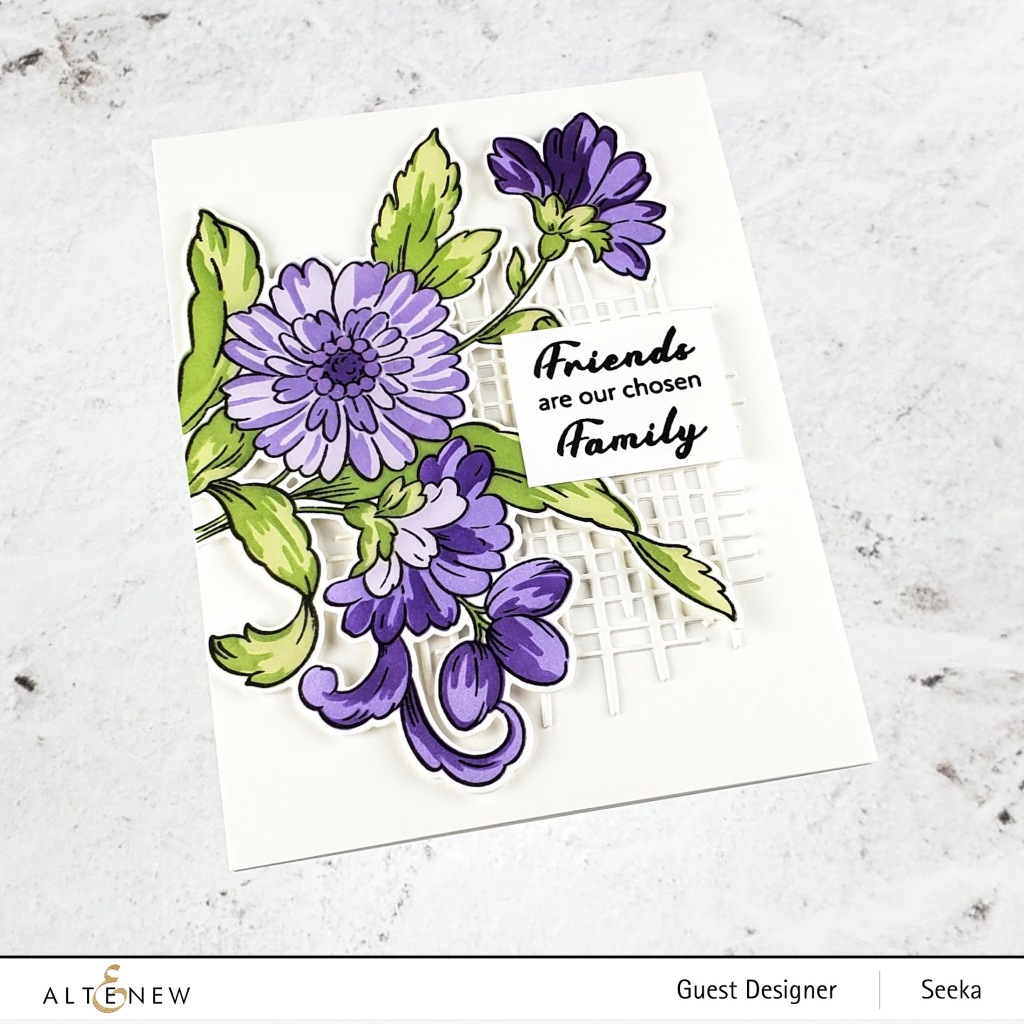
Friends Are Our Chosen Family
My next card features the new Sisters of the Heart stamps, dies, and coloring stencils (also available as a bundle). To recreate this card:
- Stamp the outline layer of the floral in Permanent Black ink onto white cardstock
- Use the coloring stencils to blend on the layers of the flowers and leaves using large blending tools. The three layers of the purple flowers are Wisteria, Hydrangea, and Ultraviolet inks, and the leaves are Frayed Leaf and Forest Glades inks
- Use the coordinating die to cut out the image; set aside
- Use the Burlap Texture die to cut a piece of white cardstock; set aside
- Stamp the sentiment in Permanent Black ink onto white cardstock
- Use glue to adhere the Burlap Texture die cut to an A2-sized panel of white cardstock
- Use foam tape to adhere the floral image; cut off any piece extending past the edge of the panel
- Use foam tape to adhere the sentiment
- Adhere the card front to a card base
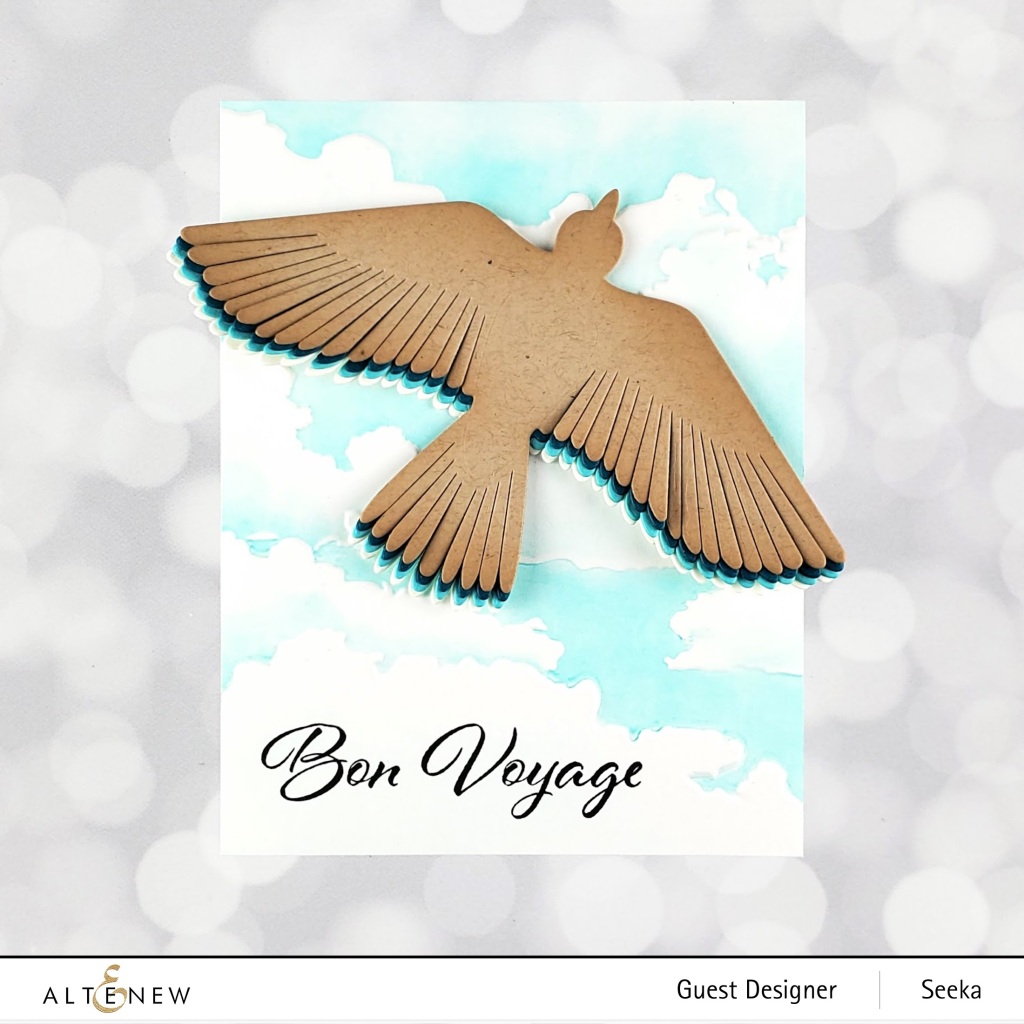
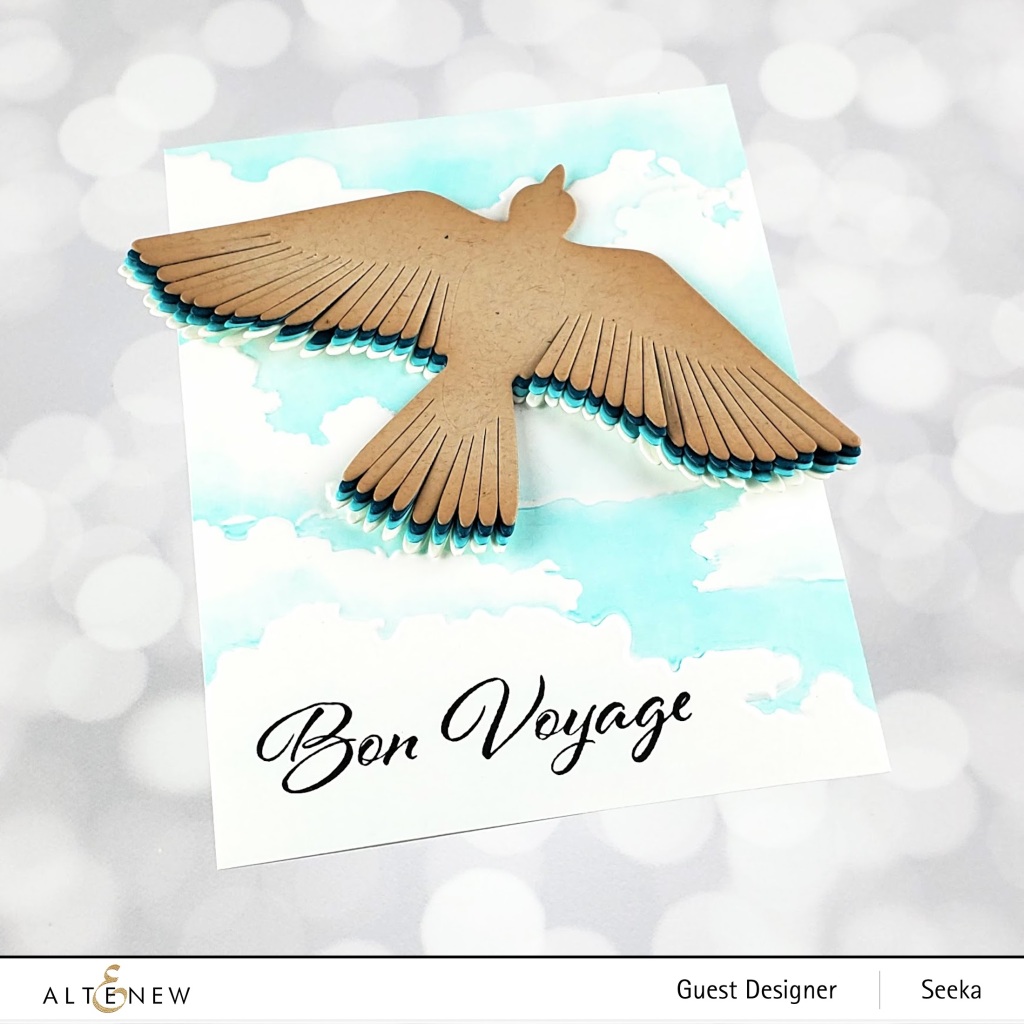
Bon Voyage – Feathered Friends
My third card features the new Feathered Friends die set and the new Cloudy Day 3D embossing folder. Here I’ve used just the largest bird in the set of three birds and created dimension by stacking multiple die cuts together.
To recreate this card:
- Use the largest bird from the Feathered Friends die set to cut kraft, dark teal, aqua, and cream cardstock (here I used Sand, Adriatic, Paradise, and Antique Ivory cardstocks from Hero Arts)
- Use glue to adhere the four die cuts together, slightly offset so that the feathers appear layered; only apply the glue to the solid parts of the bird so that the feathers can separate freely. Then set the bird aside.
- Open the Cloudy Day 3D embossing folder and use a brayer to apply Aqualicious ink to the side of the folder that will touch the top of the card; use a rag to dab up any ink that settles into the dips of the clouds, though it’s okay to have some remain as you can see from my card
- Place an A2-sized piece of white cardstock into the embossing folder; close the folder and run it through your die cutting machine using the sandwich that the manufacturer recommends for embossing folders
- Remove the cloud panel from the embossing folder and stamp the sentiment (from the Seas The Day stamp set) in black ink.
- Adhere the bird to the card front
- Adhere the card front to a card base
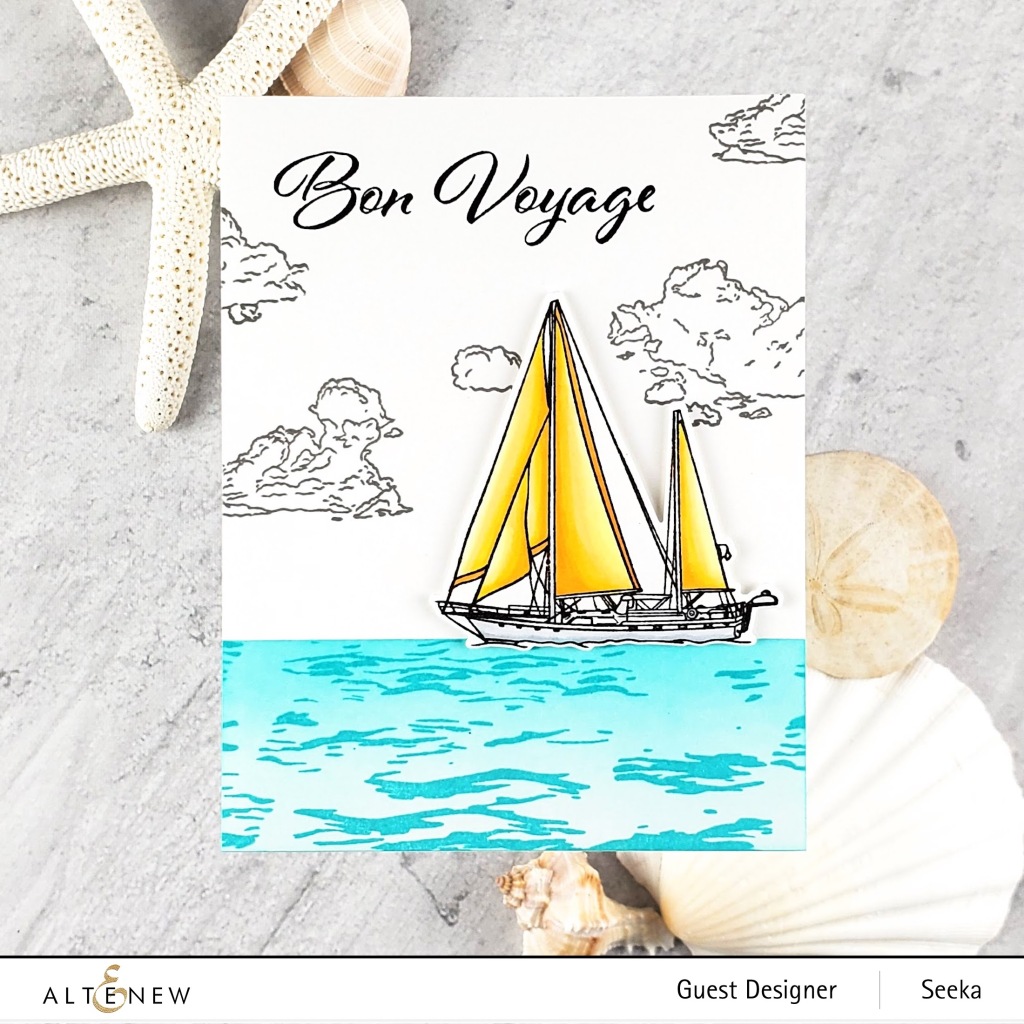
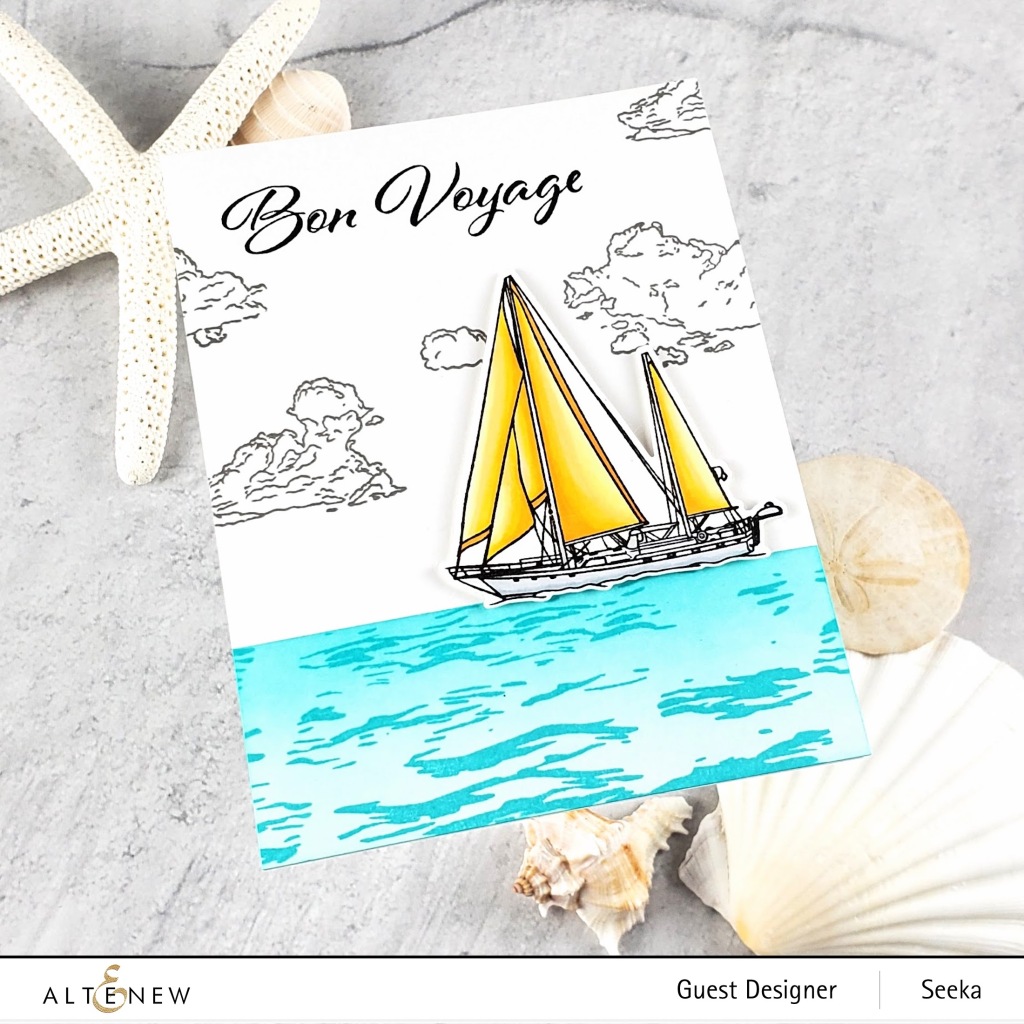
Bon Voyage – Seas The Day
My last card features the new Seas The Day stamp set and coordinating dies (also available as a bundle). I really love this beautiful sailboat!
To recreate this card:
- Stamp the boat in Permanent Black ink onto white cardstock
- Use Copic markers to color the boat. I used Y00, Y21, Y15, and Y17 for the sails, Y38 for the sails’ trim, and C1, C2, and C3 for the hull.
- Cut out the boat using the coordinating die and set aside
- Use Post-it tape to mask off the top portion of an A2-sized panel of white cardstock, leaving about an 1.5″ exposed at the bottom
- Use a large blending tool to blend Aqualicious ink over the exposed area, concentrating the color near the Post-it tape and fading out to lighter blue at the bottom of the panel
- Use the ocean waves stamp from the stamp set to stamp wave pattern in Aqualicious ink; since the stamp doesn’t extend all the way across an A2 panel, offset the stamp to the left or right of the panel and then stamp again on the opposite side, without overlapping the image
- Stamp the sentiment in black ink and the clouds in gray ink
- Use foam tape to adhere the boat
- Adhere the card front to a card base
Thank you so much for coming by! Please be sure to check out information about the giveaway below before you head on to visit the talented and wonderful Amber Rain Davis!
Giveaway
$300 in total prizes! To celebrate this release, Altenew is giving away a $50 gift certificate to 2 lucky winners and a $25 gift certificate to 8 winners! Please leave a comment on the Altenew Card Blog and/or each designer’s blog post on the blog hop list below by 06/09/2021 for a chance to win.
Altenew will draw 10 random winners from the comments left on each stop of this blog hop and announce the winners on the Altenew Winners Page on 06/11/2021.
Blog Hop List
- Altenew Blog
- Terri Koszler
- Erum Tasneem
- Jenny Colacicco
- Norine Borys
- Vicky Papaioannou
- Jaycee Gaspar
- Seeka <– You are here
- Amber Rain Davis
- Erin Thompson
- Tenia Nelson
- Natasha Davies
- Bridget Casey
- Karen Brown
- Laurie Willison
- Kelly Griglione
- Agnieszka Małyszek
- LauraJane
- Lilith Eeckels
- Maryam Perez
- Carol Hintermeier
- Therese Calvird
- Amanda Baldwin
- Verity Biddlecombe
- Emily Midgett
- Raquel Bowman
- Sande Woodson
- Nicole Watt
- Anna Mahtani
- Virginia Lu
- Sandhya Iyer
- Michelle Short
- Nathalie DeSousa
- Keren Baker
- Reiko Tsuchida
- Patricia Roebuck
- Mindy Eggen
- Kymona Tracey
- Laura Bassen
- Tania Ahmed
- Zinia Redo
- Vicki Finger
- Joylita Dsouza
- Preeti Chandran

Hi, Seeka – Your card is beautiful! Love the colors you chose. I will check out the new items from Altenew.
Lori S in PA
LikeLiked by 1 person
Beautiful cards
LikeLiked by 1 person
Great cards! I especially like the Miss You and the Bon Voyage cards.
LikeLiked by 1 person
Great cards! Love all the scene cards, but the Mountain Builder card is my favorite.
LikeLiked by 1 person
Fantastic cards. Love them all, especially the scene cards. Those make great masculine cards. Thanks for all the wonderful inspritation!
LikeLiked by 1 person
I love the sailboat with the yellow sails. Great use of color,.
LikeLike
Fabulous cards.
LikeLiked by 1 person
I love the stylized sun on your mountain builder missing you card.
LikeLiked by 1 person
Love all the layers you used on the bird die! Amazing!!!!
LikeLiked by 1 person
Your floral card colors are so beautiful.
LikeLiked by 1 person
I love the bird and the sailboat cards!
LikeLiked by 1 person
The boat! I love the boat scene!!
LikeLiked by 1 person
Love your color choices! I especially like the first card, but the one with flowers is a close second!
LikeLiked by 1 person
I love the sailboat one and gorgeous flowers!
LikeLiked by 1 person
Beautiful CAS cards.
LikeLiked by 1 person
Awesome cards! Loving the dove!!
LikeLiked by 1 person
All great cards, especially liking the Sailboat Scene. Well Done.
LikeLiked by 1 person
Awesome! Love the colors and the scenes you made.
LikeLiked by 1 person
So pretty.
LikeLiked by 1 person
Fantastic cards as always, love the new release and particularly the Let’s Go and Seas the Day ones, they are gorgeous!
LikeLike
Great cards. The mountain builder and voyage sets looks great.
LikeLiked by 1 person
Fabulous selection of cards. Love the one with boat, awesome!!
LikeLiked by 1 person
Beautiful cards with lovely color combos! Love your scene with the Mountain Builder dies!
LikeLiked by 1 person
Wow, wow, WOW! I am wondering if the Altenew designers are baseball fans? They sure have knocked it out of the park with this release!
LikeLiked by 1 person
super cards – love the birds die – so BIG
LikeLiked by 1 person
Fantastic cards!!! Love how you layered the bird!!!
LikeLiked by 1 person
I love these cards. The flowers are so beautiful and colorful and the others so clean and unique.
LikeLiked by 1 person
Your cards are outstanding! They are all lovely but the purple flowers card is my personal favorite and blue and purple flowers are my thing.
LikeLiked by 1 person
Great cards Seeka! Really love the two Bon Voyage cards. TFS
LikeLiked by 1 person
I am delighted by your layouts and coloring. You made me want to go to our cabin in the mountains – guess you know my fav card! Great job with all those lovely cards!
LikeLiked by 1 person
Fantastic cards! I love how you created the moon with the Washi tape! The layers on the bird are gorgeous!
LikeLiked by 1 person
Great cards! Thanks for sharing.
LikeLiked by 1 person
Gorgeous examples!
LikeLiked by 1 person
Lovely cards!!
LikeLiked by 1 person
Wonderful cards.
LikeLiked by 1 person
Beautiful cards – all absolutely stunning 🤩
LikeLiked by 1 person
These are all gorgeous! So much eye candy! From the colours you used in the mountain builder card to the layering of the bird…they are all a feast for the eyes!
LikeLiked by 1 person
Beautiful cards! I love the ocean and boat card- I love this stamp set! The embossed cloud folder looks fantastic colored!
LikeLiked by 1 person
I just LOVE that Washi tape moon! Such an ingenious fabulous touch ❤️
LikeLiked by 1 person