Hi there, I hope your week is going well! I’m in the middle of a gap week between jobs and am just now settling into stay-cation mode. It’s taken a few days to clear my mind of all of the in-progress projects of my old job and of course I’m now realizing that I should have heeded all the advice that people gave me to take at least two weeks off before starting a new job. Oops!
With the extra time I had last night, I decided to play around with the Waffle Flower Crafts Water Media Mat that I bought last month at Simon Says Create. While I was there, I had a chance to sit down for a create and take with Waffle Flower and to briefly use the mat for ink smooshing and blending. I liked how smoothly the ink moved from the mat to paper so I decided to grab some inks I rarely blend with and try my luck.
I pulled out four Altenew inks (Mountain Mist*, Lagoon, Dusk, and Desert Night) and an A2-sized piece of Strathmore Bristol Smooth cardstock. Bristol smooth is an excellent cardstock for ink blending so I already knew I had an advantage 🙂
Using a foam blending tool, I picked up some ink from the ink pad and then tamped the ink onto the mat. I smooshed it around a little to get even coverage on the foam and then started blending with circular motions, moving from the mat onto the paper. I started with the lightest color in one corner and then gradually added each of the darker colors to create an ombre effect.
I liked how the mat seemed to hold on to the ink a little bit more than a glass mat does. This allowed me to spread a thin layer of ink around the mat so that I could pick up a just small amount with my foam blending tool. When I try this on a glass mat, I tend to see the ink being moved from place to place, rather than spreading out thinly. I’ll definitely keep experimenting!
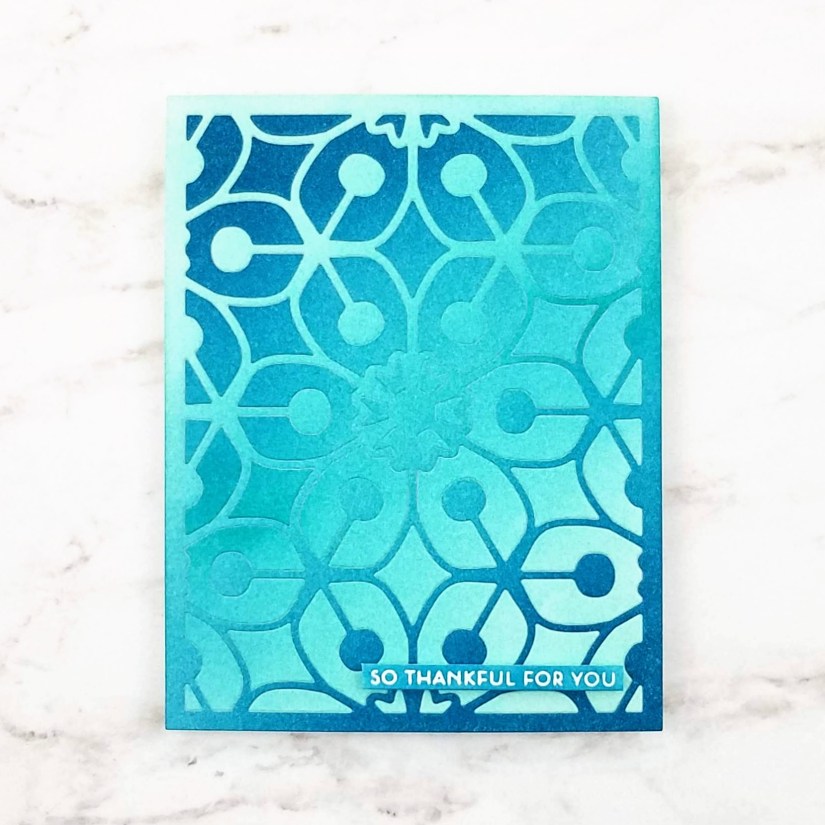
 When my panel was dry, I die cut it with the Altenew Layered Medallions Cover Die B. I removed the bottom cutting plate, leaving the die and die cut pieces in place. I placed a few strips of Post-It tape across the die cut panel to hold all of the pieces in place and then I carefully removed the die, using a craft pick to poke out smaller pieces and push them into the Post-It tape.
 Then I carefully peeled away the positive cut (the large piece with the frame) away from the Post-It tape, leaving all of the negative pieces still attached to the tape. I turned the positive cut 180 degrees and then pressed it back down onto the post it tape, fitting all the negative pieces back into place.
Then I took two more pieces of Post-It tape and laid them over the top of the panel to hold everything in place while I carefully removed the strips from the back. I replaced those back strips with thin paper tape (the kind used in medical offices) to permanently hold everything together. Finally, I removed the remaining Post-It tape and then adhered the panel onto an A2-sized card base.
For the sentiment I used Wow! Embossing pad and white Hero Arts embossing powder to heat emboss a sentiment from the Altenew Needlework Motif stamp set onto a strip of Bristol smooth and then blended Dusk ink over the strip. I backed the strip with foam tape and adhered it to the card.
Thank you so much for coming by!