Hi there, I hope you’re having a great day!
After reaching my 365-cards-in-365-days goal, I took a couple of days off and I confess that I felt a little lost. When I came back to my craft desk yesterday, I felt sooo happy. I really have come to love this hobby and to rely on it as a sort of therapy and a wonderful way to connect with crafty folks like you!
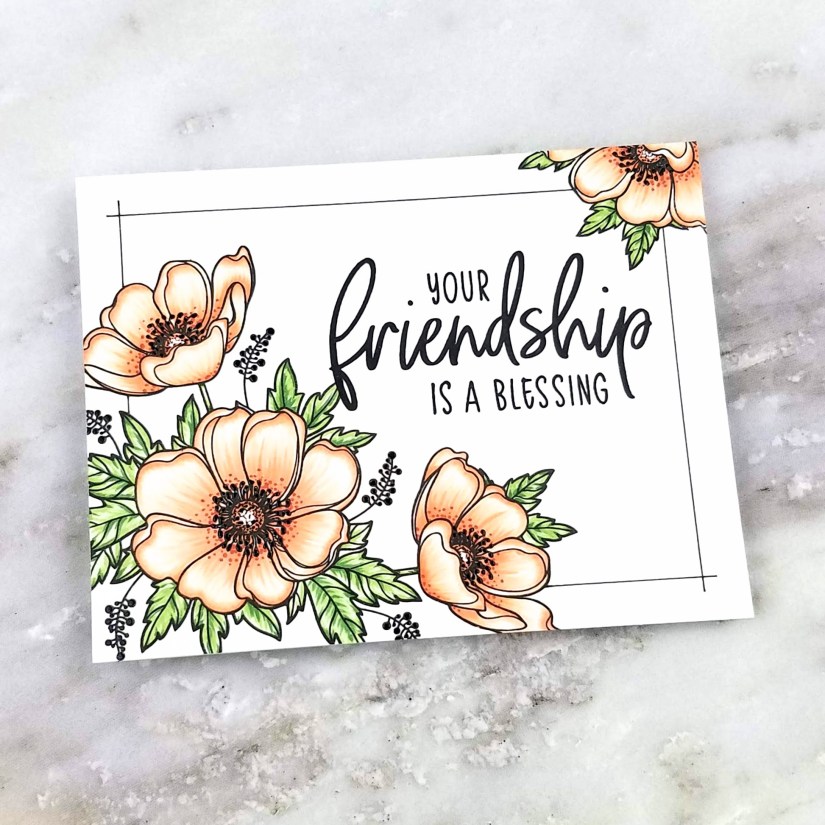
I’ve had this gorgeous Winter Anemone stamp set from Honey Bee Stamps for a while now and decided to finally settle down to color it. My bestie from junior high school left yesterday for a month-long trip to India and I was feeling sad that we won’t be able to check in every day like we usually do, so with friendships in mind I decided to combine the flowers with Honey Bee’s Friendship stamp set. I finished it just in time to text her a photo of it before her flight took off!
I started by stamping the largest of the floral stamps in Copic-friendly Hero Arts Intense Black ink onto an A2-sized piece of Neenah Soar White 80# Classic Crest cardstock. I decided that I wanted to practice coloring very light colored flowers so I chose YR0000, YR000, YR01, and YR02. I used YR0000 to completely fill in the petals and then added flicks of YR000, shorter flicks of YR01, and even shorter flicks of YR02, all radiating out from the center of the flower. Then I went it around the ends of the petals and added in a very little bit of YR02, blended out with YR01, to add some more dimension.
I filled in the centers of the flowers with E97 and then decided to use a black Copic Multiliner to add black dots. That ended up looking a bit too dark so I added some dots of white Sakura Gelly Roll pen to the very centers. I also added, at the base of each petal, some small dots of E07.
I used G40, G43. and G46 to color the leaves and then finished off the flowers by using a black Sakura Glaze pen to add slightly dimensional and shiny dots to the pistils and also to the little sprigs of what looks like very small berries.
At this point I decided to draw in the frame and used a black Copic 0.3 Multiliner pen and a ruler to do so. I thought that drawing in the frame would help me figure out where to stamp the sentiment, which I stamped in Versafine Clair Nocturne ink. But, after I stamped the sentiment, I realized that the card felt very bottom-left heavy.
So, I decided to add a flower at the top right hand corner. Unfortunately, since I’d already drawn in that corner of the frame, I had to color and fussy cut the flower. I HATE fussy-cutting! I even fussy cut that leaf that hugs the top right edge of the card because two leave didn’t feel quite right. So much for a one-layer card! It’s truly a miracle that I finished this card before my friend’s plane took off.
So, my lesson of the day was: use a pencil to drawn in a frame and ink it in only after I know I have all of my elements stamped.
To finish the card, I adhered it to an A2-sized card base.
Thanks for visiting!