Hi there!
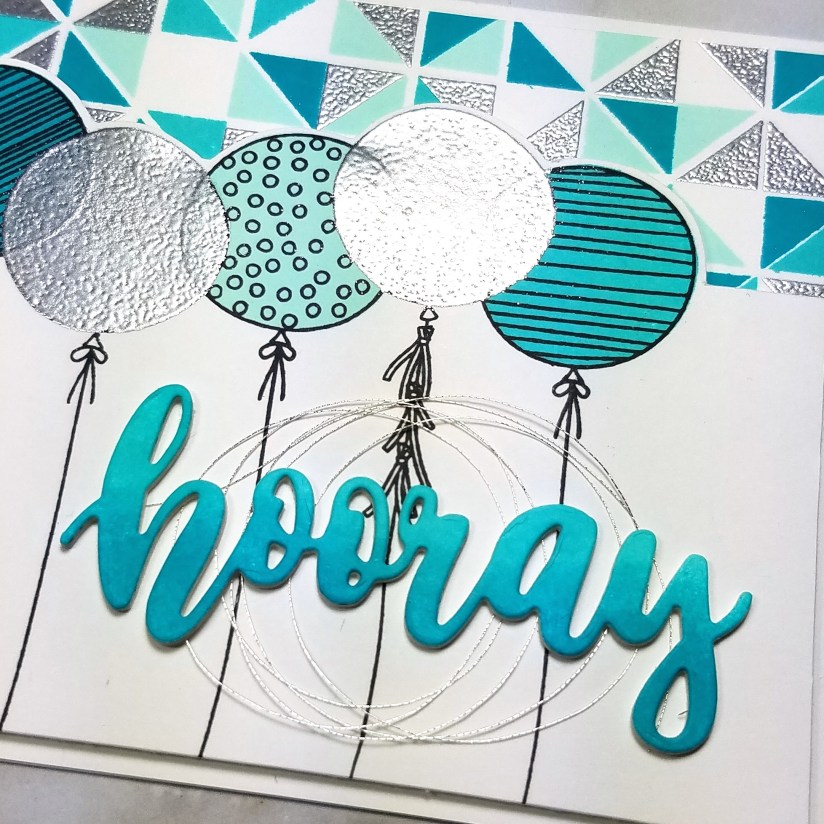
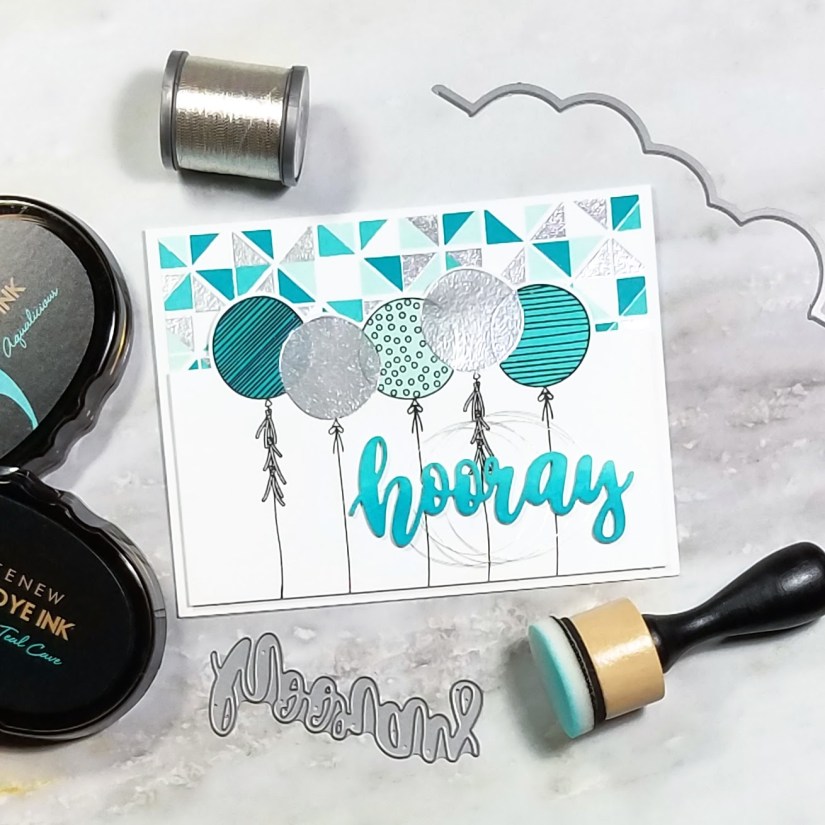
Today I have a celebration card to share. It uses a few items from Concord and 9th: Triangle Turnabout for the background, Birthday Stacks for the balloons, and the Hooray die.
For the background, I used Neenah Solar White 80# cardstock and three ink colors from Altenew (Dew Drops, Aqualicious, and Teal Cave) as well Ranger Silver Ultra Fine embossing powder. If you haven’t seen how Concord & 9ths turnabout stamps work, I encourage you watch their tutorial on YouTube. If a picture is worth a thousand words, a video is worth a hundred thousand!
On a separate piece cardstock, I stamped balloons using three stamps from the Birthday stacks set. I stamped the set of circles and the two types of strings in Versafine Onyx Black ink. Then I used the same three ink colors and embossing powder to add color and shine to the balloons. I made a mistake here in that I stamped the set of circles upside down so I had to fussy cut the balloons since the matching die didn’t line up.
For the sentiment, I ran the Hooray die through my Sizzix Sidekick five times. Once using Neenah cardstock, and four times using white 110# scrap cardstock. I placed the Neenah die cut back into it’s negative space to make it easier to hold in place while I blended Aqualicious and Teal Cave onto it, using the lighter color on the top half and blending it into the darker color on the bottom for an ombre effect. Then I adhered all five layers together using scant amounts of liquid glue to create a dimensional sentiment.
Then it came time to assemble the card. I trimmed the triangle background in half, saving the other half for a future card, and adhered it to an A2-sized card base. Then I trimmed the balloon panel so that the height of the balloons revealed some of the triangle background and still left room for the sentiment. I used foam tape to adhere it to the card base so that it stood up from the background.
Before I adhered the Hooray sentiment, I pulled out some inexpensive silver thread from my stash and wound it around a few fingers. I added a liquid glue to the back of the Hooray die cute and then adhered it to the card, sandwiching the silver thread in between. And that finished the card!
Thanks for stopping by!