Hello there! I hope you’re weekend has gotten off to a good start!
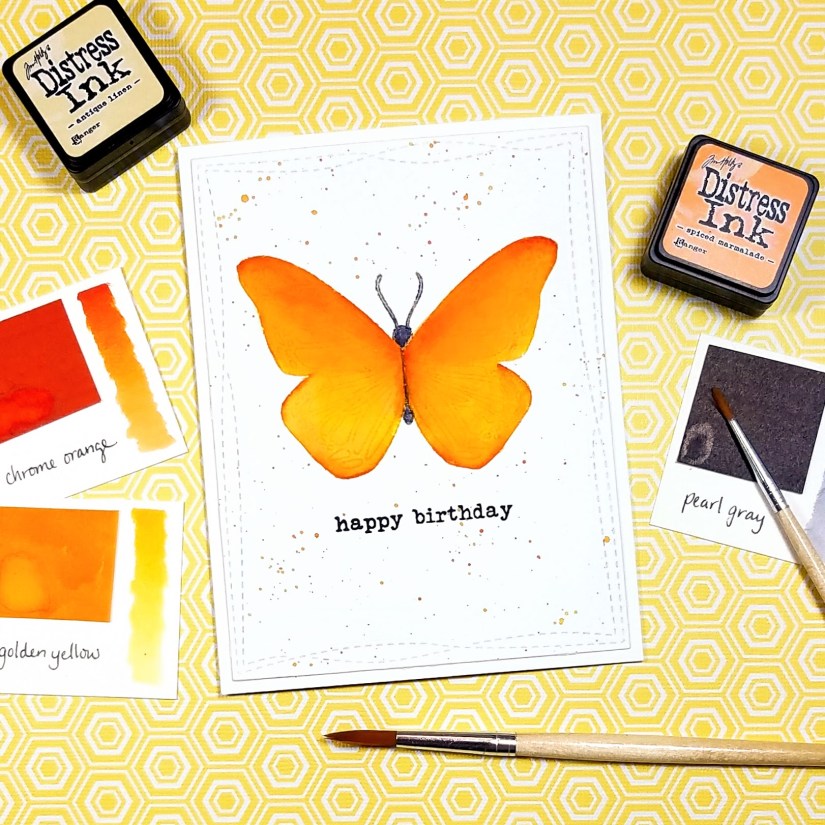
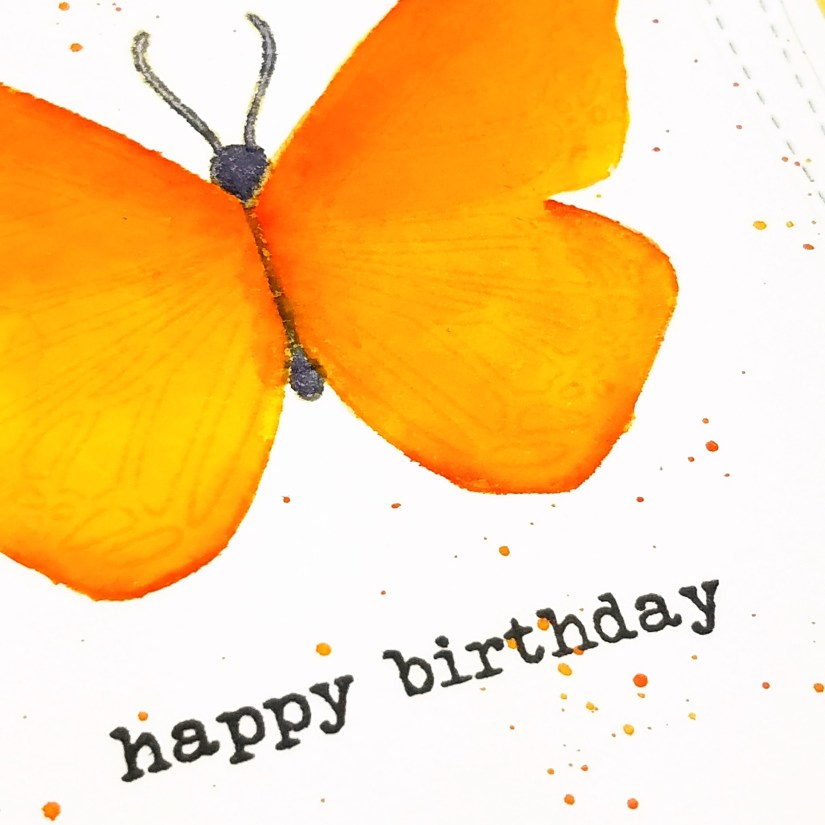
Today’s card uses the Butterfly Beauty stamp set from Concord and 9th. I wanted to use the detailed butterfly stamp to try a version of no-line coloring, where I wanted the outline of the butterfly to fade away but the detail of the butterfly to remain. I wasn’t entirely successful, but it was a fun experiment and I have an idea of what to try next time!
I started by die-cutting the card front out of Ranger watercolor paper using the largest of the Wonky Stitched Rectangle die set from My Favorite Things. Ranger watercolor paper is a nice bright white compared to other watercolor papers, and it has a rough and a smooth side (which is not uncommon, in my limited experience). I used the smooth side for my stamping and painting.
 Then, I stamped the butterfly image in Antique Linen Distress Ink. This ink color is very light and since Distress Inks react with water, I knew that the stamping could be made to fade as I added water and watercolor.
I used painter’s tape to tape down the card front to my desk and then I used an 8 round brush to apply clean clear water over the butterfly, being careful to follow the outline, and avoiding the body and antennae. I chose Golden Yellow and Chrome Orange from Peerless Watercolors and laid down a layer of the Golden yellow with a 8 round brush. Then I added Chrome Orange around the edges, blending inwards. Peerless watercolors are very easy to blend and I find that I could go over areas that had dried a bit without pulling up the color. The result is a relatively smooth layer of color. Using a 1 round brush, I added more Chrome orange to the edges for some color variation. Finally, I used the same brush to add Pearl Gray to the body and antennae.
 I then decided that I wanted to add some splatter to the card, but not to the butterfly, so I created a mask by stamping the butterfly onto a piece of Judikins Eclipse Tape* that I stuck on to a piece of scrap cardstock. Then I cut out the butterfly, peeled-off the cardstock, and masked off my watercolor butterfly.
I smooshed a bit of Carved Pumpkin Distress Ink onto an acrylic block and then, with a lightly wet brush, picked up some color and splattered it onto the card. I removed the mask and stamped the sentiment in Versafine Black Onyx ink.
Finally, I added Scor-tape to the back of the card front and adhered it to an A2-sized card base and that finished up the card.
The next time I try this, I think I may choose a very light dye ink. While I was able to retain some of the detail of the butterfly, the veins blended away a bit too much and are harder to see where I used darker orange.
Thanks for visiting!
*Eclipse Tape is a 6″ wide roll low tack tape (it feels like Post-It tape to me). It can be used like Stick It Adhesive Sheets or Inkadinkadoo Mask Paper, but I find it to be much more affordable since the roll contains 33 feet of tape. It doesn’t have release paper, but I apply it to cardstock and find that it peels off cleanly.


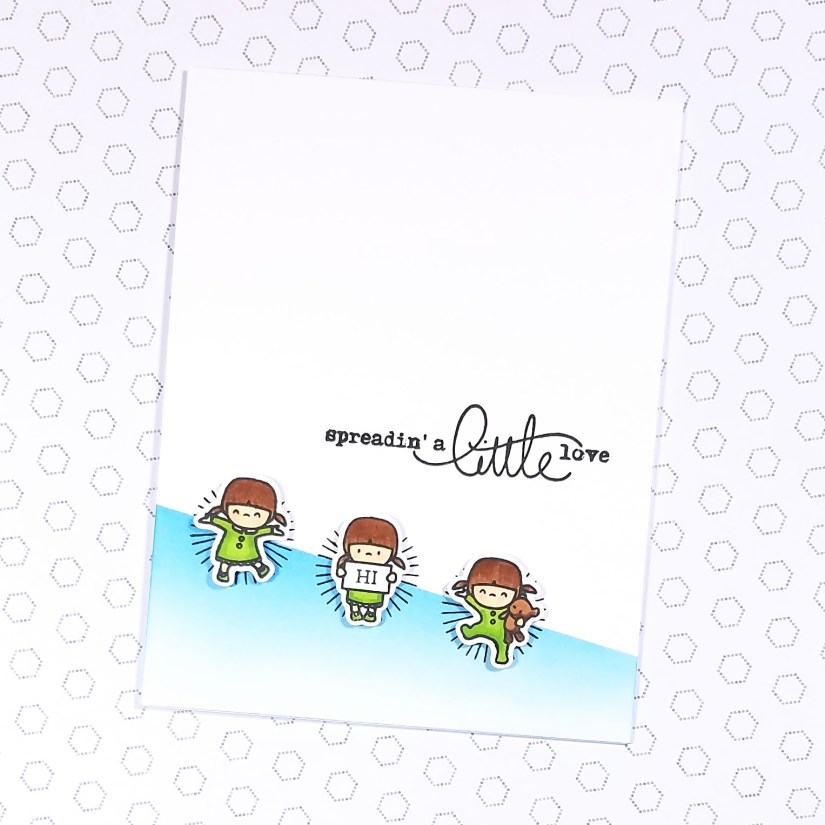
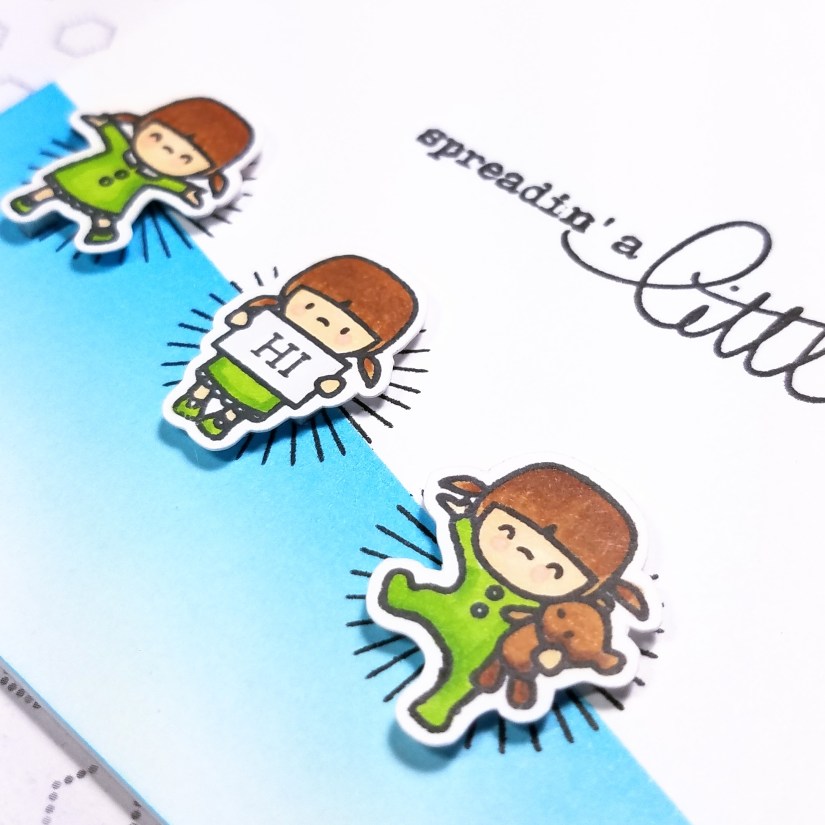
 Today I’m playing along with the CAS(E) this sketch! challenge #266. I’ve been following a couple of challenge blogs for a few months now, but yesterday and today are the first times I’ve played along. I’m finding challenges to be a great way to get my creative juices flowing, and to learn about color combinations and compositions that I might not otherwise have thought of. You can check out the