Animal Cards, Friendship Cards, Thank You Cards

Thank You For Being There When I Kneaded You

20180410_224215.jpg

Happy National Pet Day!

I love animals, but I especially love my two cats. They came home with me as half-pound kittens and grew into 20-pound beasts. They’re from the shelter and my best guess it that they’re Norwegian Forest cats. So today I have a simple card to celebrate my cats and the many times they’ve saved me over the years.

I started by die-cutting a piece of Neenah Solar White 80# Classic Crest cardstock with the scalloped rectangle die from My Favorite Things Blueprints 27 Die-Namics. Then, using stamps from the My Favorite Things Cool Cat stamp set, I stamped the cushion and sentiment using Copic-friendly Hero Arts Intense Black ink.

20180410_221750.jpg

I colored in the cushion in two shades of blue (B32 and B34), doing some very simple blending. On a separate piece of cardstock, I stamped the cat image and colored it using W1, W3, and the colorless blender to make a virtually all white cat. I added a bit of R30 inside the ears and on the nose. Then I cut out the kitty using a Brother ScanNCut2.

Then I adhered the scalloped panel to an A2-sized piece of Recollections kraft cardstock. I backed the kitty with foam tape and adhered her onto the cushion. I adhered the card front onto an A2-sized card base and that finished today’s card.

I hope you have a wonderful day! Thanks for stopping in!

20180410_224125.jpg

Animal Cards, Encouragement Cards, Feel Good Cards, Friendship Cards

We Can Weather Any Storm

20180409_224343.jpg

Hello there! I know winter is digging in its heels in many parts of the US so I hope, wherever you are, you get to see a glimpse of sunshine today!

Today I’m playing with the new Rain or Shine stamp set from My Favorite Things. I’m a sucker for encouraging sentiments (and ducks!) and this set has a few great ones. I also pulled out a couple of stencils for the background, as well as some standalone dies for the clouds and sun.

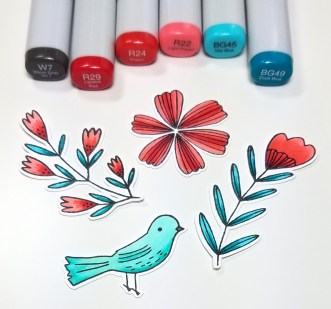
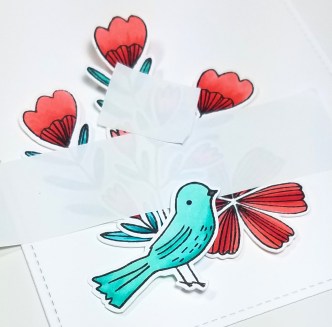
I started by stamping out the girl, ducks, and water elements in Copic-friendly Hero Arts Intense Black ink onto Neenah Solar White 80# Classic Crest cardstock. I then brought out what is essentially my entire collection of Copics to color in all of the images, doing some very simple two-color blending. When I was done, I cut out all of the images using my Brother ScanNCut2.

20180409_212921.jpg

For the background, I used another piece of Neenah Solar White. I used Tombow Mono Removable Adhesive to temporarily adhere the panel to a piece of scratch paper and then I used washi tape to hold the My Favorite Things Drifts & Hills stencil in place while I used a foam blending tool to apply a heavy layer of Salty Ocean Distress Oxide ink on the top half of the card to create a blue sky. Then, on top of the inked area, I used more washi tape to hold down the Simon Says Stamp Falling Snow stencil.

20180409_213641.jpg

I misted water over the stencil using a mini-mister (Ranger sells these, however mine is from Tombow). My thought here was that the water would touch the paper at the open areas of the stencil and lift the Distress Oxide ink, creating lighter colored dots that would look like rain (I hoped) and not snow. I let the water sit for about 15 seconds, and then used a paper towel to wipe off the stencil and pick up any excess water.

Then I cleaned the Drifts & Hills stencil and re-arranged it over the blue side of the card and proceeded to ink up the remaining white space with Antique Linen Distress Oxide ink to create the ground. The curve of the stencil didn’t line up perfectly but I was able to make some micro adjustments to match the curve of the sky.

For the clouds, I used Lawn Fawn’s Simple Puffy Clouds die set to cut out clouds of varying sizes from some scrap Neenah Solar White. The sun is a piece of yellow Recollections cardstock die cut with My Favorite Things’ Sunny Skies die.

Next I laid out all of the elements onto the background and got a sense of where I wanted to stamp the sentiment, which I stamped in Versafine Black Onyx ink. I ended up using only one of the three little ducks that I’d made.

Then, I got out the adhesives. I used Tombow Mono Liquid Glue to adhere pieces flush to the background. For the splashes, I used Zots Bling Clear Adhesive Dots because I wanted just a bit of dimension but couldn’t bring myself to try to cut tiny pieces of foam tape. And for the the clouds in front of the sun I used foam tape. I left most of the rays of the sun glue-free so that they stand up a bit from the background. To finish, I adhered the card front to an A2-sized card base.

Thanks for stopping by!

20180409_223143.jpg

Animal Cards, Baby Cards, Celebration Cards

Welcome Baby

20180408_204601.jpg

Hi there! I hope your week is getting off to a nice start!

Today I’m sharing my first baby card. I’m using an old stamp set, Baby Party Animals, from Simon Says Stamp which I found on sale last week. I love these cute animals which I’m sure I’ll be able to put to use on non-baby cards as well.

I started by stamping all of the images in Copic-friendly Hero Arts Intense Black ink onto Neenah Solar White 80# Classic Crest cardstock. I colored all of the images using a variety of Copic Sketch markers: R20 and R30 for the pig, E31 and E35 for the monkey, YR21 and YR23 for the cat, W1 and W3 for the bunny, and Y19 and Y21 for the rest of the elements. I did very very basic blending and added a few highlights using a white Sakura Gelly Roll pen.

Though I purchased the coordinating dies, I ended up using my Brother ScanNCut2 to cut out all of the images in one pass. I’m really falling in love with that machine!

I created the card front panel by die-cutting a piece of Strathmore Bristol Smooth paper with the largest of the Wonky Stitched Rectangles die set from My Favorite Things. Then I blended Spun Sugar and Tattered Rose Distress inks all over the panel. It was only after I finished blending that I remembered I had intended this card to be for a boy or a girl, so in hindsight, pink wasn’t the best color choice. Oops! And somewhere hiding on or under my desk is the bunny’s balloon. Double oops!

I sprinkled a few drops of water onto the panel, let them sit for 10 seconds, and then mopped them up with a paper towel in order to create a splatter effect. It’s very subtle, but gives a bit of interest and dimension I think.

Before I began adhering all of the stamped pieces, I stamped the word “baby” in Versafine Onyx Black ink in the bottom right corner. Then I laid out all of the stamped elements and once I found a layout I liked, I began adhering them down using Ranger Multi Medium Matte adhesive. I saved a few of the elements (the balloons, banner, and two of the presents) to pop up with some foam adhesive, for added dimension.

To finish, I adhered the entire panel to an A2-sized card base.

Thanks for visiting!

20180408_205014.jpg

Feel Good Cards, Just Because Cards

Spreadin’ A Little Love

20180406_204714

I hope you’re having a lovely Saturday!

CTS_266
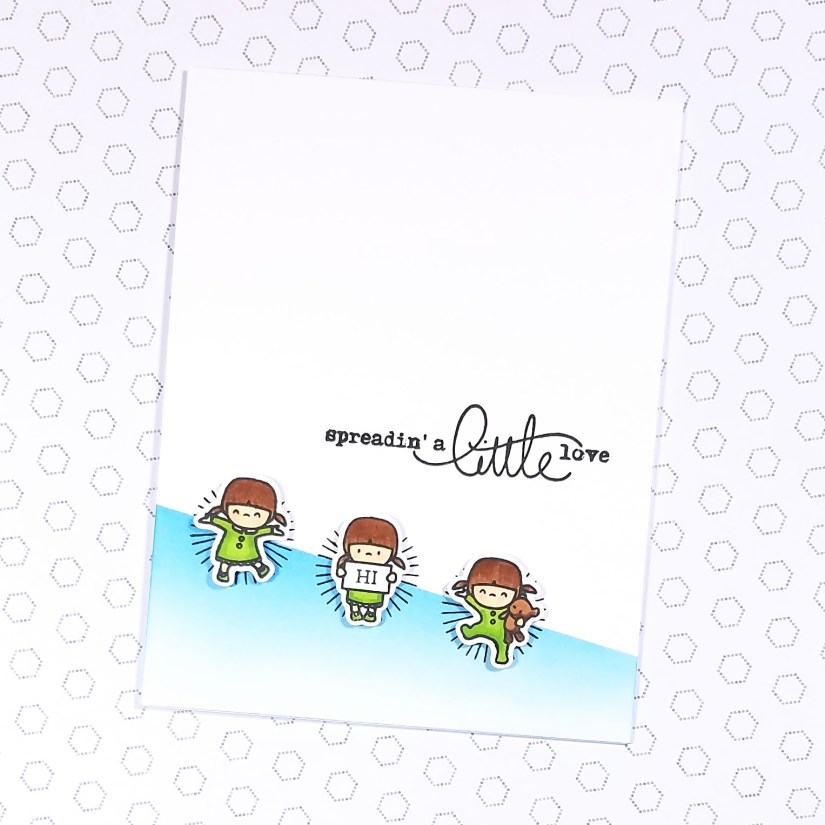
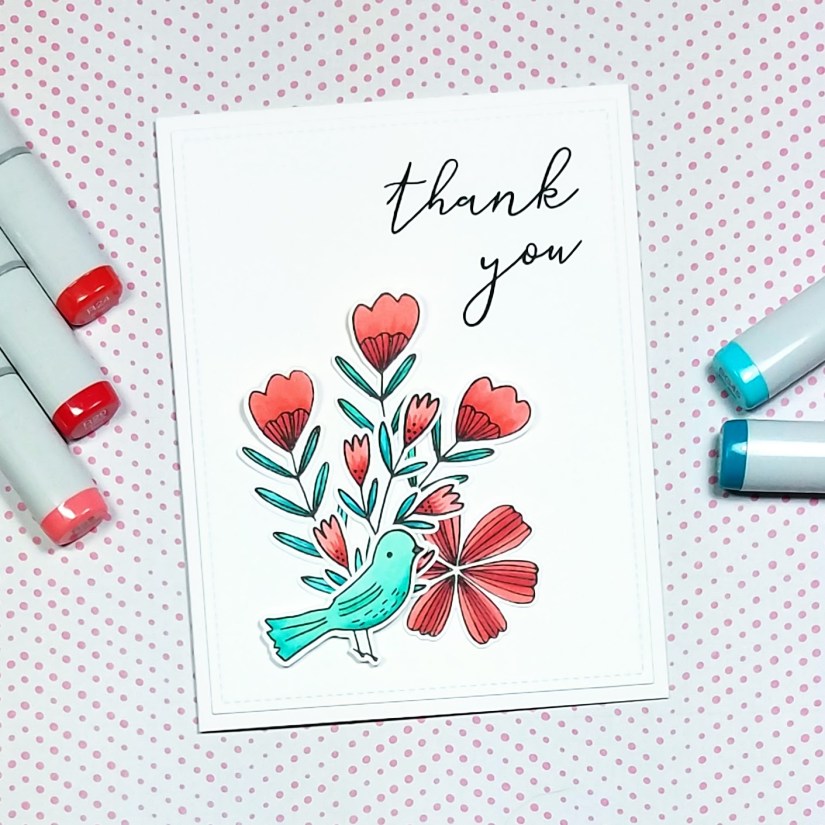
Today I’m playing along with the CAS(E) this sketch! challenge #266.  I’ve been following a couple of challenge blogs for a few months now, but yesterday and today are the first times I’ve played along.  I’m finding challenges to be a great way to get my creative juices flowing, and to learn about color combinations and compositions that I might not otherwise have thought of.  You can check out the CAS(E) this sketch! blog to follow along.

When I saw this sketch I immediately thought of the Create A Smile Hocus Focus stamp set that I have in my stash.  It has a variety of circular starburst stamps that I thought would be perfect for this challenge.

The next thing I thought of was the Little Girl Agenda stamp set from Mama Elephant.  I just love these cute little girls, especially the ones with their arms thrown out.  They just feel so cheerful to me.

I started by stamping three little girl images onto Neenah Solar White 80# Classic Crest cardstock in Copic-friendly Hero Arts Intense Black ink.  I used several colors of Copic Sketch markers to do some very basic coloring (YG17 and YG25 for the dresses and shoes, E53 for skin, R20 for cheeks, and E35 and E37 for hair and bear).  The images are so tiny that I finished in no time.  I die cut them out and set them aside.

For the card front, I used a 4.25″ x 5.5″ piece of Strathmore Bristol Smooth paper.  I masked the top of the card off at an angle using Post-It Tape.  Then I used a foam blending tool to add Salty Ocean Distress Ink.  I added the ink more heavily near the Post-It Tape and then blended downwards, slowly fading out towards the bottom of the card front.  If you have trouble with blending regular Distress Inks as I do, try Bristol Smooth paper.  It makes me feel like a pro!

Then I removed the mask and stamped a starburst image three times along the edge of the inked area.  I used Versafine Onyx Black ink for both the starbursts and the sentiment which is from Mama Elephant’s Everyday Greetings stamp set.

To finish, I added foam tape to the back of the little girls and adhered them to the center of the starbursts and then glued the panel to the front of an A-2 sized card base.

Thanks so much for swinging by!

20180406_204549.jpg

Animal Cards, Spring Cards, Thank You Cards

Thank You – Pinkfresh Studios

20180405_222219.jpg

Happy Friday! Even though I’m taking today off work, it sure felt like a long work week. I hope you had a good one and that you have some time to do something nice for yourself this weekend!

Today I’m sharing my first submission to a challenge. When I saw the colors for the Color Throwdown Challenge #487, I knew I wanted to play along. I just love these shades together!

I started by stamping flower images from Pinkfresh Studio’s Fleur 1 stamp set onto Neenah Solar White #80 Classic Crest cardstock using Copic-friendly Hero Arts Intense Black ink. Then I stamped the bird from their Bird With Flowers stamp set (the Thank You sentiment also came from this set).

20180405_213433.jpg

I colored the images using R22, R24, and R29 for the flowers, and BG45 and BG49 for the leaves and bird. I also used just a touch of W7 for the bird’s beak, though I could have easily used black or any other dark brown or gray. I did not take much care in blending since these are such small images.

Then I cut everything out using my new Brother ScanNCut2. I checked the cut lines and as far as I can tell, the Fleur 1 die set cuts these three flower images very similarly to the ScanNCut2. The Bird With Flowers set doesn’t have coordinating dies and since I’m a terrible fussy cutter, I’m glad I decided to splurge on the ScanNCut2. It have a feeling it’s going to come to my rescue on a regular basis.

I created a card front by die cutting another piece of Neenah cardstock with the largest die from the Lawn Fawn Outside In Stitched Rectangle Stackables. This added the pretty stitching along the borders.

20180405_213518.jpg

The bunch of flowers was a little hard to manage so I used Post-It Tape to temporarily hold the individual flowers in place while I arranged them. This has become one of my favorite tricks. It’s like having an extra pair of hands! Once I had the flowers in place, I flipped the bunch upside down (still held together by the tape) and applied liquid adhesive to glue them all together.

At this point, I pulled out my Misti stamping tool, experimented with the placement of the flowers and sentiment, and then stamped the Thank You sentiment in Versafine Onyx Black ink.

Then came time to assemble the card. I added liquid adhesive to the back of the bunch of flowers and adhered them to the card front. I avoided adding glue to the tulip shaped flowers since I wanted those to stand up a bit from the card. Once the glue took hold, I gently removed the Post-It Tape. Then I added foam tape to the back of the little bird and adhered her on top of the flowers. At the last minute I touched a black Sakura Gelly Roll Glaze pen to the eye of the bird to give it the tiniest bit of shine and dimension.

Finally, I adhered the card-front to an A2-sized side-folding card base and that finished off today’s card.

Thanks for visiting!

20180405_223919.jpg