Feel Good Cards, Just Because Cards

Hello

20180412_205140.jpg

Hello and happy Friday! I hope you’re having a wonderful day!

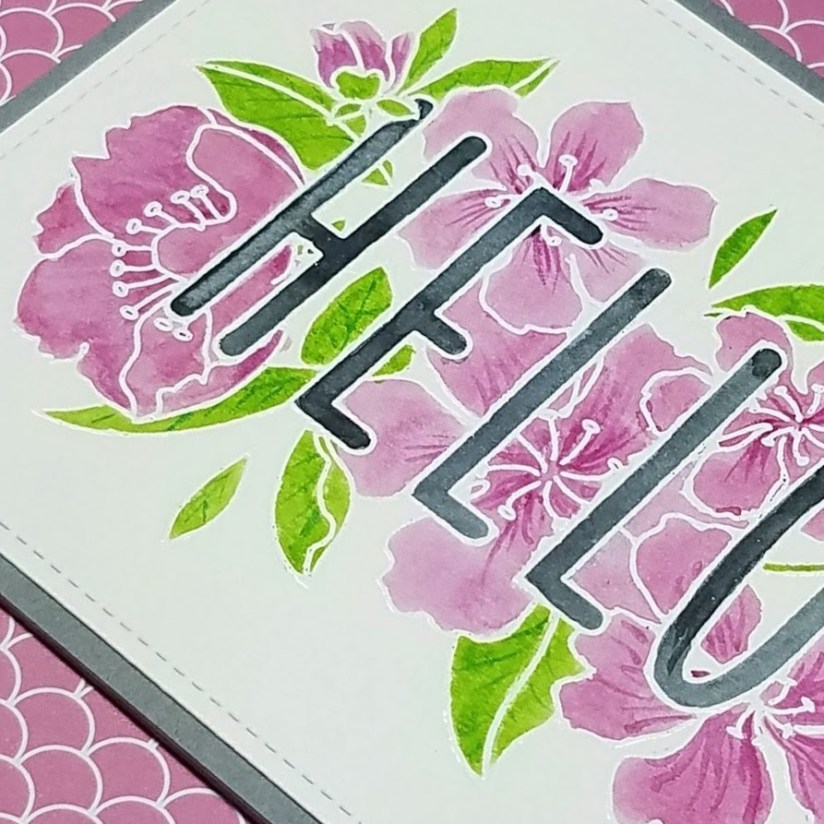
Today I’m sharing a card using Mama Elephant’s Botanic Hello stamp. I love this large stamp that covers an entire card and has beautiful flowers and leaves to color.

I used the largest die of the Lawn Fawn Outside In Stitched Rectangle die set to cut down and add stitching detail to a piece of Canson XL watercolor paper. Then I stamped the combined image and sentiment in VersaMark ink. I sprinkled the card with Hero Arts white embossing powder, tapped off the excess, and then melted the embossing powder with a heat gun.
20180412_203557.jpg

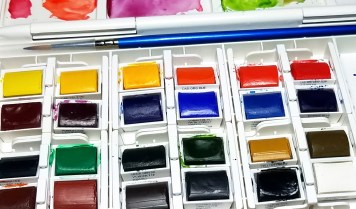
For watercolors, I used colors from a Windsor & Newton Cotman watercolor set. This set is their Painting Plus (I’ve also seen it called Pocket Plus) set of 24 half-pans. It’s a great size to take on the go and in the past, I’ve prepped multiple heat-embossed card fronts using this stamp set and painted while on vacation.

The colors I used are Purple Lake for the flowers, Sap Green and Hooker’s Green Dark for the leaves, and Payne’s Gray for the sentiment. I started by simply coloring in the flowers and leaves with Purple Lake and Sap Green with a #3 round brush. I didn’t wet the watercolor paper first, so this was a wet-on-dry approach. I let it dry and then I went back in with a #2 round brush and added more Purple Lake (with less water) to the flowers to add detail, and Hooker’s Green Dark to the leaves to add veins. Then, I used Payne’s Gray to color in the Hello sentiment.

To finish the card, I used liquid glue to adhere the card front to an A2-sized piece of Recollections Grey Kraft cardstock and then in turn adhered that to an A2-sized card base.

Thanks for coming by!
20180412_205200.jpg

Feel Good Cards, Just Because Cards

Spreadin’ A Little Love

20180406_204714

I hope you’re having a lovely Saturday!

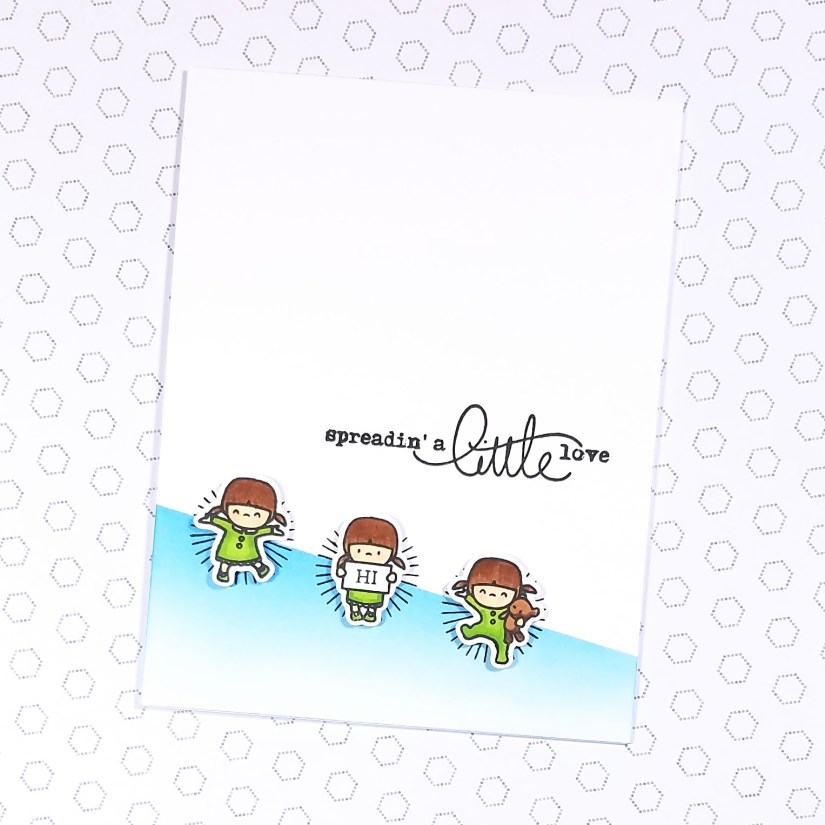
CTS_266Today I’m playing along with the CAS(E) this sketch! challenge #266.  I’ve been following a couple of challenge blogs for a few months now, but yesterday and today are the first times I’ve played along.  I’m finding challenges to be a great way to get my creative juices flowing, and to learn about color combinations and compositions that I might not otherwise have thought of.  You can check out the CAS(E) this sketch! blog to follow along.
When I saw this sketch I immediately thought of the Create A Smile Hocus Focus stamp set that I have in my stash.  It has a variety of circular starburst stamps that I thought would be perfect for this challenge.

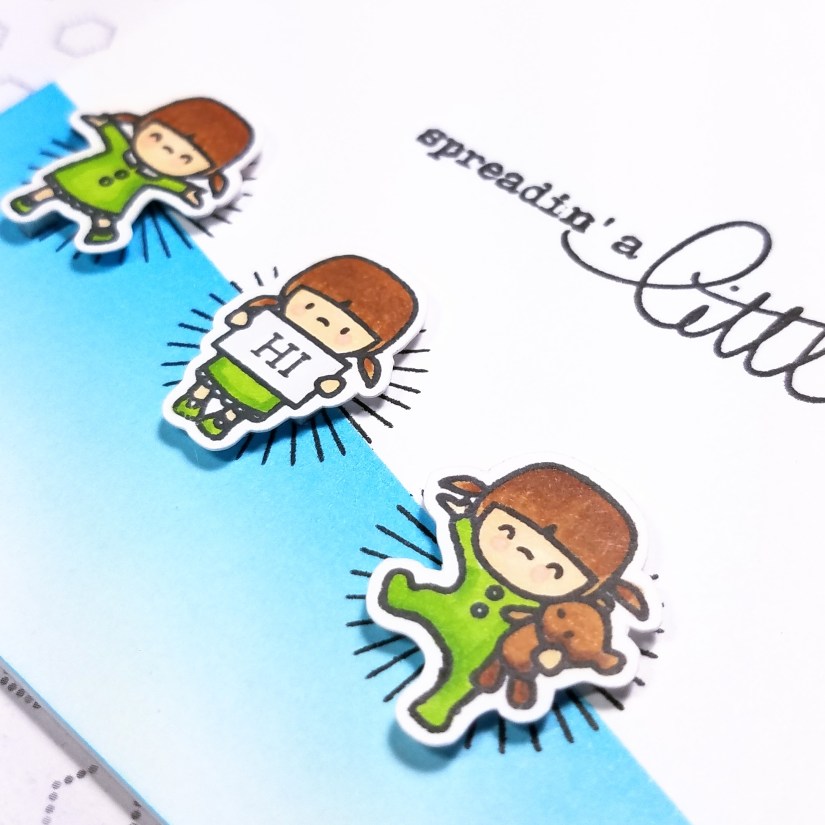
The next thing I thought of was the Little Girl Agenda stamp set from Mama Elephant.  I just love these cute little girls, especially the ones with their arms thrown out.  They just feel so cheerful to me.

I started by stamping three little girl images onto Neenah Solar White 80# Classic Crest cardstock in Copic-friendly Hero Arts Intense Black ink.  I used several colors of Copic Sketch markers to do some very basic coloring (YG17 and YG25 for the dresses and shoes, E53 for skin, R20 for cheeks, and E35 and E37 for hair and bear).  The images are so tiny that I finished in no time.  I die cut them out and set them aside.

For the card front, I used a 4.25″ x 5.5″ piece of Strathmore Bristol Smooth paper.  I masked the top of the card off at an angle using Post-It Tape.  Then I used a foam blending tool to add Salty Ocean Distress Ink.  I added the ink more heavily near the Post-It Tape and then blended downwards, slowly fading out towards the bottom of the card front.  If you have trouble with blending regular Distress Inks as I do, try Bristol Smooth paper.  It makes me feel like a pro!

Then I removed the mask and stamped a starburst image three times along the edge of the inked area.  I used Versafine Onyx Black ink for both the starbursts and the sentiment which is from Mama Elephant’s Everyday Greetings stamp set.

To finish, I added foam tape to the back of the little girls and adhered them to the center of the starbursts and then glued the panel to the front of an A-2 sized card base.

Thanks so much for swinging by!

20180406_204549.jpg

Feel Good Cards, Just Because Cards

What A Lovely Face

20180404_193430.jpg

Hello lovely!

We’re due for some heavy rain in the next few days so I was inspired to create something bright and summery to offset the gray skies.

This card uses elements from two stamp sets from The Ink Road stamps: Frond of You and Chin Up Buttercup. A note about The Ink Road is at the bottom of this post.

20180404_195710.jpg

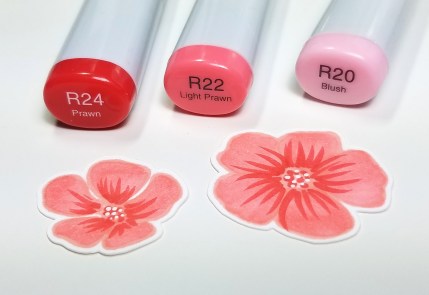
I started by stamping multiple solid leaves and fronds in three shades of Altenew ink (Bamboo, Parrot, and Olive) onto a piece of Neenah Solar White 80# Classic Crest cardstock. Then I stamped a few flowers in Peach Bellini ink from Gina K. Designs. The flower stamps were outline stamps, so I used a few shades of Copic Sketch markers to fill them in and add some detail. I used R20 for the center of the flower, R22 for the petals, and then I added flicks of R24, the darkest of the colors, on the petals as well as a few dots in the center of the flowers. In hindsight, the R20 isn’t noticeable so I could have used just two colors. I also added some dots to the centers of the flowers using a white Sakura Gelly Roll pen.

Since these stamp sets don’t have coordinating dies, I put my new toy to use. I recently splurged on a Brother ScanNCut2 so that I could cut out images without needing dies. I ran the sheet of stamped images through the machine and wound up with beautifully cut elements.

20180404_184758

I used Post-It Tape to help temporarily hold the leaves in place while I arranged them in the pattern that I wanted. Because they were all held together, I was able to easily flip them over and add small pieces of Scotch Tape to adhere them together. Then I added some liquid adhesive and adhered the entire set of leaves to the front of an A2-sized card base before removing the Post-It Tape.

For the sentiment, I stamped in VersaMark ink onto black cardstock and then sprinkled gold Ranger Super Fine embossing powder over it. I tapped off the excess and hit it with a heat gun to melt the powder. I trimmed and adhered a piece of scrap white cardstock to create a mat for sentiment, and then adhered the flowers in place using liquid adhesive. I re-used the Post-It tape to temporarily hold everything in place while I was arranging the flowers and gluing them to the sentiment.

Then I added foam tape to the back of the sentiment/flower strip and then adhered it to the card base and that finished up the card.

Thanks for stopping by!

A note about The Ink Road: I placed my first order with them last week using a special link that someone shared on Instagram. That link gave me 50% off my first order and I was able to find some great deals, including the stamp sets that I used today (with the 50% off they were $3.50 each!). When I received my order, I was pleasantly surprised to see a hand-written thank you note from Lara, the owner, as well as a bonus full-sized ink pad and some beautiful sequins. Lara offers many ways to save on orders and one is by providing a referral link. I’ve posted my referral link at the top right of this page which can be used for 50% off your first order (as the referrer, I would receive a $5 credit to the shop). Please visit The Ink Road for ways to save without using the referral link.

20180404_193524.jpg

Feel Good Cards, Friendship Cards, Just Because Cards, Love Cards

You + Me = Awesome

20180403_211049.jpg

Good morning, I hope you’re having a great week!

Let me start by apologizing for any duplicate blog post emails you may have received over the past couple of days.  I’m still learning about this blog platform and I made a couple of mistakes that caused the extra emails.  Thanks for your patience!

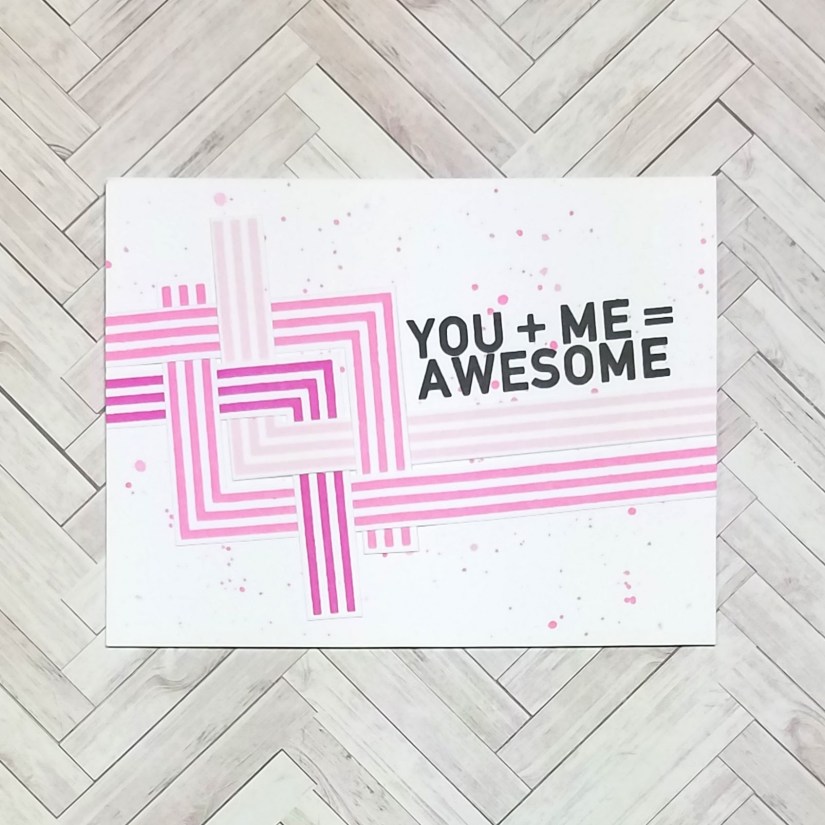
Today I have something a little different.  I felt challenged by this Simon Says Stamp You + Me set which has a lot of linear elements and bold sentiments.  I decided that I wanted to use the “You + Me = Awesome” sentiment and then somehow weave together strips to resemble a knot, or “we.”

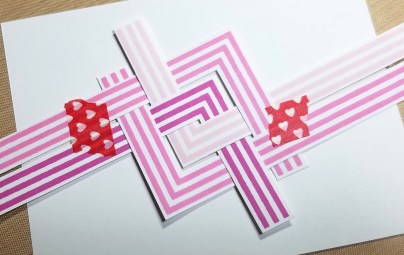
20180402_205101.jpgI started with Neenah Solar White 80# Classic Crest cardstock and stamped the L-shaped strips (the stamp has three stripes) four times in Altenew inks (Rose Quartz, Puffy Heart, and Purple Wine).
I fussy cut the strips and then wove them together, using washi tape to temporarily hold everything still while I got all four pieces spaced and lined up properly.

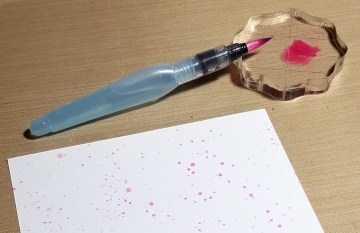
20180402_205529.jpgFor the background, I created a pink splatter on an A2-sized piece of Neenah Solar White.  I started by smooshing my Picked Rasberry Distress Ink mini ink pad onto an acrylic block, and then I used a Pentel Aquash Water Brush to mix a bit of water into the ink and to pick up some of the color.  Holding the brush over the paper, as if I was turning a key in a lock, I used a finger of my other hand to tap the middle brush and splatter ink onto the card front.  By moving closer or farther from the paper, I was able to create splatter drops of varying sizes.
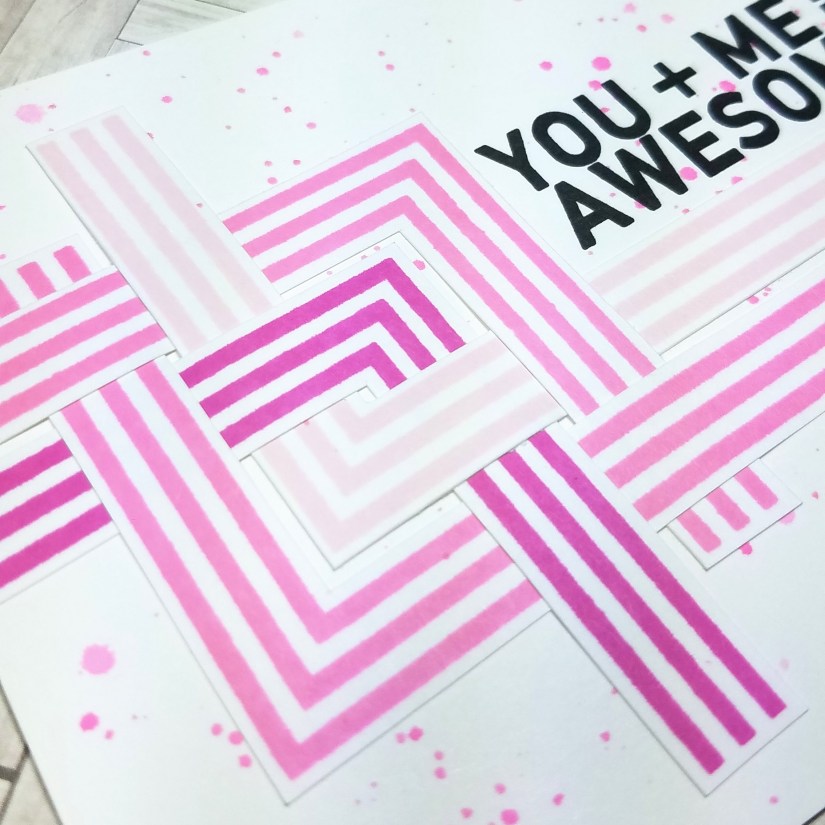
To finish, I adhered the “knot” to the card front and then removed the washi tape.  I stamped the sentiment using Versafine Black Onyx ink and then adhered the card front to an A2-sized card base.

Thanks for stopping by!

20180403_211112.jpg

Feel Good Cards, Just Because Cards

You Are Crazy Beautiful

20180401_203410.jpg

Happy Monday!  I hope you had a wonderful weekend!

I just received my first order from The Ink Road Stamps and I couldn’t wait to use this sentiment from the Compliments Volume I stamp set.  I just love the expression and the simple, open font.  Because the font is so uniform, I wanted to pair it with a softer image so I chose this large spray of flowers from Concord and 9th’s Hello Lovely stamp set.

Because this flower stamp is so large, I used my Misti stamping tool so that I would be able to re-stamp the image in the exact same place if I didn’t get a perfect impression the first time.  I used Hero Arts Extreme Black ink, which is Copic-friendly, and Neenah Solar White 80# Classic Crest cardstock.

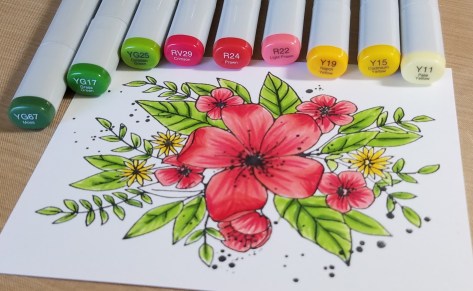
20180401_140749.jpgI chose colors and a coloring technique inspired by (copied from, really) this post by Kay Miller.  I’m not great at coloring so I liked that her coloring has distinct strokes and doesn’t require perfect blending.   I used three colors from three color group (I don’t own much more than that) but I think I could have gotten away with using just two colors from each group.  I started with the lightest colors, then added the middle and then darker colors, and then returned to add more of the lightest colors to do a bit, but not much, blending.  The colors I used were YG17, YG25, YG67, RV29, R22, R24, Y11, Y15, and Y19.
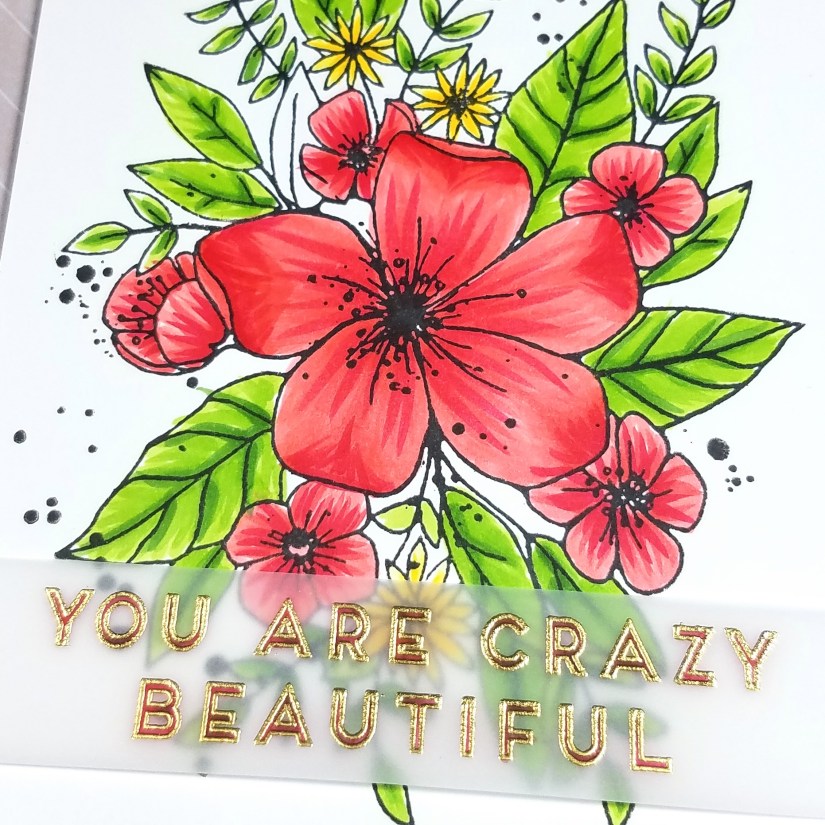
I then stamped the sentiment with VersaMark ink onto a strip of vellum.  I poured Ranger Super Fine Gold embossing powder over it, tapped of the excess, and hit with a heat gun to melt the embossing powder.  Since you can see a lot of the flower image through the vellum, I felt that the sentiment was a bit hard to read so I flipped it over and colored in the letters with R29, another red Copic marker.  I colored on the back of the vellum because I’ve read that using Copics directly on heat embossing can damage the markers.  I’ve also seen some crafters not heed that warning with no ill effect on their markers.  I just prefer to not to risk damaging my markers since they’re already a bit of a splurge.

I finished by laying the vellum strip over the card front and folding the ends of the strip over the back where I adhered them with a bit of tape runner adhesive. Then I glued the entire card front to an A2-sized card base.

Thanks for visiting!

20180401_203424.jpg