

Hello and welcome!
Today we’re celebrating the release of the Altenew Classic Imagery Collection Release! If you arrived from Virginia Lu’s blog, you’re right on track. If you want to hop along from the beginning, visit the Altenew Card Blog. Check the bottom of this post for giveaway information and the full blog hop list.
I have four cards to share, so let’s dive in!
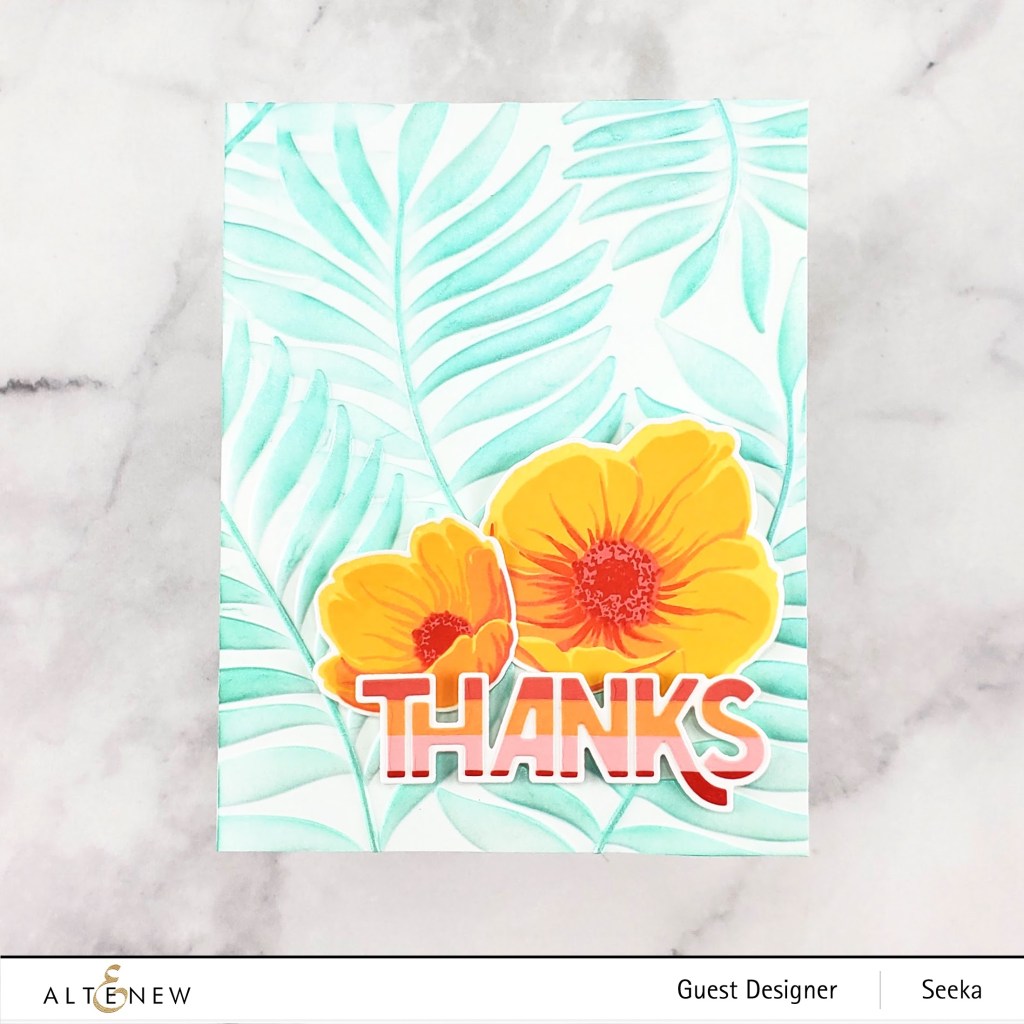
Thanks – Areca Palm 3D Embossing Folder
My first card features the new Areca Palm 3D Embossing Folder in the background. I really like this leaf pattern, I think the size and shape of the leaves makes it a versatile backdrop for all types of different florals!
To recreate this card:
- Place a 4.25″ x 5.5″ piece of white cardstock into the embossing folder and run it through a die cut machine using the embossing folder sandwich recommended by the machine’s manufacturer. When I’m using an embossing powder from a company the first time, I always start with a very slim sandwhich and build up from there if I need more pressure.
- Use a large blending tool to blend Volcano Lake and Ocean Waves Crisp Dye inks over the leaves, using light pressure so that the bristles of the blending tool glide over the raised leaves and make minimal contact with the background
- Use a foam blending tool to gently tamp a white shimmery ink over the leaves to create a pearlescent finish (I used Delicata White Shimmer ink), then set the panel aside to dry
- Create the flowers using the Build-A-Flower: Hellebore stamp and die set, stamping in Sunray ink as the base layer, then Chamomile, then Coral Bliss, and finally Heart Beat for the detail in the center of the flowers
- Create the striped paper for the sentiment by applying strips of washi from the Red Sunset Slim Washi Tape Set onto white cardstock
- Use the the Bold Thanks Die to cut the striped washi paper and use the shadow layer die to cut a piece of white cardstock; adhere the sentiment layers together
- Assemble the card by adhering the blooms and sentiment with foam tape, tucking the bottom of the blooms behind the sentiment
- Adhere the card front to a card base

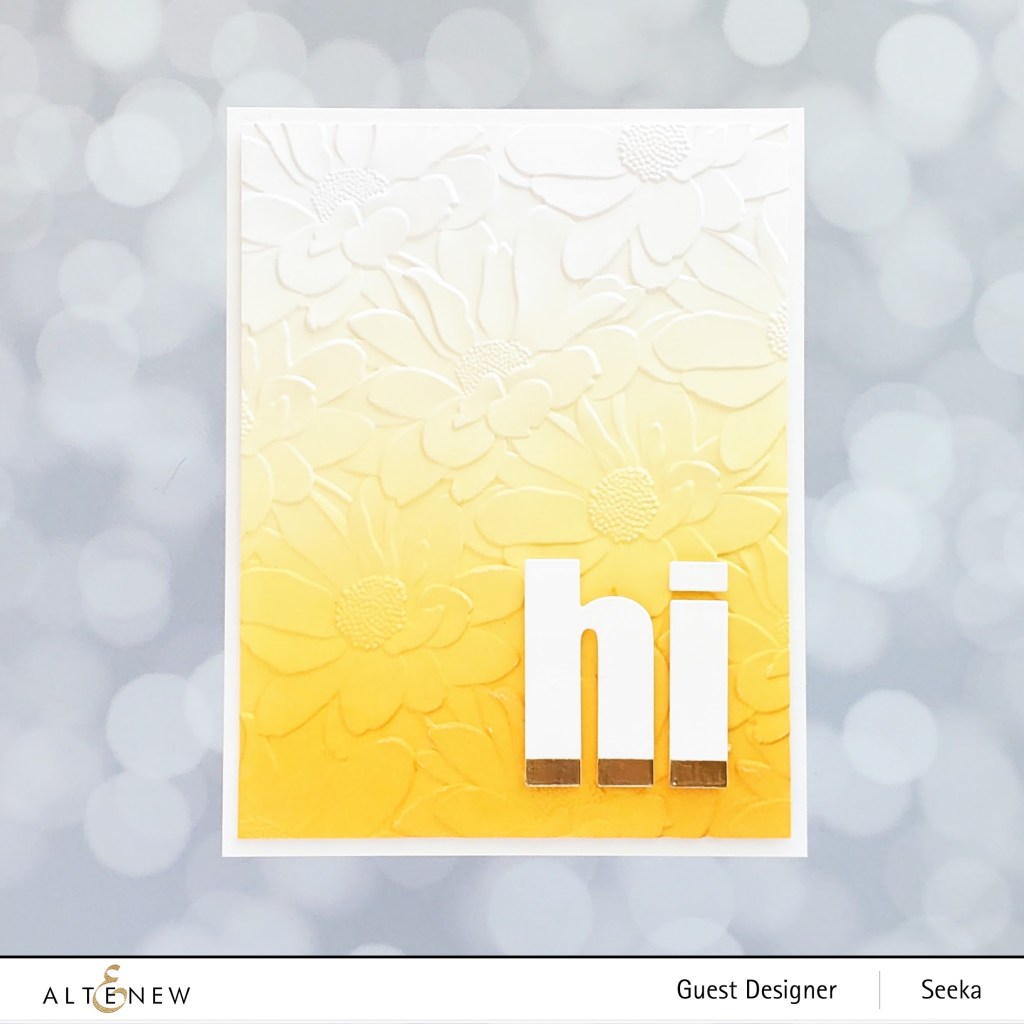
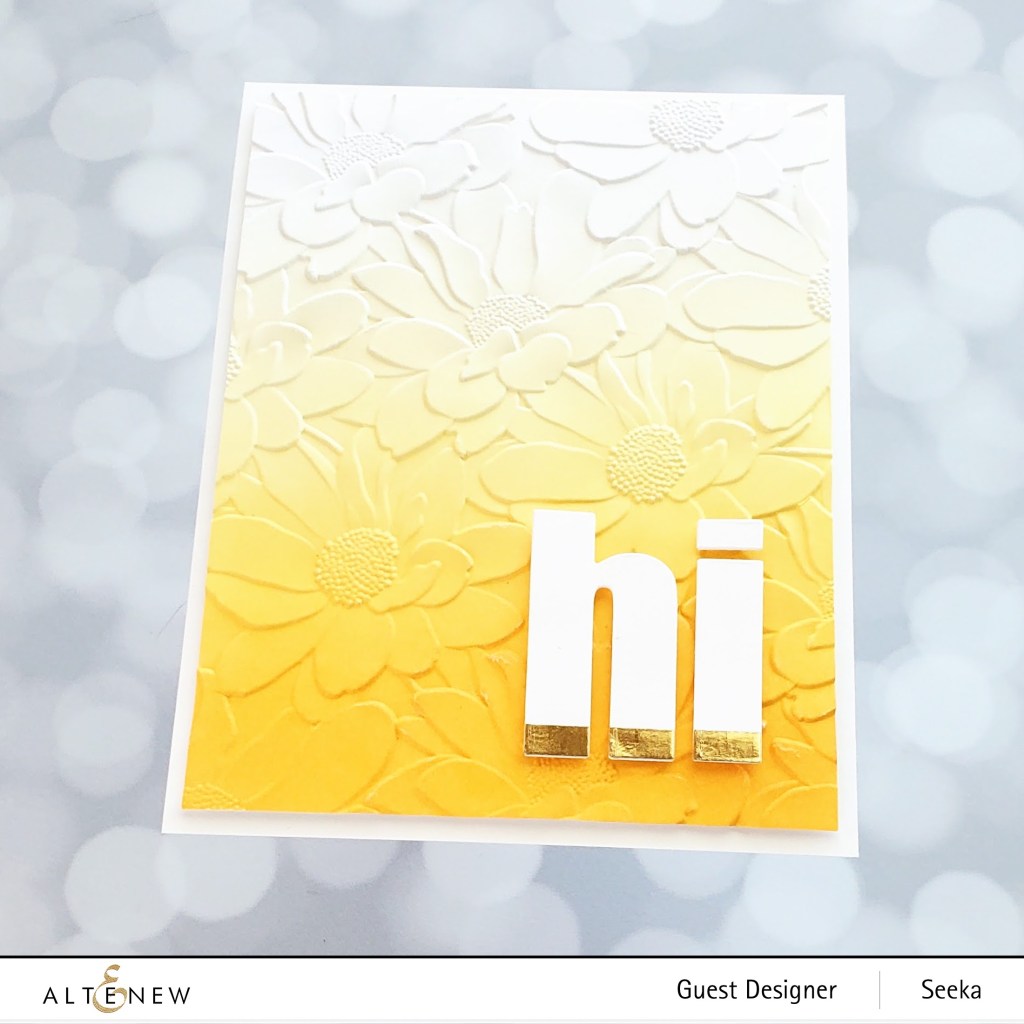
Hi – Daisy Bed 3D Embossing Folder
My next card features the new Daisy Bed 3D Embossing Folder. I just had to go for yellow with this fun pattern!
To recreate this card:
- Use a large blending tool to blend Maple Yellow, Snapdragon, and Marigold Crisp Dye inks onto a 4.25″ x 5.5″ panel of white cardstock, concentrating the darker color at the bottom and fading almost to white near the top of the panel
- Place the cardstock into the embossing folder and run it through a die cutting machine using the correct sandwich
- Trim a quarter inch off the length and width of the panel and set aside
- Apply a strip of Golden washi tape to a piece of white cardstock
- Use the Bold Alphabet die set to cut the letters out of the white cardstock, aligning the bottom of the letters to the bottom of the gold washi tape
- Use foam tape to adhere the letters to the background and then use more foam tape to adhere the embossed panel to a card base
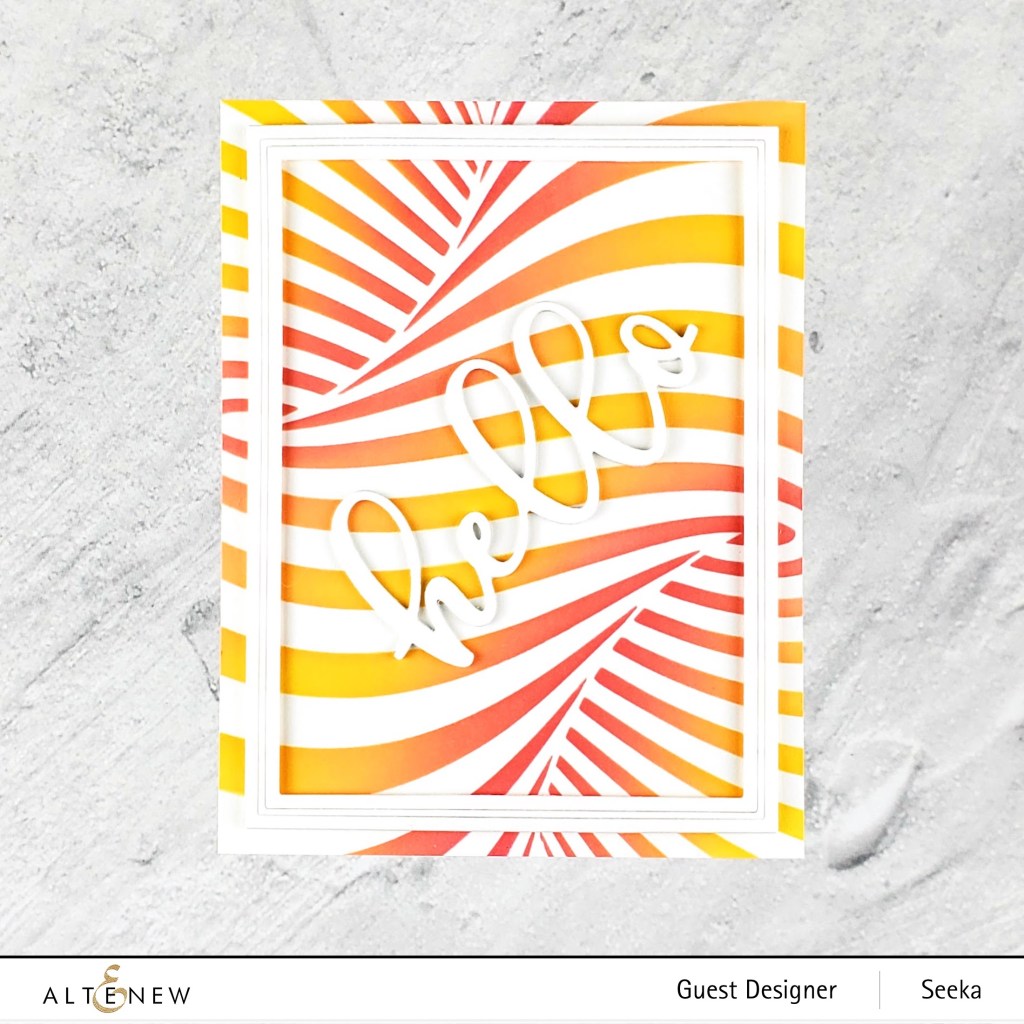
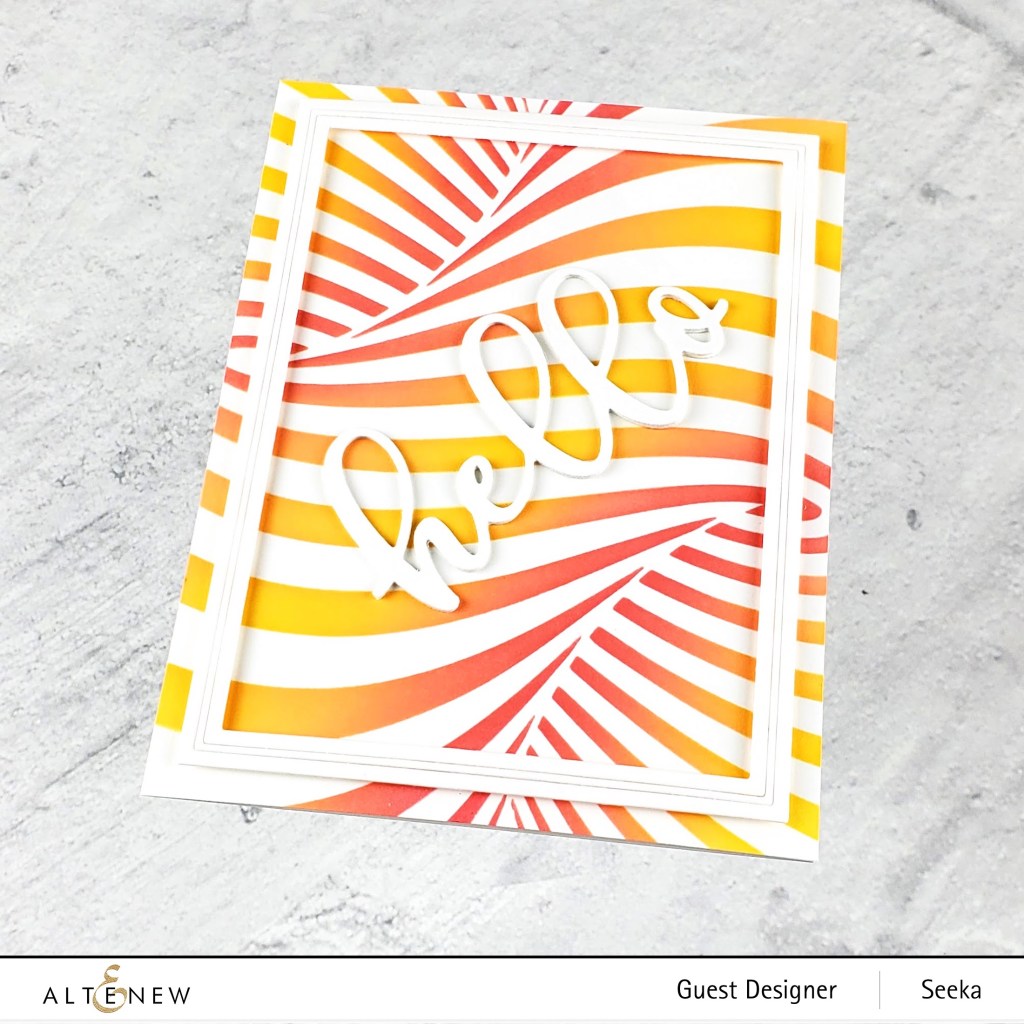
Hello – Illusion Twist Stencil
My third card features the neat Illusion Twist stencil. It’s very fun to see this 3D image come to life!
To recreate this card:
- Position the stencil over a 4.25″ x 5.5″ panel of white cardstock and temporarily hold the two together by using low-tack tape on the back side of the cardstock and stencil
- Use blending brushes to apply Warm Sunshine, Sunkissed, and Coral Bliss Crisp Dye inks over the pattern, blending where the colors meet
- Wash the stencil and set it and the blended background aside
- Create the frame by using the Fine Frames Cover Die to cut white cardstock; leave three of the fine frames attached to each other and apply Scotch tape on the back to hold the pieces together
- Create the sentiment by using the Circled Greetings Hello Die to cut white cardstock; repeat three times and then stack and adhere the layers together, trimming away the circle to leave just the sentiment
- Use foam tape to adhere the frame to the stencilled background and use glue to adhere the sentiment
- Adhere the card front to a card base
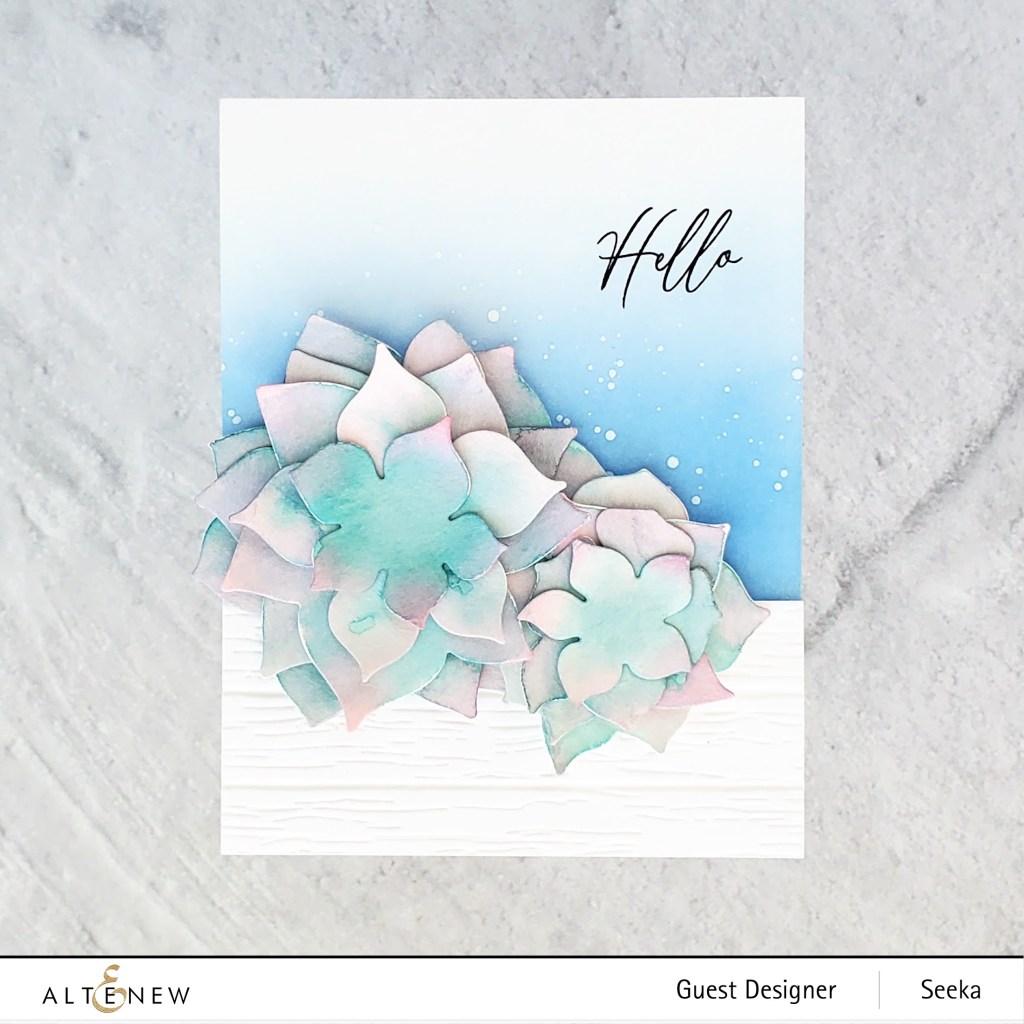
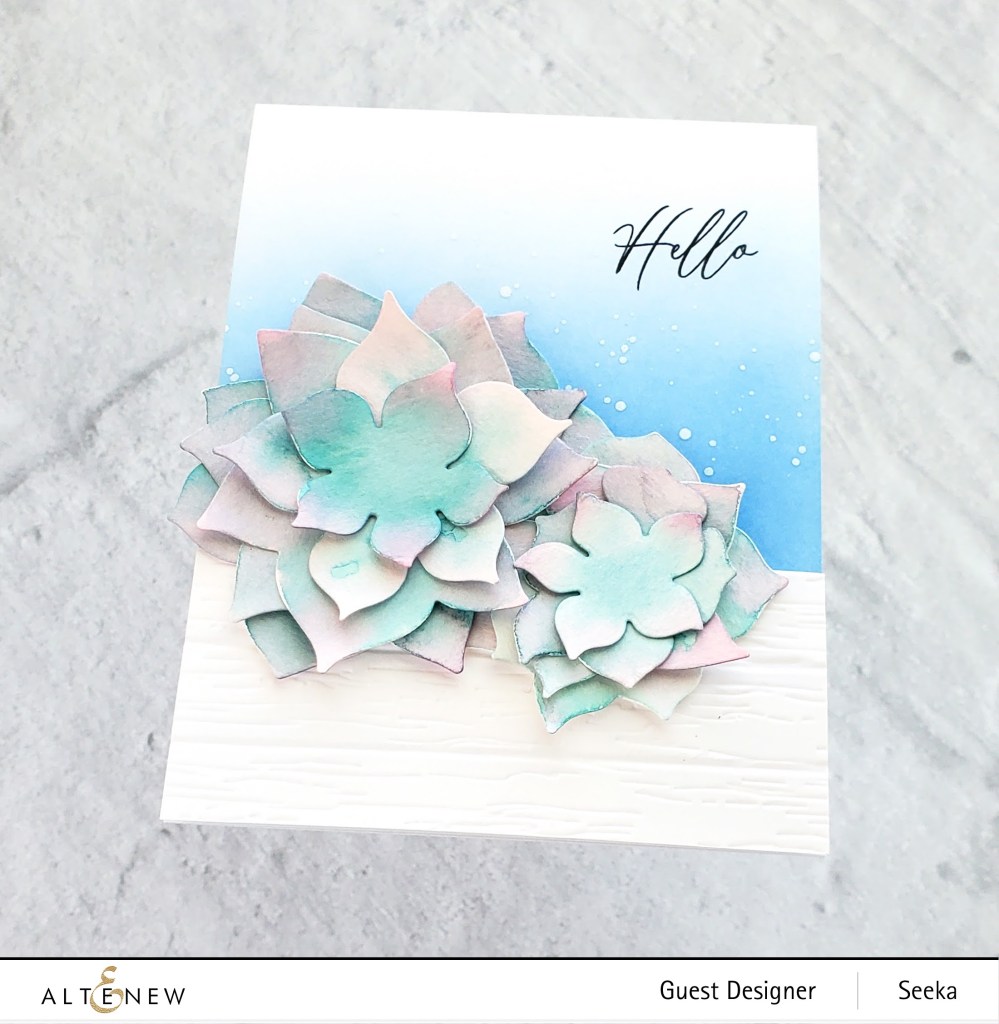
Hello – Deck Planks 3D Embossing Folder
For my last card, I used the new Deck Planks 3D Embossing Folder to create a planter for some succulents that I made using the recently released Succulent Layering Die Set.
To recreate this card:
- Cut the layers of the succulents out from watercolor paper
- Add one drop each of Dusk, Emerald, and Ruby Red liquid watercolor refills into separate wells of a palette or onto a glass work surface
- Dilute each drop with clean clear water and then use the watercolor to loosely color the pieces; set aside to dry
- Place a 4.25″ x 5.5″ panel of white cardstock into the Deck Plans 3D embossing folder and run it through a die cutting machine using the correct sandwich
- Trim the panel to about three planks tall and set aside
- Use a large blending tool to blend Ultramarine Crisp Dye ink onto another 4.25″ x 5.5″ panel of white cardstock, letting the color fade to white at the top of the panel
- Remove the cap from Pure White Ink Spray and dip a paintbrush into the bottle; use the paintbrush to splatter a bit of white over the ink-blended panel (using the spray nozzle creates a much denser pattern of fine dots)
- Stamp the sentiment, from the Vintage Garden stamp set, in black pigment ink
- Use foam tape to adhere the plank/planter piece to the background
- Adhere the layers of the succulents together using glue or adhesive dots; then adhere the two succulents to the background
- Adhere the card front to a card base
Thanks so much for sticking through four cards! Please be sure to check out information about the giveaway below before you head on to visit Nandini Karmarkar!
Giveaway
$300 in total prizes! To celebrate this release, Altenew is giving away a $50 gift certificate to 2 lucky winners and a $25 gift certificate to 8 winners! Please leave a comment on the Altenew Card Blog and/or each designer’s blog post on the blog hop list below by 05/24/2021 for a chance to win.
Altenew will draw 10 random winners from the comments left on each stop of this blog hop and announce the winners on the Altenew Winners Page on 05/26/2021.
Blog Hop List
- Altenew Blog
- Nathalie DeSousa
- Terri Koszler
- Erum Tasneem
- Jenny Colacicco
- Emily Midgett
- LauraJane
- Norine Borys
- Sandhya Iyer
- Lilith Eeckels
- Ardyth Percy-Robb
- Michelle Short
- Bridget Casey
- Maryam Perez
- Teresa Litchfield
- Carol Hintermeier
- Joylita Dsouza
- Virginia Lu
- Seeka <– You are here
- Nandini Karmarkar
- Christine Pennington
- Tricia Schaden
- Helen Kalb

What a versatile release. I love the projects.
LikeLiked by 1 person
That daisy embossing folder lends itself to so many different looks! Love that hi card.
LikeLiked by 1 person
Love you gold tipped letters on your hi card. Simple, elegance.
LikeLiked by 1 person
such pretty cards – thanks for sharing
LikeLiked by 1 person
Your cards are gorgeous! I love the color combinations.
LikeLiked by 1 person
Gorgeous cards!
LikeLiked by 1 person
Lovely cards. The first one is my favorite. I love you color choices, especially for the leaves. Thanks for sharing!
LikeLiked by 1 person
Your cards are beautiful! I love all those backgrounds you created.
LikeLiked by 1 person
The pink/orange/red color scheme is really pretty. And the striped sentiment on the other card is really great.
LikeLiked by 1 person
These are all great. If I had to pick one favorite I would have to go with my favorite color- yellow daisy bed Hi for the win!
LikeLiked by 1 person
Your cards are so pretty! Love the way you used color to define the different areas!!
LikeLiked by 1 person
Thanks for the tips on each card! That daisy EF is wonderful and your coloring enhances it nicely.
LikeLiked by 1 person
I love that HI one! Great colors!
LikeLiked by 1 person
Love the bright yellow colors, amazing cards!
LikeLiked by 1 person
Love the illusion folder
LikeLike
Lovely cards, love the tropical vibe of the first card.
LikeLiked by 1 person
So pretty!
LikeLiked by 1 person
I love your simple “hi” card. Sometimes that’s all it takes to make one’s day!
LikeLiked by 1 person
Beautiful cards! Thanks for sharing.
LikeLiked by 1 person
All really bright and cheerful!
LikeLiked by 1 person
Wonderful and amazing cards! I always enjoy seeing your cards! Have a creative day. Thank you b
LikeLiked by 1 person
Beautiful cards Seeka, I always enjoy looking at your designs. Thanks for the inspiration!
LikeLiked by 1 person
Wonderful cards. This is a fantastic release and you’ve showcased it beautifully.
LikeLiked by 1 person
Beautiful cards! So colorful and creative
LikeLiked by 1 person
Beautiful cards! So colorful and creative
LikeLiked by 1 person
The daisy bed ombre card is my favorite! Love!
LikeLiked by 1 person
All are really cute, great ideas and thanks for sharing.
LikeLiked by 1 person
Beautiful, bright, and cheerful cards! Love this release but don’t know what to get first!
LikeLiked by 1 person
Nice cards.
LikeLike
I love the CAS look of the yellow Hi card!
LikeLiked by 1 person
Great color combinations. I like the layers.
LikeLiked by 1 person
Beautiful cards! I love the embossing folders you used! The Daisy Bed embossing folder is an absolute fave!
LikeLiked by 1 person
Beautiful cards all! Using the fine frames really made the illusion pop as did your color placement. Wow! My other favorite is the Thanks card, so tropical and summery. Thanks for the great ideas.
LikeLiked by 1 person
Pretty cards!
LikeLiked by 1 person
Both cards are beautiful. I really love the soft colors on the second card.
LikeLiked by 1 person
Love your ombré blending technique, really beautiful happy cards
LikeLiked by 1 person
Love your ombré technique. Really beautiful happy cards
LikeLiked by 1 person
Oh all your cards have such a beach/Hawaii feel! Love
LikeLiked by 1 person
Pretty cards! I LOVE the ombre yellow embossed card!
LikeLiked by 1 person
Thank you for the inspiration and detailed instructions. Your cards are so different and lovely use of colour.
LikeLike
Great cards! I am looking forward to getting the deck plank embossing folder. I just love that look and it’s so versatile.
LikeLiked by 1 person