


Hello, lovely, I hope your week is going well!
Today, we’re celebrating the Altenew Storybook Fantasy Stamps/Dies/Stencils/Embossing Folders Collection Release! If you arrived from Laurie Willison’s blog, you’re right on track. If you want to hop along from the beginning, visit the Altenew Card Blog. Check the bottom of this post for giveaway information and the full blog hop list.
I have five cards to share today so I’ll dive right in with quick steps to recreate each card!
Thank You
To recreate this light and airy floral that features the Book Engravings stamp set and coordinating dies (also available as a bundle):
- Stamp the outline layers of the florals and leaves in Permanent Black ink onto white cardstock (I use Neenah Solar White 80# Classic Crest)
- Stamp the three layers of the blooms using Pastel Sunrise and Canyon Clay for the petal layers, and Sunray for the centers of the flowers
- Stamp the detail layer of the leaves using Frayed Leaf
- Die cut all the images
- Stamp the sentiment in Permanent Black ink onto a strip of white cardstock
- Along the left side of a 4.25″ x 5.5″ panel of white cardstock, adhere a strip of Delicate Stripes washi tape
- Adhere the two small blooms and leaves to the panel with a combination of glue and foam tape, using very small pieces of foam tape at the outer edges of the images to help them curve up from the panel
- Adhere the center bloom with foam tape
- Adhere the card front to a card base

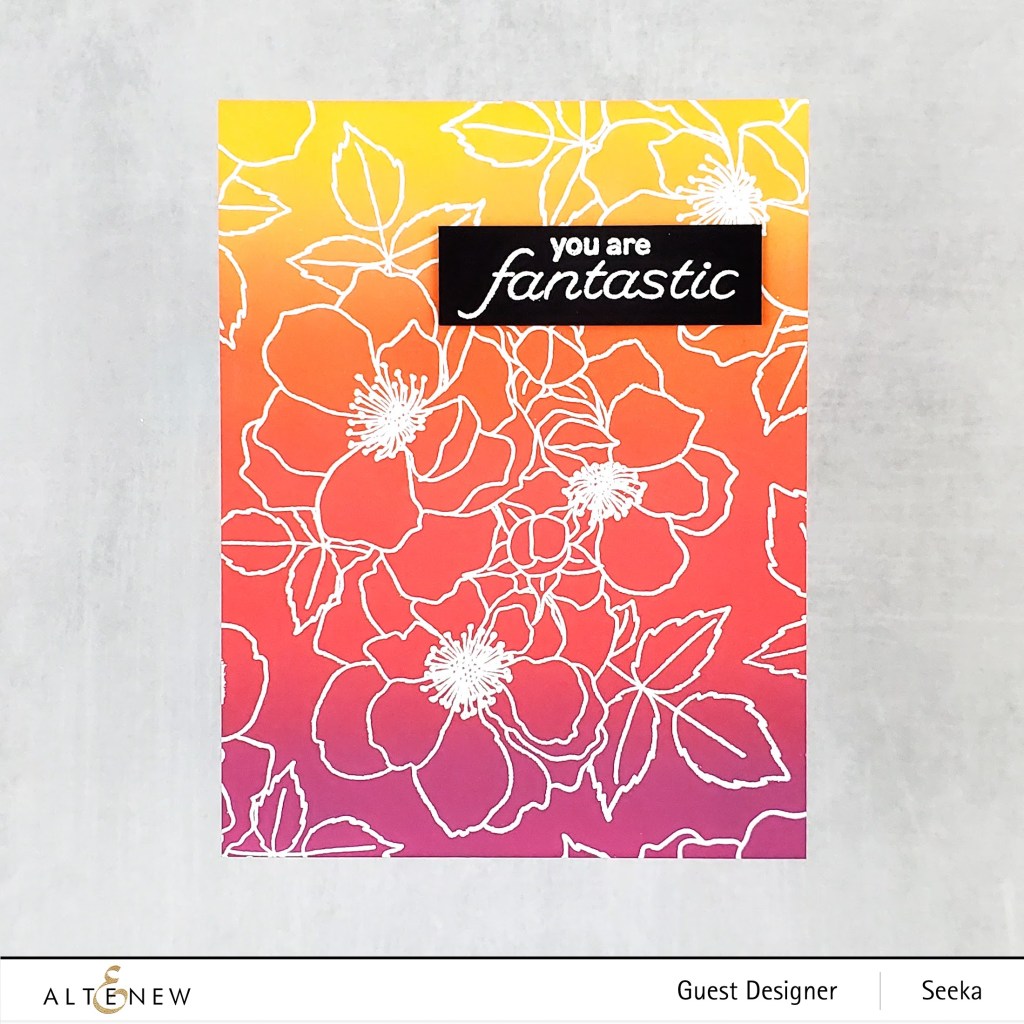
You Are Fantastic
To recreate this easy and bold card that features the Fairy Tale Florals stamp set:
- Use foam blending tools to Wild Honey, Ripe Persimmon, Festive Berries, and Seedless Preserves Distress Oxide inks onto a 4.25″ x 5.5″ panel of Strathmore Bristol Smooth cardstock and allow to dry (I leave mine for several hours or overnight)
- Use embossing ink and white embossing powder to heat emboss the large floral image in the center of the panel
- Repeat step 2, except shift the stamp to fill in the borders of the panel, resulting in a background stamp-like pattern
- Heat emboss the sentiment onto a strip of black cardstock
- Adhere the sentiment strip with foam tape
- Adhere the card front to a card base
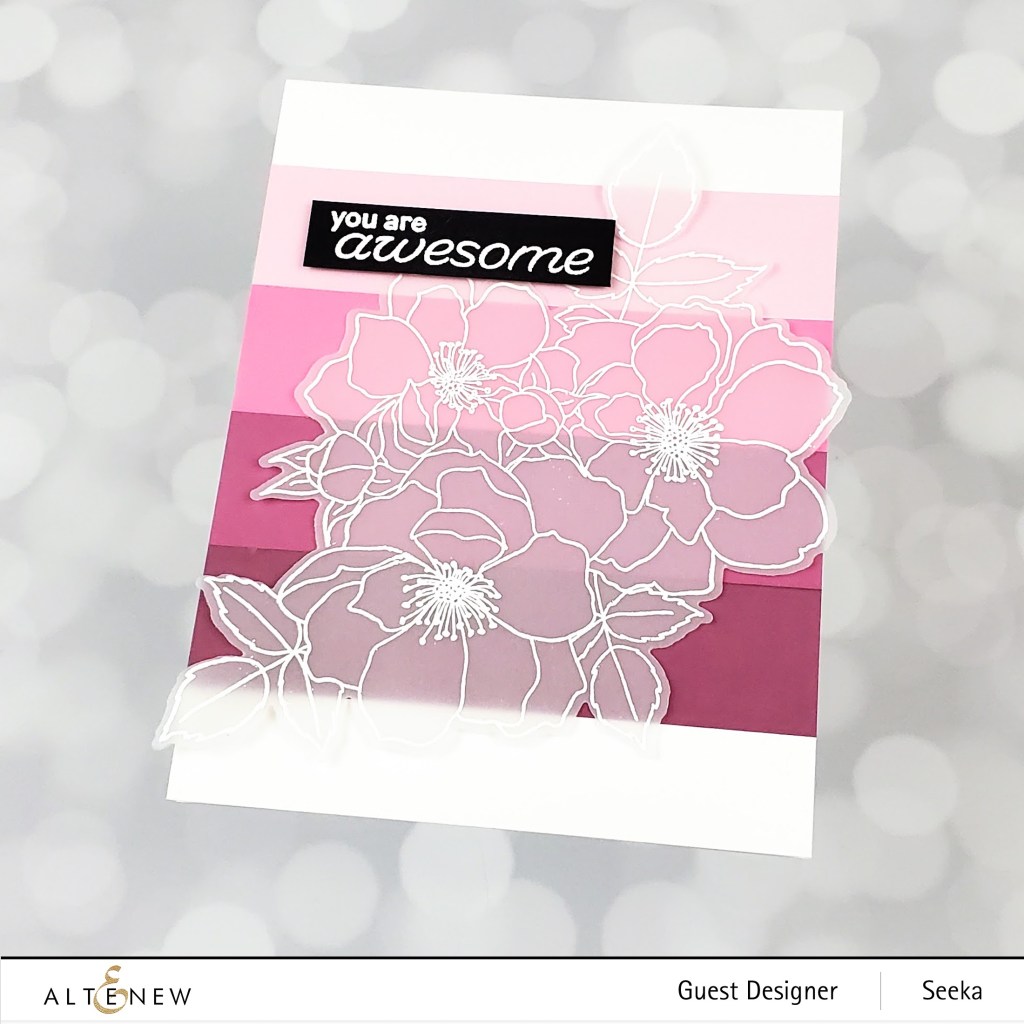
You Are Awesome
To recreate this quick and easy card that features the Fairy Tale Florals stamp set and coordinating dies (also available as a bundle):
- Use embossing ink and white embossing powder to heat emboss the large floral image onto vellum
- Use the coordinating die cut cut out the image
- Heat emboss the sentiment onto a strip of black cardstock
- Onto a 4.25″ x 5.5″ panel of white cardstock, adhere stripes of washi from the Rose Petal Washi Tape set
- Position the vellum floral image over the panel
- Use foam tape to adhere the sentiment strip over the image and onto the panel, ensuring that the sentiment overlaps enough of the floral to hold it securely
- Adhere the card front to a card base

To recreate this colorfully patterned card that features the Whimsical Herribone stamp set:
- Use embossing ink and white embossing powder to heat emboss the background pattern stamp onto a panel of watercolor paper that’s larger than 4.25″ x 5.5″
- Use painter’s tape to adhere the panel to a hardboard or other work surface
- Prepare Tea Party and Cherry Blossom watercolors by adding a few drops of clean clear water to each of the two wells in the Artists Watercolor 24 Pan Set
- Use a flat paintbrush to add clean clear water over the panel
- Use a 4 round watercolor brush to splatter Tea Party and Cherry Blossom watercolors over the panel
- Help the colors mix on the panel by gently moving them with the brush, taking care not to over mix in order to maintain some color variation
- While the panel is still wet, splatter gold watercolor over the panel (I used a Finetec watercolor)
- When the panel is dry, trim to 3 7/8″ x 5 1/8″
- Stamp the small sentiment onto white cardstock using black pigment ink
- When the sentiment is dry, mask it with a strip of Post-it tape
- Stamp the large sentiment above the small sentiment, and over the mask, using black pigment ink
- Remove the mask and trim the sentiment
- Adhere the sentiment to slightly larger piece of vellum
- Adhere the sentiment to the watercolor background using foam tape
- Adhere the card front to a card base using foam tape
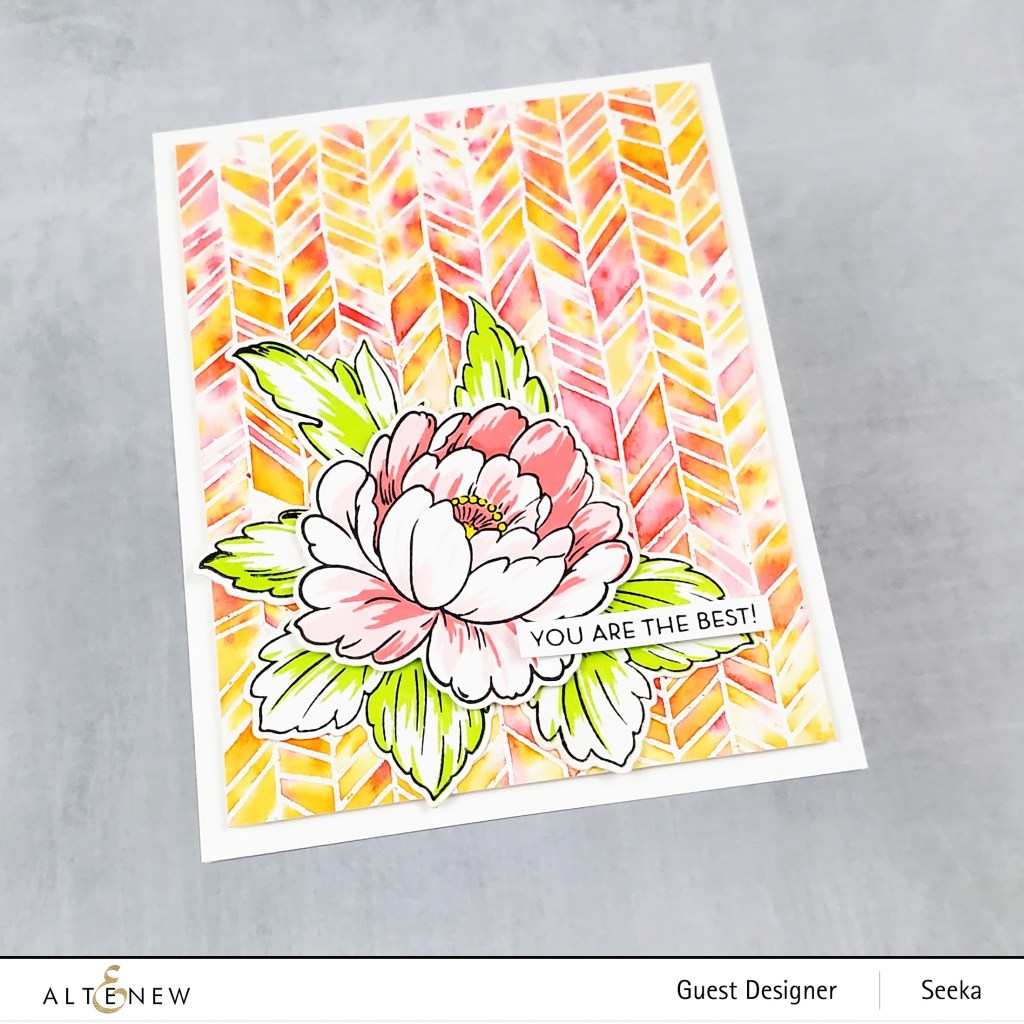
You Are The Best!
This last card features florals and a background made using similar techniques to those of the cards above. For this card:
- Stamp the Book Engravings stamp set blooms in Permanent Black, Frosty Pink, Coral Bliss, and Sunray
- Stamp the leaves in Permanent Black and Bamboo
- Use the coordinating dies to cut out the images
- For the heat-embossed Whimsical Herribone background, splatter Summer Afternoon and Tea Party from the Artists Watercolor 24 Pan Set
- Stamp a sentiment strip
- Adhere the bloom, leaves, and sentiment strip using glue and foam tape
- Adhere the card front to a card base using foam tape
Thank you so much for coming by and sticking with me through five cards! Your next stop in the hop is Kymona Tracey, and be sure to read below for information about the giveaway and for the full blog hop list.
Giveaway
$300 in total prizes! To celebrate this release, Altenew is giving away a $50 gift certificate to 2 lucky winners and a $20 gift certificate to 10 winners! Please leave a comment on the Altenew Card Blog and/or each designer’s blog post on the blog hop list below by 03/15/2021 for a chance to win. Altenew will draw 12 random winners from the comments left on each stop of this blog hop and announce the winners on the Altenew Winners Page on 03/17/2021.
Blog Hop List
- Altenew Card Blog
- Laura Bassen
- Jaycee Gaspar
- Amanda Baldwin
- Emily Midgett
- LauraJane
- Nicole Watt
- Norine BorysNichol Spohr
- Erum Tasneem
- Jennifer McGuire
- Therese Calvird
- Yoonsun Hur
- Svitlana Shayevich
- Barb Engler
- Virginia Lu
- Michelle Short
- Lilith Eeckels
- Terri Koszler
- Tania Ahmed
- Jenny Colacicco
- Laurie Willison
- Seeka <– You are here
- Kymona Tracey
- Teresa Litchfield
- Reiko Tsuchida
- Karen Brown
- Amber Rain Davis
- Rachael Shedeed
- Maryam Perez
- Tenia Nelson
- Katrina Howe
- Agnieszka Małyszek
- Keren Baker
- Dana Joy

Oh,my. Your cards are lovely. I am especially partial to card 1 and 3. I’m loving the look of vellum flowers of late.
LikeLiked by 2 people
Love the colors you used in all of your cards!
LikeLiked by 1 person
Fabulous cards!! Wonderful colors and designs. 🙂
LikeLiked by 2 people
Your cards so lovely and thanks for sharing the step by step
LikeLiked by 2 people