


Hi there, lovely, I hope you’re keeping safe and warm!
Today we’re celebrating the Altenew Wondrous World Release and I’ve got four cards to share using some of the great new dies, stencils, and embossing folders from the collection! If you arrived from Preeti’s blog, you’re right on track. If you want to hop along from the beginning, visit the Altenew Card Blog. Check the bottom of this post for giveaway information and the full blog hop list.
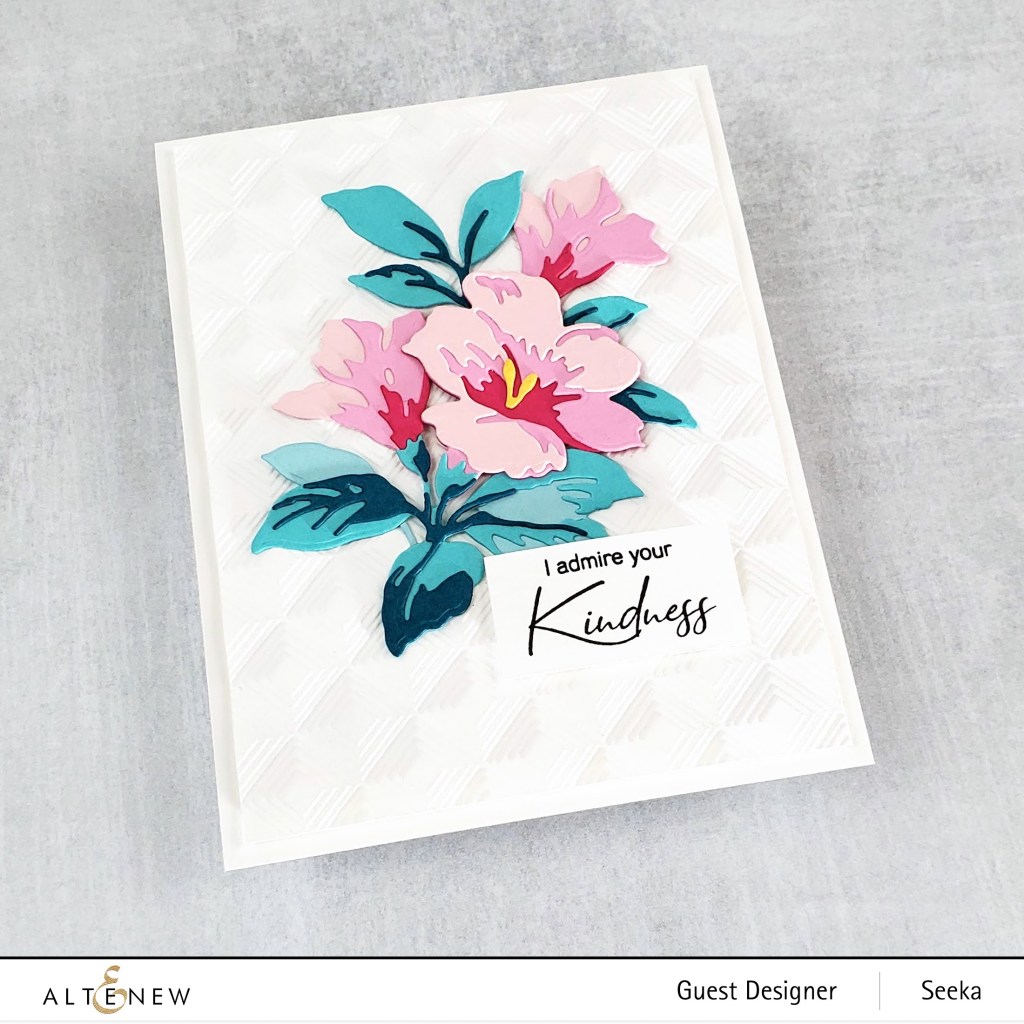
I admire your kindness
My first card today features the Climber Flowers Die Set against a textured background I created using the Mod Squares 3D Embossing Folder. To make this card, I followed these steps:
- Using the Climber Flowers Die Set, die cut the petal layers of the blooms in shades of pink
- Die cut the anthers in yellow
- Die cut the layers of the leaves in shades of teal
- Adhere the layers together and set aside
- Place a 4.25″ x 5.5″ piece of white cardstock inside the Mod Squares 3D Embossing folder and run through die cut machine (I used a sandwich appropriate for my machine) and watch amazing dimension and texture appear!
- Trim the panel to about 4″ x 5.25″
- Arrange and adhere the flowers and leaves onto the embossed panel using a combination of glue and foam tape for varying depth and added dimension
- Stamp the sentiment from the Tall Foliage Stamp Set in black ink onto white cardstock and trim
- Adhere the sentiment to the panel using foam tape
- Adhere the panel to an A2-sized card base using foam tape
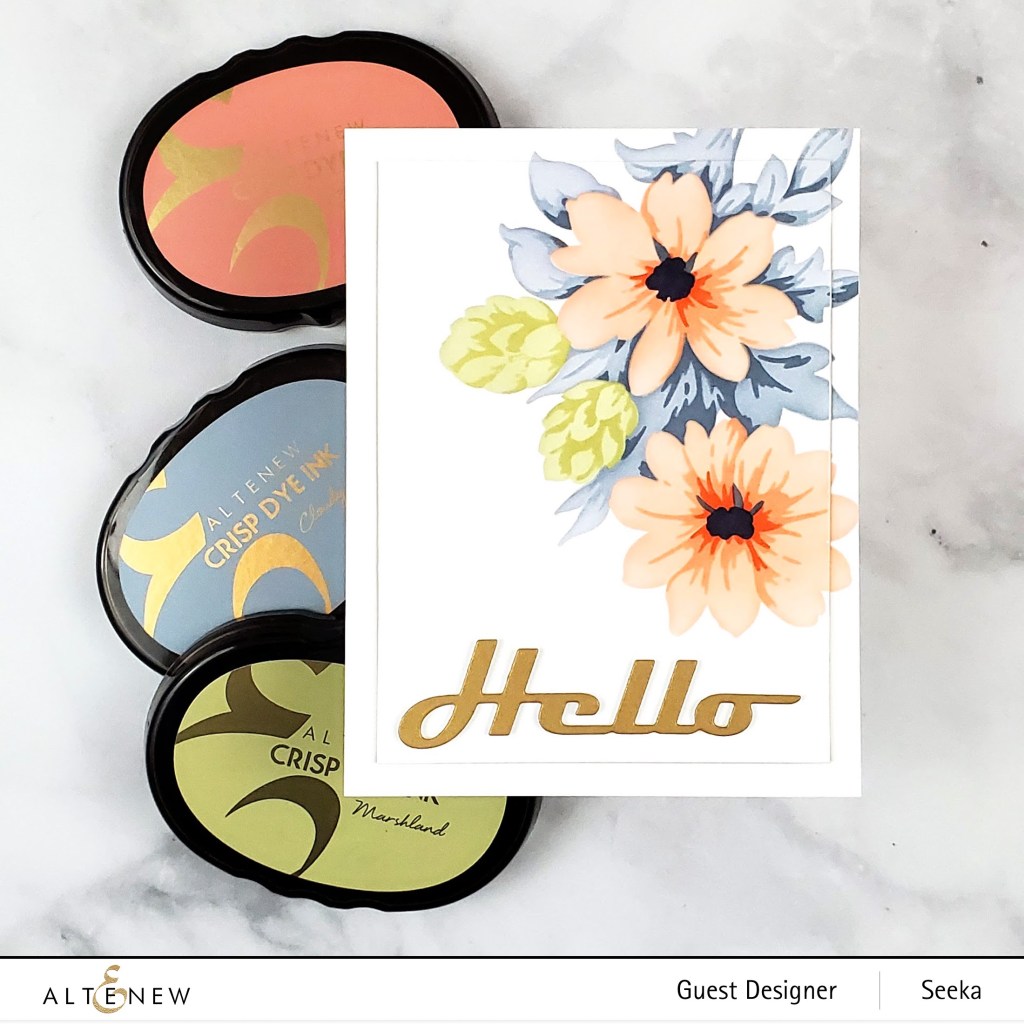
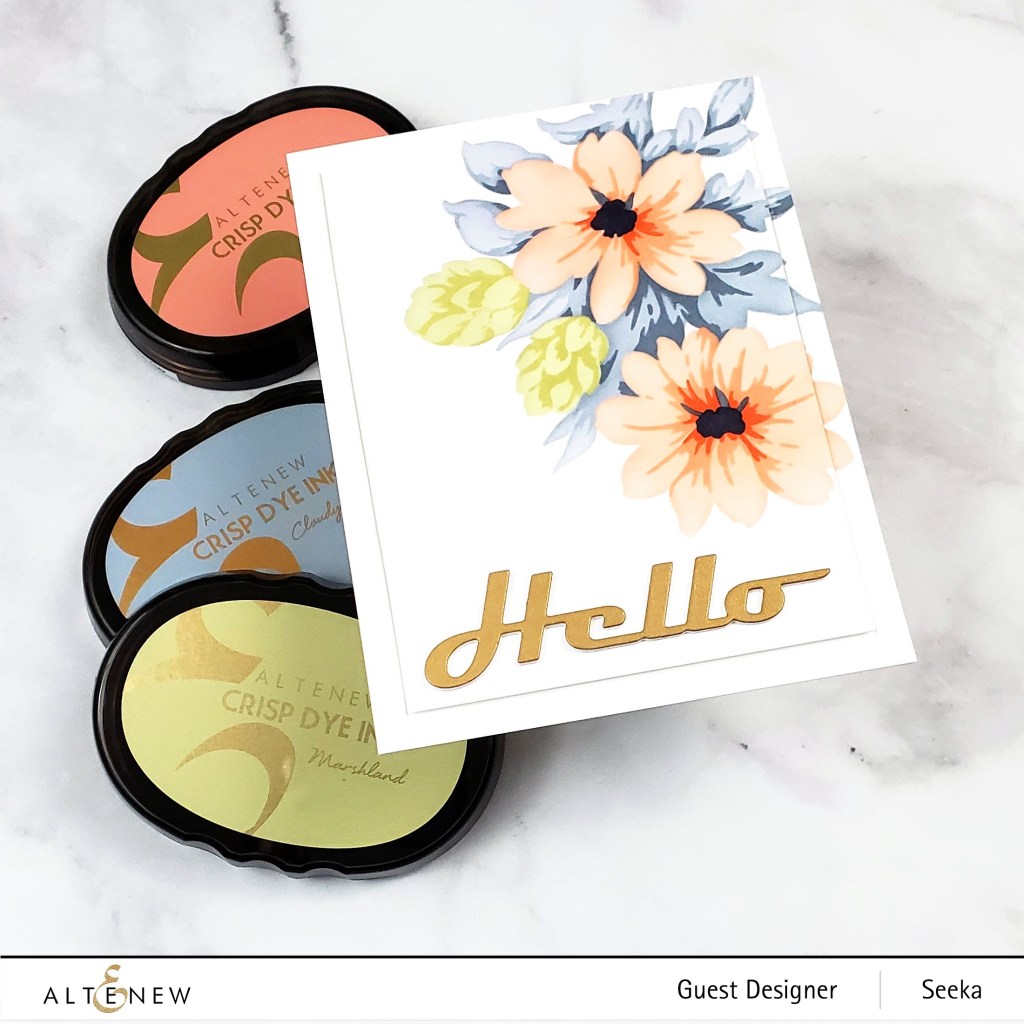
Hello
My second card today features the gorgeous new Flower Bunch Simple Layering Stencil Set. This set has four separate stencils, each with different layers/groupings of the elements in the bouquet. It was magical to watch the image appear as I added each layer! For this card, I followed these steps:
- Use Post-It Tape to hold the stencil with the base layers of the leaves to the center of a 8.5″ x 11″ piece of white cardstock (I used a large piece of cardstock because I wasn’t sure how I wanted to position the blooms on my final card so I wanted to make sure I had lots of margin around the image so that I’d have options when it came time to trimming it down to A2 size)
- Use small or large blending tools to blend the layers of leaves, making sure to mask off any part of your cardstock that isn’t protected by the stencil that you might accidentally blend over, and repeating the positioning and masking with each layer. From light to dark: Misty Morning, Cloudy Sky, and Nimbus Crisp Dye inks (these three colors are also available as part of a set, and I use the fourth color laster on: Tranquility Crisp Dye Oval Set)
- Repeating the positioning of the stencils and masking, then blend the layers of the open blooms. From light to dark: Pastel Sunrise, Canyon Clay, Burnt Red, Nimbus, Dark Night (the first three colors are also available as part of the Martian Terrain Crisp Dye Ink Oval Set)
- Repeating the positioning of the stencils and masking then blend the layers of the closed blooms. From light to dark: Misty Moor, Marshland
- Trim cardstock to 4.25″ x 5.5″
- Use a rectangle die to further trim the panel, saving the border/frame
- Adhere the border/frame to an A2-sized card base using liquid glue
- Adhere the center rectangle (with the bulk of the flower image) in the center of the border/frame using foam tape
- Use the Hello die from the Bold Greetings Die Set to die cut a piece of matte gold cardstock
- Adhere the sentiment to the card front
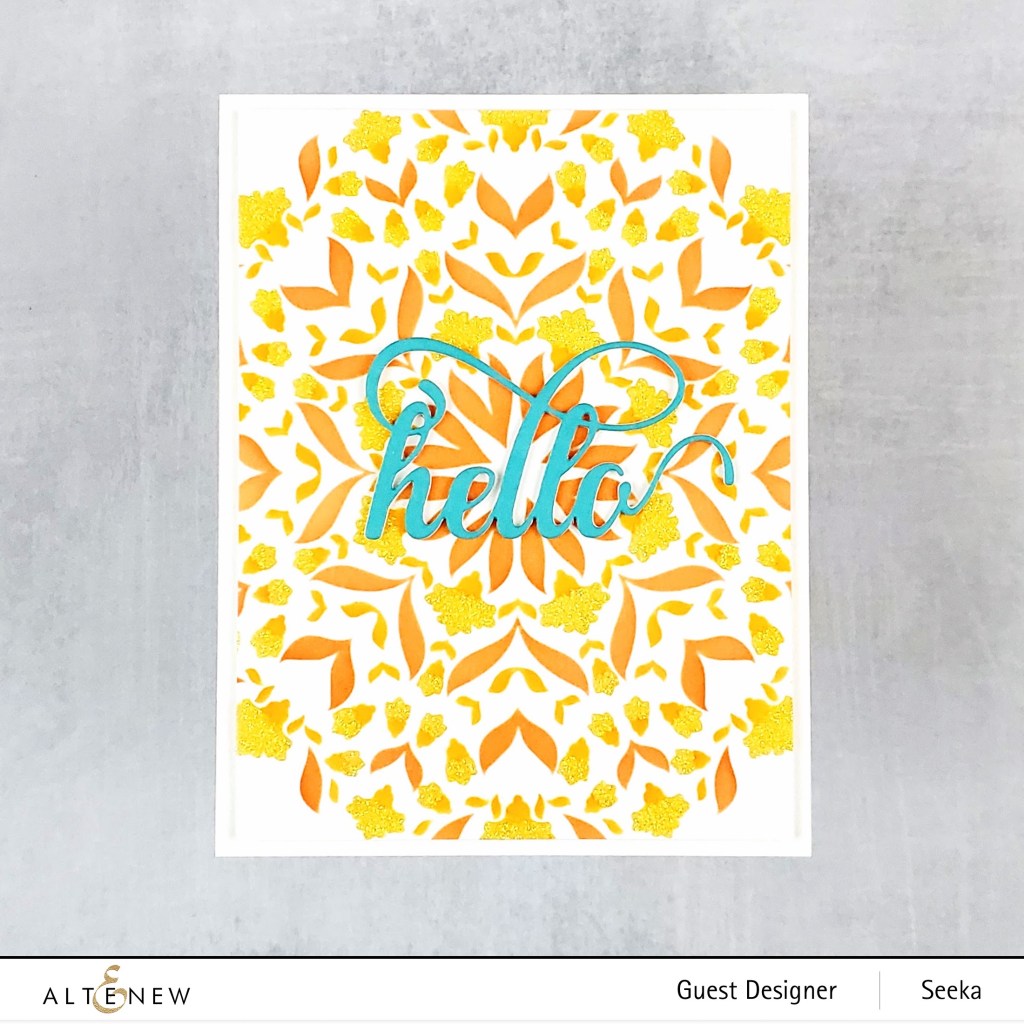
Hello (Again!)
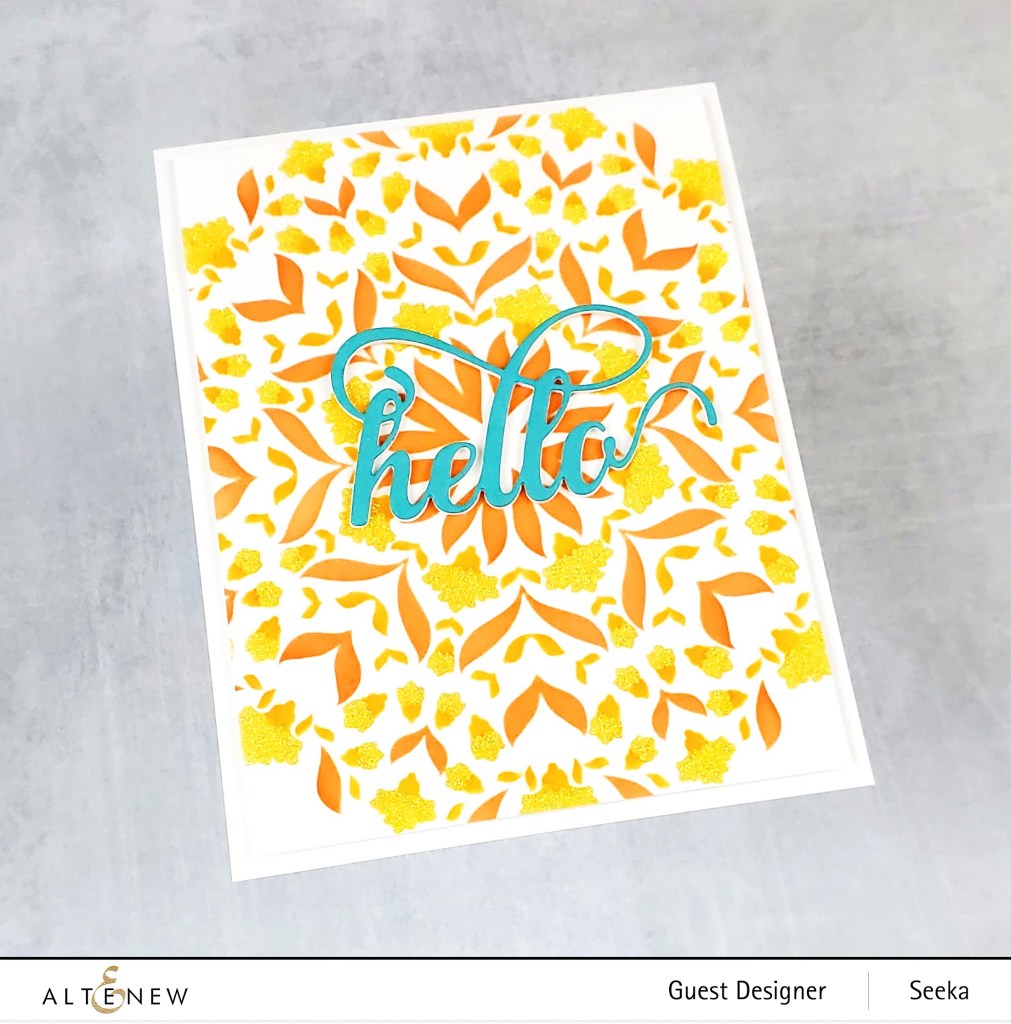
My next two cards feature the Mandala Builder Stencil Set. The color combinations you could use with this set are endless! To make this card, I followed these steps:
- Center the first stencil layer over an A2-sized piece of white cardstock and use Post-It Tape to temporarily hold it in place
- Use a blending brush to blend Marigold Crisp Dye Ink over the stencil
- Remove stencil (and wash) and position and blend over the stencil, this time with Snapdragon ink
- Remove stencil (and wash) and position and blend over the final stencil layer, this time in Chamomile ink
- Remove stencil and wash, then reposition this same stencil over the panel, in the same position it was in in step 4
- Use a palette knife to spread Nuvo Moonstone paste over the stencil. This clear shimmer paste will let the color underneath it (Chamomile) show through.
- When the panel is dry, trim to 4″ x 5.25″ and adhere to an A2-sized card base
- Use the Fancy Hello die to cut a piece of teal cardstock and adhere the sentiment to the card front

Celebrate
For my last card, I used Aqualicious, Dusk, and Coral Berry Crisp Dye Inks to create the mandala. Then I used a die from the new Nesting Slim Rectangles Die Set to trim the panel to slimline size. I like how the dies in this set emboss a frame inside the cut line; it’s a subtle but lovely detail.
I used foam tape to adhere the panel to a larger panel of teal cardstock, and then I used the new Fancy Celebrate die to cut the sentiment from a piece of dark teal cardstock. I adhered the sentiment to the card front and then adhered the card front to a card base. To finish, I used a shimmer pen to add a bit of sparkle over the sentiment.
Thank you so much for coming by! Read on below for giveaway information and for the full blog hop list. Your next stop is the amazingly talented Maryam Perez!
Giveaway
$300 in total prizes! To celebrate this release, Altenew is giving away a $50 gift certificate to 2 lucky winners and a $20 gift certificate to 10 winners! Please leave a comment on the Altenew Card Blog and/or each designer’s blog post on the blog hop list below by 02/22/2021 for a chance to win. Altenew will draw 12 random winners from the comments left on each stop of this blog hop and announce the winners on the Altenew Winners Page on 02/25/2021.
Blog Hop List
- Altenew Card Blog
- Therese Calvird
- Virginia Lu
- Emily Midgett
- Vicky Papaioannou
- Nicole Watt
- Dana Joy
- Jenny Colacicco
- Svitlana Shayevich
- Verity Biddlecombe
- Laurie Willison
- Tina Smith
- Erum Tasneem
- Terri Koszler
- Tenia Nelson
- Amanda Baldwin
- Lilith Eeckels
- LauraJane
- Jennifer McGuire
- Nathalie DeSousa
- Preeti Chandran
- Seeka <– You are here
- Maryam Perez
- Teresa Litchfield
- Agnieszka Małyszek
- Karen Brown
- Yoonsun Hur

Your first 2 cards are so lovely and delicate. I favor those type , however, the bright Mandela cards are very uplifting.
LikeLiked by 1 person
I just love the colors you used with the layered stencils!
LikeLiked by 1 person
Beautiful cards and love the color combos!
LikeLiked by 1 person
Stunning cards
LikeLiked by 1 person
Pretty mandala!
LikeLiked by 1 person
Love the teal leaves, so pretty
LikeLiked by 1 person
Hello Seeka!
You are so talented at putting colors together.
Very beautiful work thank you bunches!
LikeLiked by 1 person
very pretty cards thanks for sharing
LikeLiked by 1 person
I never think to use anything but green for leaves, but the colors you chose are spectacular.
LikeLiked by 1 person
I just love the floral stencil. Having added it to my wish list. Beautiful work here. The release is so packed with great items.
LikeLiked by 1 person
These are pretty, soft cards. They make me smile!
LikeLiked by 1 person
I am in love with the color combo you used for the Flower Bunch Simple Layering Stencils, this card turned out amazing
LikeLiked by 1 person
Your cards are beautiful, especially the flower bunch stencil card! This release is amazing!!!
LikeLiked by 1 person
I love that you did not make the leaves green. And love the colors you choose. Gives me something to think about. Great cards!
LikeLiked by 1 person
So, so pretty!
LikeLiked by 1 person
I love your first two cards!!! They use my top three from the new Altenew release! Thank you for sharing!
LikeLiked by 1 person
I love the different color combos you shared. Altenew surely came up with irresistable products this time of year. I especially love the variety of products to choose from.
LikeLiked by 1 person
So pretty, I really like the color combinations you chose.
Thanks for the inspiration!
LikeLiked by 1 person
Love your work and all of the colors you used! Thanks for sharing!
LikeLiked by 1 person
Lovely cards. I like how you cut the frame on the second card and popped up the middle.
LikeLiked by 1 person
Just gorgeous! Perfectly floral elegance, and beauties all in their own right 🙂
LikeLiked by 1 person
Lovely cards. Like the use of the glimmer paste with the mandala stencils but the two floral cards are my favorites. Thanks for sharing!
LikeLiked by 1 person
Love your slimline celebrate card! Love the colours you used with the stencil
LikeLiked by 1 person
Love your color palette. Lovely cards. Thank you for sharing your talent with us!!!
LikeLiked by 1 person