
Hi there, I hope you’re keeping safe and healthy.
Today I’m sharing an simple card that I was able to mass-produce with the help of a stamp positioning tool. It features the Just A Little Message stamp set from The Stamp Market.
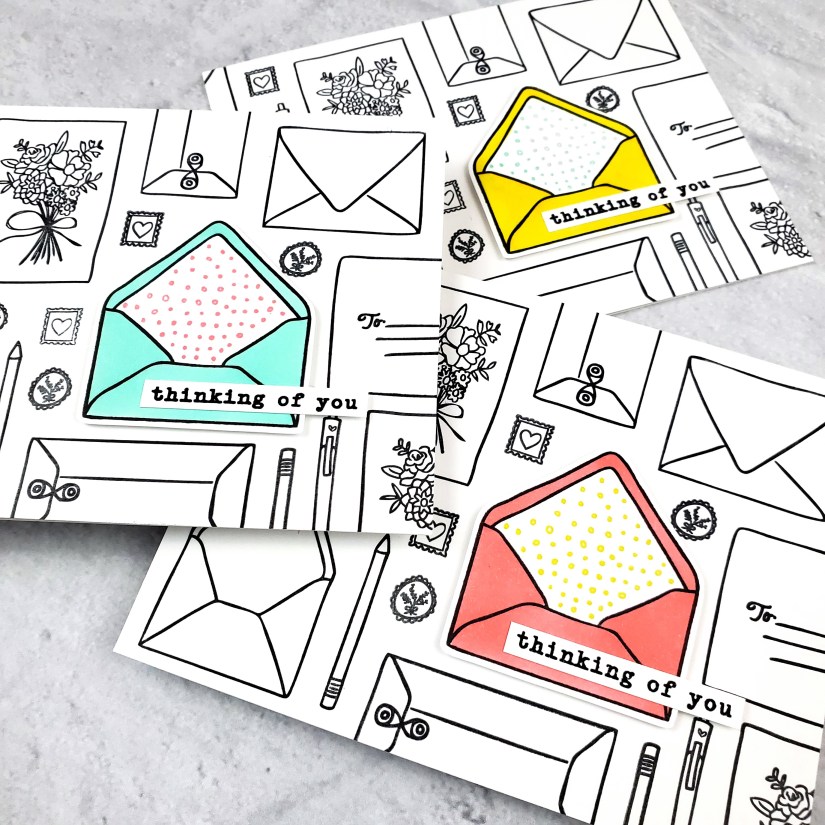
I started with an A2-sized piece of Neenah Solar White 80# classic crest cardstock placed in my Misti. I positioned the largest open envelope stamp first, since it’s the focal point. Then I positioned other stamps around it, to begin making a pattern. Since there aren’t enough images in the stamp set to cover an entire A2 card, I knew I was going to have to reuse and reposition them, so I tried to space and position them in a way to make it seem like there were more stamps in the set than there really are (for example, I placed the stamp that has “To:” hanging off the right side of the panel and then again hanging off the left side of the panel where you just see the little ribbon stamp on the envelope).
I stamped 10 panels using Versafine Clair Nocturne ink and then repositioned the stamps to fill out the pattern and stamped again. In all, I stamped each panel three times.
Next, I stamped the focal image ten times, this time in Copic-friendly Hero Arts Intense Black ink. I used various Copics to quickly color the envelopes (no shading!), and then used a coordinating stamp to stamp the inside of the envelope with a complimentary color. I fussy cut the envelopes and set them aside.
Next, I stamped the sentiment, also from the Just A Little Message stamp set 10 times and trimmed them into sentiment strips.
To assemble each card, I used foam tape to adhere the Copic-colored envelope over the stamped image, and then adhered the sentiment strip over top, using a bit of foam tape under the right end of the strip to support it. Finally, I adhered the card fronts to A2-sized card bases.
Thank you for coming by!


I really love these … I feel like I’m going to have to try my own version
LikeLiked by 1 person
Love!
LikeLiked by 1 person