Thank You Cards

You’re So Sweet

20180312_205917.jpg

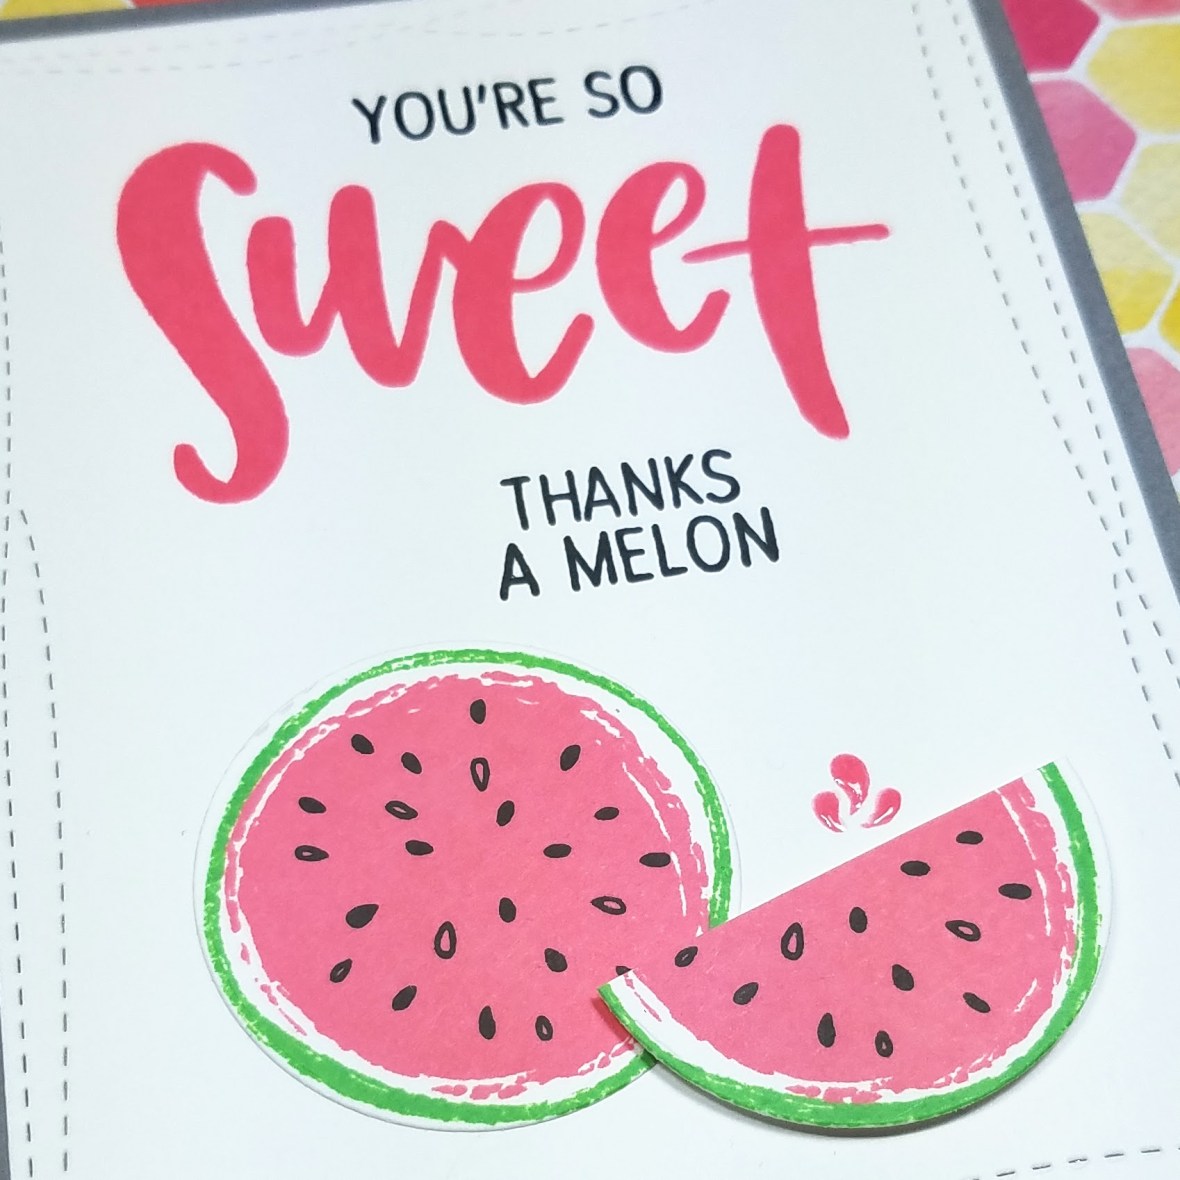
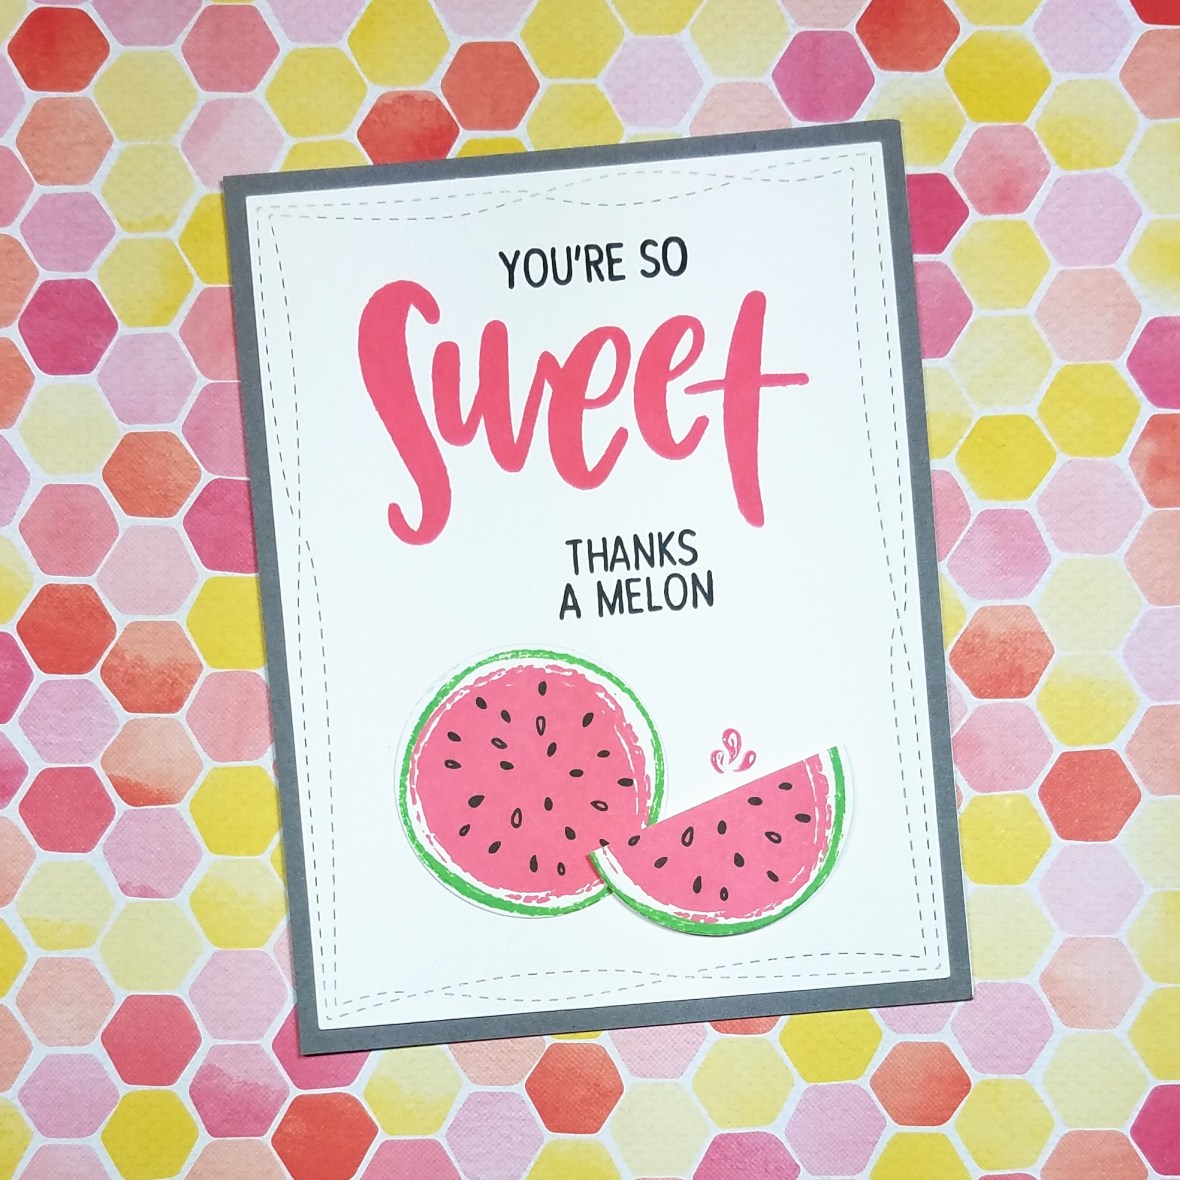
I love this big Sweet stamp from Concord & 9th’s Orange You Sweet set and it gave me a reason to pull out one of my favorite Hero Arts ink colors.

I started by putting together the two watermelon pieces which consists of separate stamps that create the outline, circle, and seeds.  I used Hero Arts Fresh Lawn for the rind, Hero Arts Pale Tomato (my favorite!) for the flesh, and Versafine Onyx Black for the seeds.  I die cut the two pieces as well as a few extra plain white circles out of heavier and inexpensive 110# cardstock.  I cut one of the watermelon pieces in half and layered it with the extra pieces of white cardstock, cut in half, to give it some dimension.

For the card front, I cut down a piece of Neenah Solar White 80# cardstock with a Wonky Stitched Rectangle die from My Favorite Things.  Then I stamped the sentiments using the same Pale Tomato and Onyx Black inks.

I adhered the watermelon pieces in place, and then stamped the juice drops and added some Ranger Glossy Accents to give them a truly juicy look.

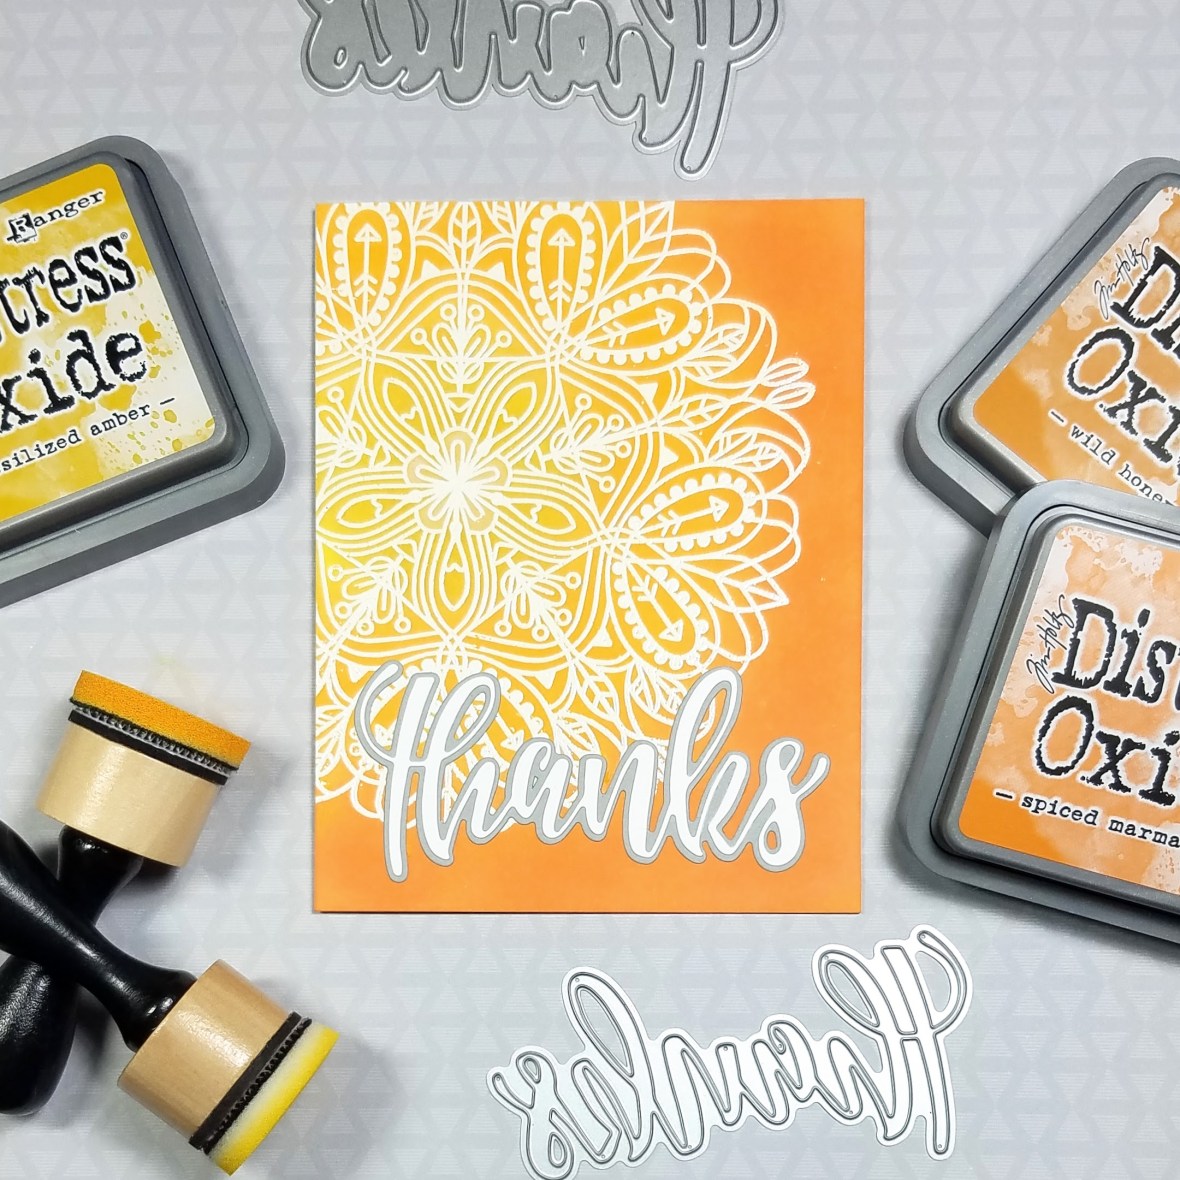
To finish, I adhered the card front to an A2-sized piece of gray cardstock and then glued it to an A2-sized white card base.

I know it’s only spring, but I’m already looking forward to watermelon season!

20180312_205924.jpg

Thank You Cards

Bright and Sunny Thanks

20180321_215219.jpg

It’s been unusually cool and rainy in Oakland for this time of year and so I felt like making my own sunshine.  I started by laying the Emma Background Stamp from Simon Says Stamp on my work surface, etched side facing up.  I inked it up with VersaMark ink, and then laid a piece of Neenah Solar White 80# cardstock over the top, offsetting it just a bit to get the composition I wanted.  Then I laid a sheet of scrap typing paper over that to keep my hands clean while I rubbed over the top to make sure I got a nice stamped image. With that done, I sprinkled Hero Arts white embossing powder over the image and heat set it.

Then it was time for the fun part.  I used three colors of Distress Oxide ink: Fossilized Amber, Wild Honey, and Spiced Marmalade.  Starting in the middle of the embossed image with Fossilized Amber, I blended outwards into the darker colors.  I went heavy with the ink for vibrant color.  At this point I realized that I really do “need” the new Squeezed Lemonade color because the Fossilized Amber and Wild Honey didn’t give me the quite contrast I was hoping for. I did take a water brush to the very center of the image to pick up a bit of the Fossilized Amber hoping to lighten that area a bit, but I don’t think the result is noticeable.

With the inking done, I moved on to the sentiment using the Large Thanks die set from Honey Bee Stamps.  I tried several different colors (yellow, orange, and white) for the shadow layer and settled on using a light gray cardstock which I felt gave enough contrast to make the sentiment readable against the white embossed pattern, and didn’t distract from the rest of the card.  I like to use Recollections cardstock from Michael’s because you can easily collect a rainbow of colors without breaking the bank.

I glued the sentiment pieces together, and then to the card front, with Ranger Multi Medium Matte glue.  Then I glued the entire thing to a card base to finish this A2-sized card.

20180321_220158.jpg

Just Because Cards

It’s Crafting Time!

20180318_103701.jpg

What’s not to love about Kristina Werner’s hand lettering?  The combination of her beautiful writing and this sentiment immediately landed this stamp in my Simon Says Stamp cart.

I started with Canson XL watercolor paper which I cut down with a stitched rectangle die from My Favorite Things to a size just smaller than an A2-size card.

Then, using VersaMark ink and Hero Arts white embossing powder, I heat embossed the sentiment to the center of the panel.

With clean clear water, I wet the paper over and around the sentiment and then dropped in Wisteria Violet and Deep Blue watercolors from Peerless Watercolors.  These watercolors blend beautifully.  I had hoped for soft edges, but I did end up with some hard lines where I let the color pool a bit too much.  I’m still learning!

Once the panel was dry, I adhered it to an A2-sized piece of craft cardstock and then glued the entire thing to a top-folding card base to finish.

Happy crafting!


Encouragement Cards

One Day at a Time

20180318_212607.jpg

I bought the You Got This stamp set from Simon Says Stamp for this single sentiment.  Though the set has a lot of other great sentiments that I know I’ll use, this one really spoke to me.  When I’m suffering or inching towards a goal and feeling like I’m not making progress, a reminder like this helps keep me going.

Because the words themselves are so powerful to me, I wanted this card to be very simple.  I started by cutting a scrap piece of Neenah Solar White 80# cardstock with the Paper Smooches Linked Hearts die.  Then I did the same, three more times, using some inexpensive 110# white cardstock from Michael’s.

I pieced the Neenah die cut back into the positive cut and backed it all with some Post-It Tape to temporarily hold it together while I ink blended. I used three colors of Distress Oxide Inks (Candied Apple, Picked Raspberry, and Worn Lipstick) blending left to right.

Once that was done, I used the borders of the other three die cuts and adhered them to the inked border so that the heart borders would have some dimension.  I adhered that to my card front, then pieced in inked hearts in a single layer.

I stamped the sentiment in Versafine Onyx Black ink and trimmed the card front to a size just smaller than an A2-sized card.  To finish, I added foam tape to the back of the card front and adhered it to a white A2-sized card base, for a white-on-white finish.

Keep on keeping on.  You can do it!

20180318_213259.jpg